The 7 Best Backpacking Stoves
This post may contain affiliate links.
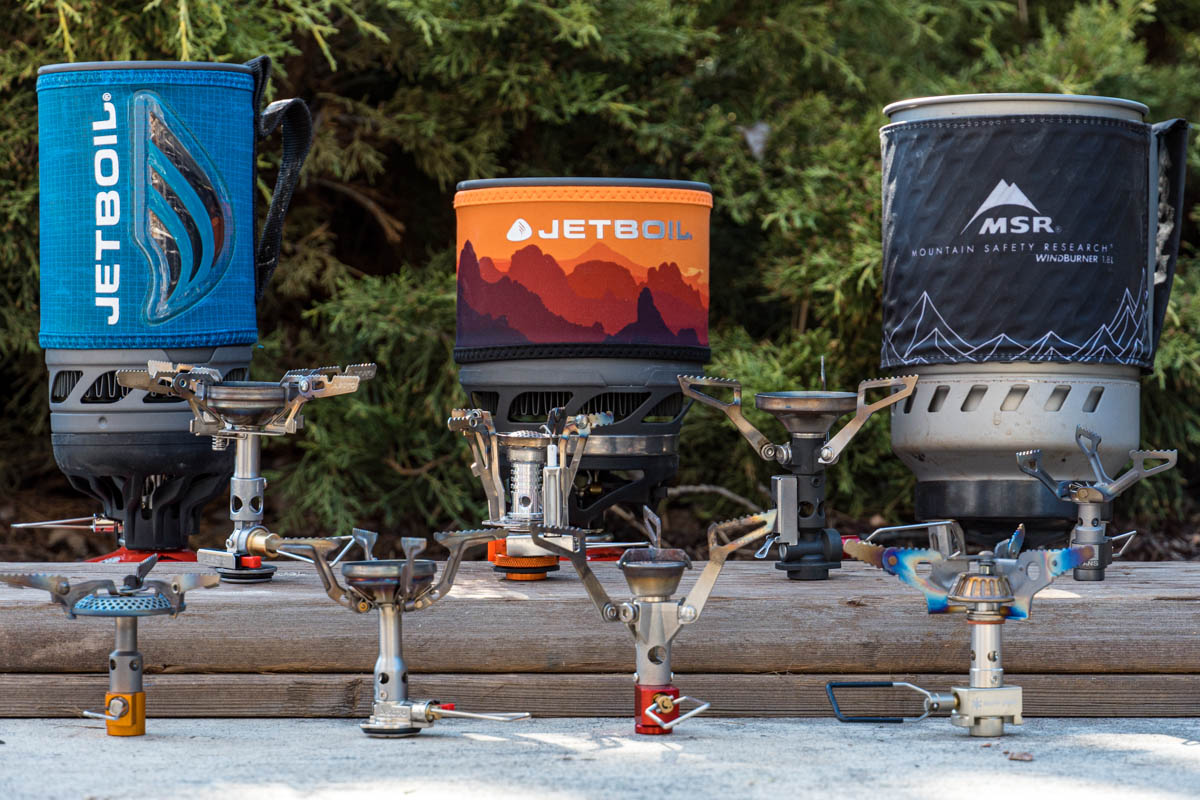
In this article, we take a deep dive into lightweight backpacking stoves. We researched dozens of different stoves, purchased the top contenders, and ran them through a series of tests to simulate how they will perform on the trail.
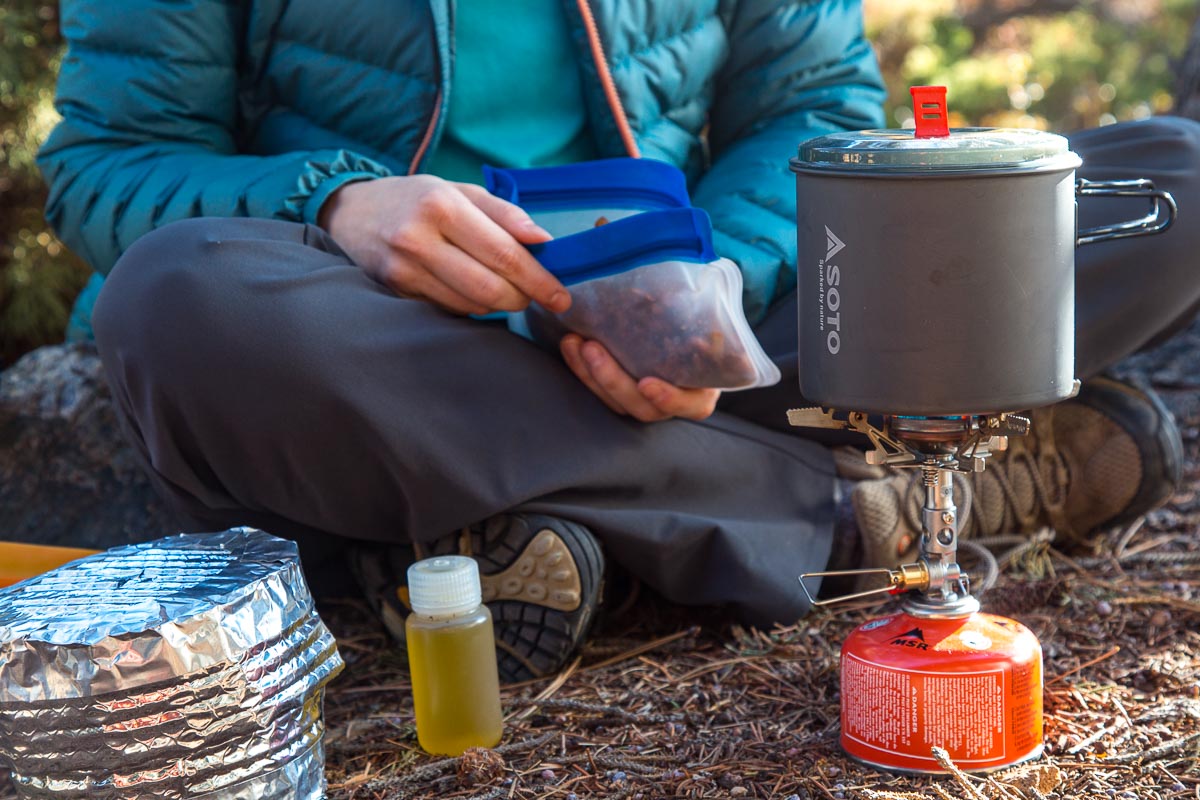
Sipping a hot cup of coffee as dawn touches the mountain peaks. Enjoying a warm and hearty meal under a starlit sky. These small, fleeting moments of backcountry luxury are often our most cherished memories of a trip. And they are made possible because of a stove.
A lightweight stove is an essential piece of backpacking gear and can really elevate your cooking experience out on the trail. The problem is finding the right one….
With dozens of different stove models on the market, making sense of all the different specs can feel like a graduate-level research project.
There are a lot of variables to consider including cooking style, fuel types, burner size, simmer control, and wind performance. Not to mention the obvious factors of weight and price. So where to even begin?!
In this article, we’re going to to cut through all the noise and narrow down the best backpacking stoves on the market today. We’ve identified the most important features to consider, tested the top stoves against one another, and offer our insights on each based on years of backpacking and camp cooking experience.
So if you’re ready to take your backcountry cooking to the next level, let’s jump into it and help you choose the best backpacking stove for you!
Top backpacking stove recommendations
We did a lot of research and hands-on testing in order to generate these recommendations, but if you want to skip all that and jump right to our winners, here are the stoves we recommend as “the best in their category”.
Best All-Around Canister Stove:
Soto WindMaster
More fuel-efficient than the lightest options, but lighter than the most fuel-efficient options. The WindMaster offers the broadest range of positive attributes, making it one of the most versatile stoves on this list.
Best Integrated Canister Stove:
Jetboil MiniMo
The Jetboil MiniMo has great wind performance, crazy fast boil speeds, user-friendly features, and is very fuel efficient.
Best Ultralight Canister Stove:
BRS 3000T Ultralight Stove
The BRS is insanely lightweight. It has competitive fuel efficiency in calm conditions but is extremely vulnerable to even small amounts of wind. It is a great option for ultralight backpackers or for shorter trips.
Beginner on a Budget:
AOTU Canister Stove
Competitive fuel efficiency, user-friendly features, and decent wind performance—at an incredibly low price! If you are new to backpacking or on a tight budget, this stove is a phenomenal value.
The sections below explain each stove’s performance, durability, weight, price, and best-use case.
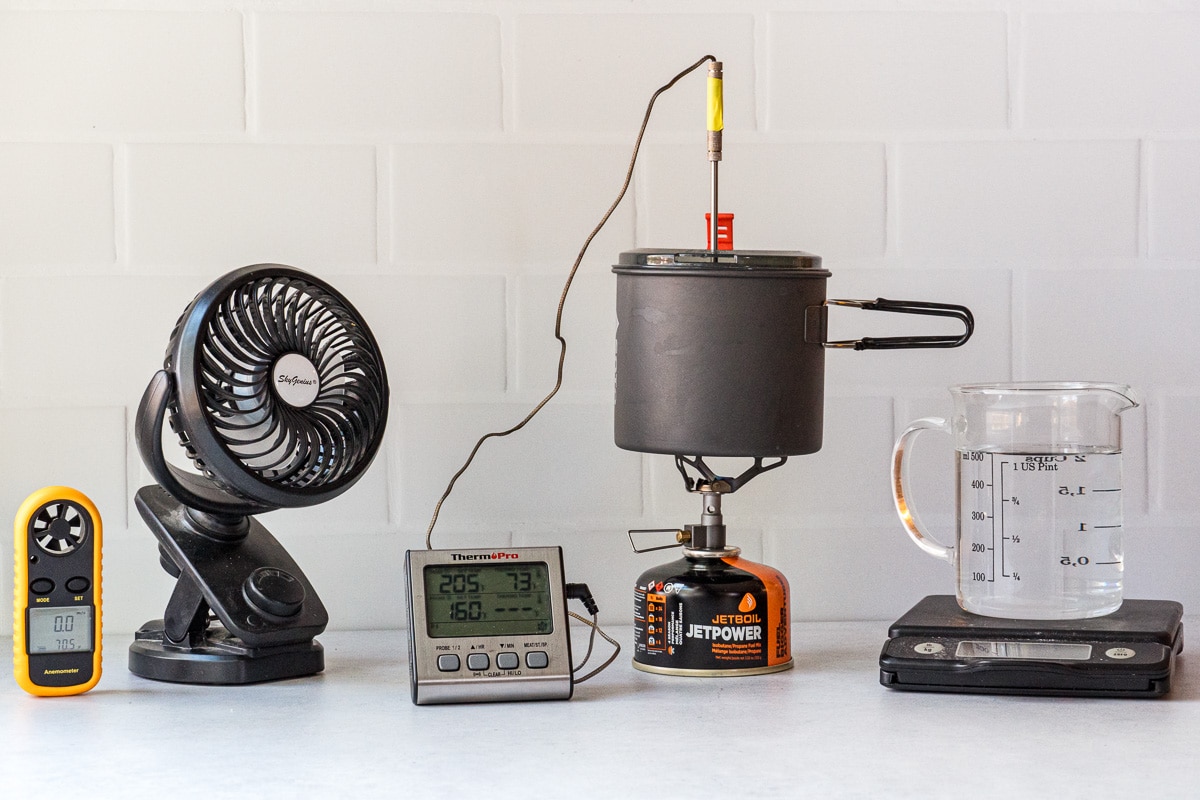
Testing Methodology
Elevation: 3780 ft
Water Volume: 500 mL
Water Start Temp: 43 – 45 F
Water End Temp: 205 F (boiling temp for our elevation)
Ambient Room Temp: 68 F
Stoves were subjected to multiple boil tests using the same fuel canister under various controlled conditions. The goal was to move from ideal conditions (full canister, room temp, no wind) to increasingly challenging conditions.
- “Best conditions”: Full canister. No wind. Room temperature.
- Oscillating Wind Test @ 5mph
- Constant Wind Test @ 5mph
- Freeze Test: Canisters were kept in the freezer overnight.
- “Worst Conditions”: Wind/Freeze Test. Canisters were kept in the freezer overnight and 5 mph wind “gusts” were simulated by an oscillating fan.
*In the reviews below, we provide the average boil time and fuel used from our tests for comparative purposes. However, take these numbers with a grain of salt–you will likely experience a range of boil times and fuel usage for any particular stove depending on the conditions.
Best Backpacking Canister Stoves
Best Backpacking Stove Overall
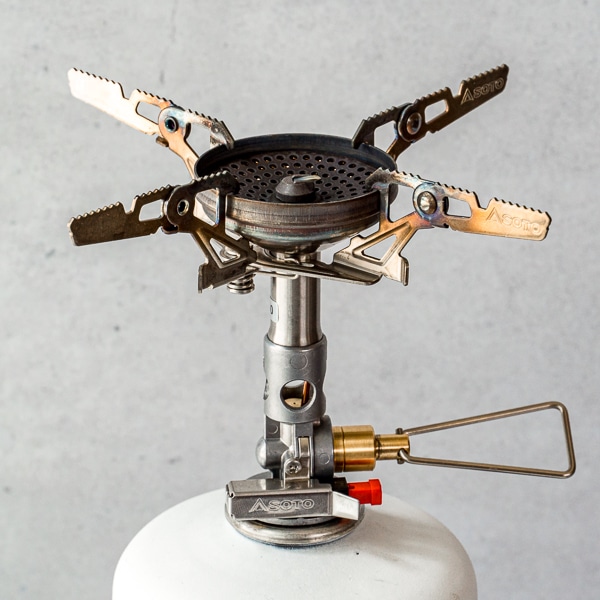
Soto WindMaster
MSRP: $64.95
Weight: 3 oz (86g)
Fuel Delivery: Regulated
Avg. Boil Time: 3:45
Avg. Fuel Used: 10.4g
What We Liked: We heard a lot about the Soto WindMaster and were happy to find that it lives up to the hype. The concave burner is clearly a superior design, creating a strong and focused flame. The high-lipped edge and squat position of the pot supports did a great job of minimizing the effects of the wind. And the regulated fuel delivery kept the flame going strong, even during our freeze test. All this resulted in exceptional fuel efficiency across a wide range of conditions. Additionally, we really liked the stability offered by the 4-stay pot support (particularly for large pots).
What We Didn’t Like: The WindMaster is unique in that the pot support is detachable via a spring-loaded clip. This clever design allows for more flexible storage, but the pot support is jangly when detached. This floppiness doesn’t really affect anything, but we do find it vaguely annoying.
Bottom Line: This is an excellent, full-featured stove at a fair price. The wind protection is great, the fuel efficiency is the best of the non-integrated stoves, and the 4-stay support can easily handle larger pots. You are getting a lot of versatility with this stove, with minimal trade-offs.
Compare current prices:
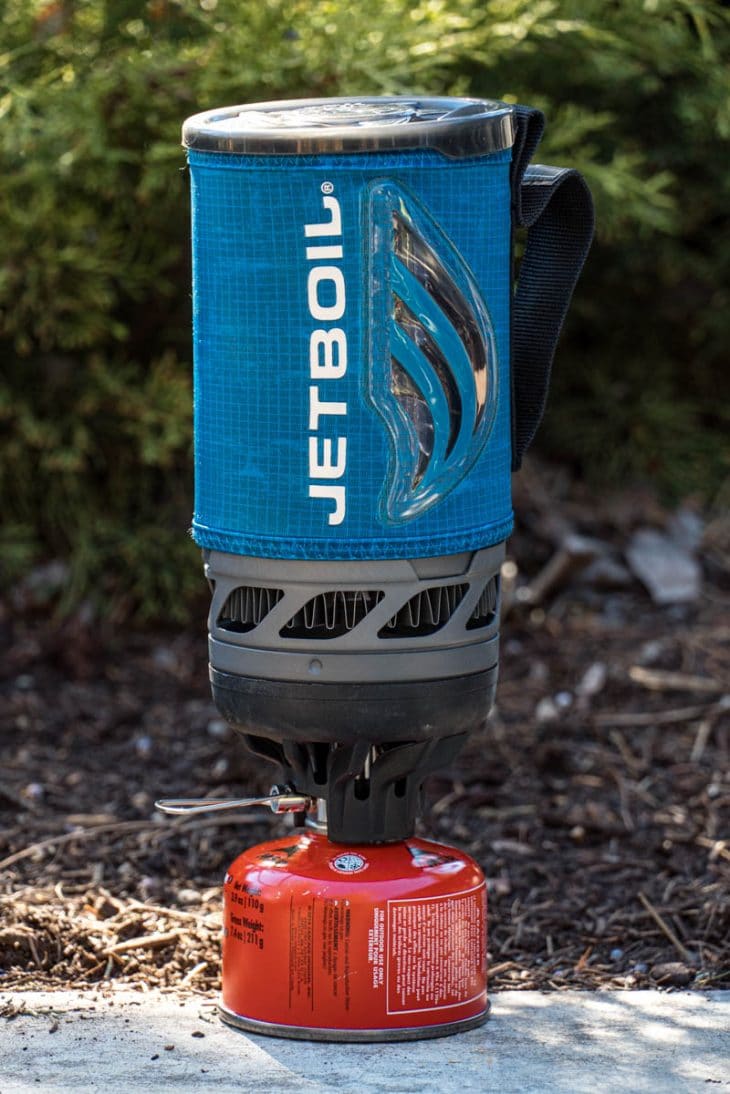
Best Performing Integrated Stove
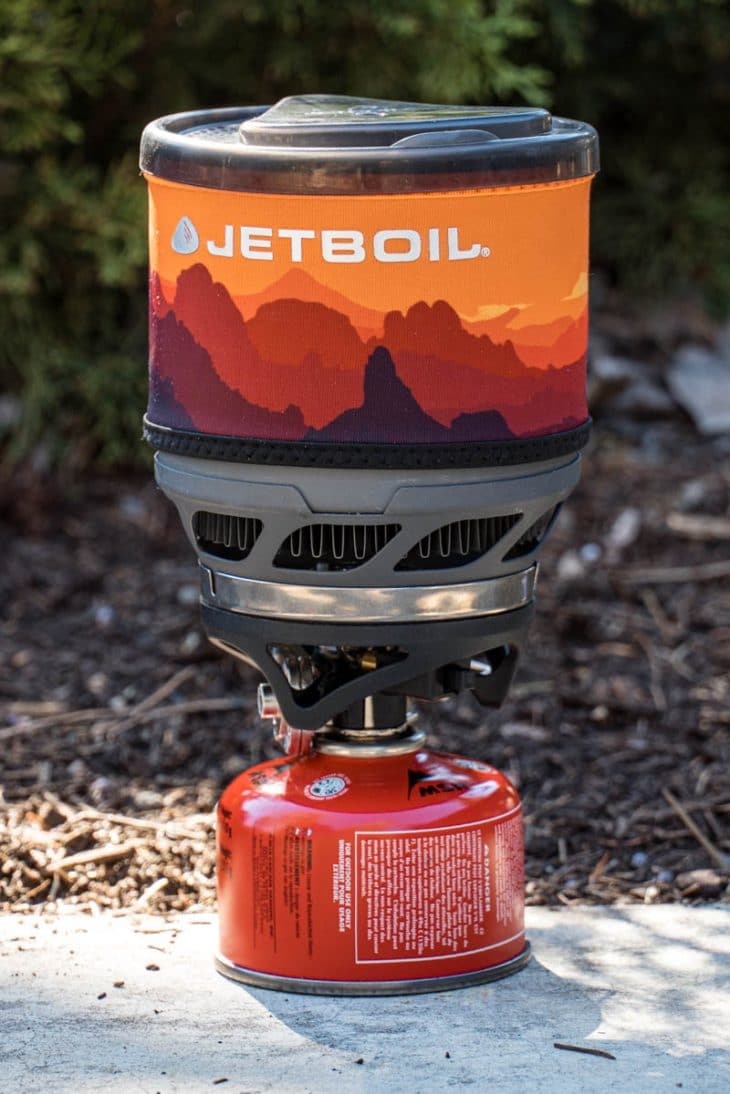
Jetboil MiniMo
MSRP: $169.95
Weight: 14.6 oz (includes pot)
Fuel Delivery: Regulated
Avg. Boil Time: 2:53
Avg. Fuel Used: 5.8g
What We Liked: The Jetboil MiniMo boasts extremely fast boil times, great simmer control, very good wind protection, and strong cold temperature performance. Most importantly, it’s super fuel-efficient across a wide range of conditions–roughly twice as efficient as the best stand-alone stove option, meaning you’ll get about double the boils out of a single canister. Additionally, the wider, squatter pot design makes it really easy to eat out of. It’s perfect for beginners and more experienced hikers.
What We Didn’t Like: While the performance of this integrated canister stove system is unparalleled, it comes with increased weight and price. Is it worth it? It depends on your style of hiking. You’ll get more boils out of each canister, which can reduce fuel anxiety and potentially save you from having to size up a canister.
Bottom Line: This is a high-performance all-in-one stove setup that is well-suited for a lot of different use cases.
Compare current prices:
Best Budget Stove
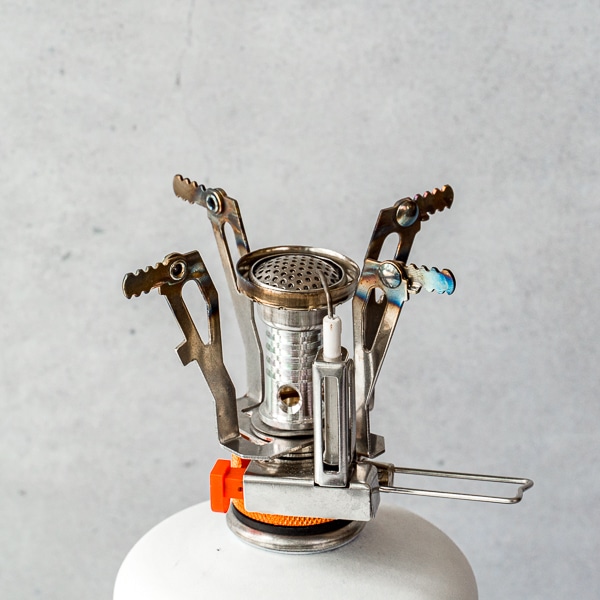
AOTU Canister Stove
MSRP: $12
Weight: 3.3 oz (93g)
Fuel Delivery: Unregulated
Avg. Boil Time: 5:50
Avg. Fuel Used: 10.2g
What We Liked: This stove is an unbelievable value. The AOTU stove has many of the same features and performs just as well as canister stoves which cost 4x as much. It has a strong flame with adequate wind resistance, four sturdy pot supports, an integrated lighter, and decent simmer control. It also has respectable boil times and fuel efficiency.
What We Didn’t Like: It’s a touch on the “heavy” side, but for the price, we’re not complaining! The other thing we wonder about is reliability. We’ve seen this stove sold under dozens of different “brands” over the years (AOTU, Reehut, Etekcity). Again, the stove we tested works great. But with so many knock-offs out there, quality control might be an issue.
Bottom Line: This is a great value buy for anyone with a limited budget or for beginner backpackers who need to gain experience with backpacking stoves before deciding to upgrade. You’re getting a very serviceable backpacking stove for an absolute steal.
Most Efficient Water Boiler
Jetboil Flash
MSRP: $129.95
Weight: 13.1 ounces (includes pot)
Fuel Delivery: Unregulated
Avg. Boil Time: 3:41
Avg. Fuel Used: 6.4g
What We Liked: Under ideal circumstances, the Jetboil Flash had the fastest boil time of any stove we tested. It’s insanely fast, at a hair over two minutes in our tests. It has a temperature-activated flame logo on the neoprene sleeve that progressively changes color as the water inside approaches boiling. This feature is innovative at a campsite, allowing you to casually look over and see how close you are to boiling. It is also roughly as fuel-efficient as the MiniMo.
What We Didn’t Like: The Flash (unregulated) saw a notable performance drop during our freeze test—whereas the MiniMo (regulated) performed much better.
Bottom Line: The JetBoil Flash is a fuel-efficient rapid water boiler. While it lacks the simmer control and cold weather regulation of the MiniMo, it is a lighter and significantly cheaper option. It is still on the heavy side when compared to a canister stove and pot combo, but the superb fuel efficiency and ease of use might make it worth it.
Compare current prices:
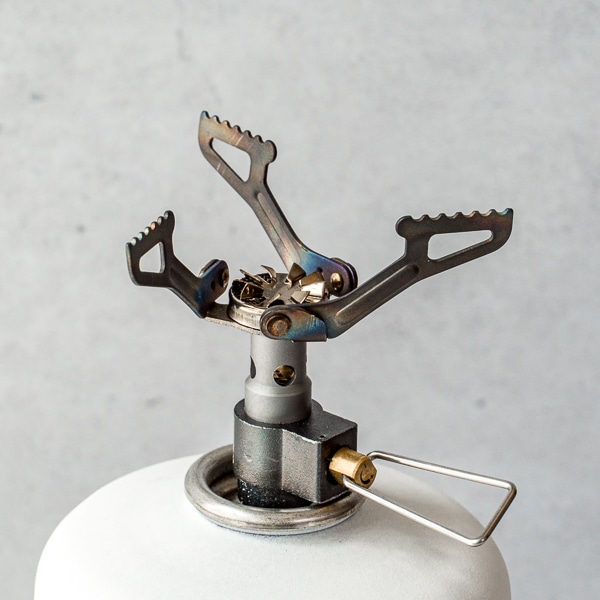
Ultralight Backpacking Stove
BRS 3000T
MSRP: $16.95
Weight: 0.89 oz (25g)
Fuel Delivery: Unregulated
Avg. Boil Time: 6:33
Avg. Fuel Used: 13.4g
What We Liked: The BRS is by far the lightest weight canister stove we could find on the market and comes with a very attractive price tag. It also had surprisingly competitive fuel efficiency and boil times when operated under dead calm conditions. This is a gram counter’s dream stove.
What We Didn’t Like: The goal of the BRS is to be ultralight, so we understand it will lack many of the features found on heavier canister stoves (burner size, simmer control, etc). However, our testing found that the BRS is extremely vulnerable to wind. Not only will stronger gusts blow it out completely, but even a slight breeze will ruin its fuel efficiency. This can be counteracted if you use a windscreen or create a protected wind shelter—but you will need to be vigilant about it.
Bottom Line: If you’re a gram-counting ultralight hiker looking to boil water in a narrow-bodied pot, and don’t mind building a wind shelter every time you use it, then this is a great option.
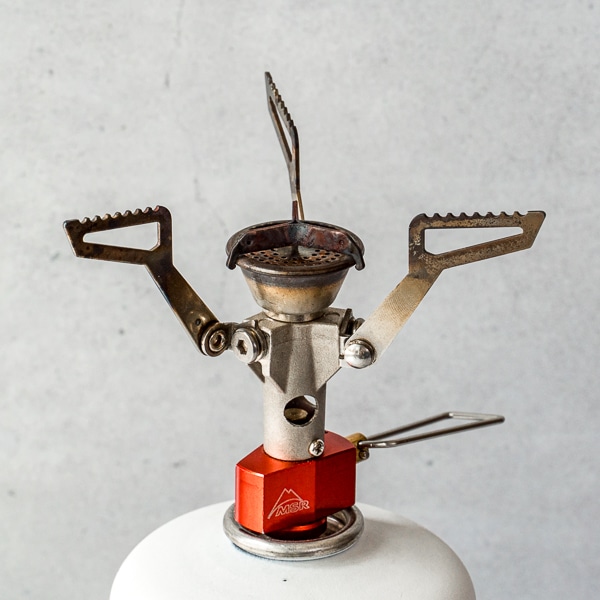
Time Tested Trail Favorite
MSR Pocket Rocket 2
MSRP: $59.95
Weight: 2.6 oz (74g)
Fuel Delivery: Unregulated
Avg. Boil Time: 5:18
Avg. Fuel Used: 11.8g
What We Liked: The MSR Pocket Rocket 2 was our go-to backpacking stove prior to writing this article, so we have a lot of experience with it going in. It has a sturdy and compact design, a middle-of-the-road weight, and a middle-of-the-road price point. It’s been a trail favorite in the backpacking community for years, which speaks to its reliability over time.
What We Didn’t Like: The Pocket Rocket 2 never really distinguished itself in any particular category. While it weighs slightly less than stoves at higher price points, it was as efficient as the $12 stove by AOTU, and is less efficient than the similarly priced Soto Windmaster. We have a lot of confidence in the reliability of MSR products, but it’s hard not to take note of the price difference.
Bottom Line: While the MSR PocketRocket 2 is a very serviceable canister stove, its design and performance no longer stand out in an increasingly competitive market.
Compare current prices:
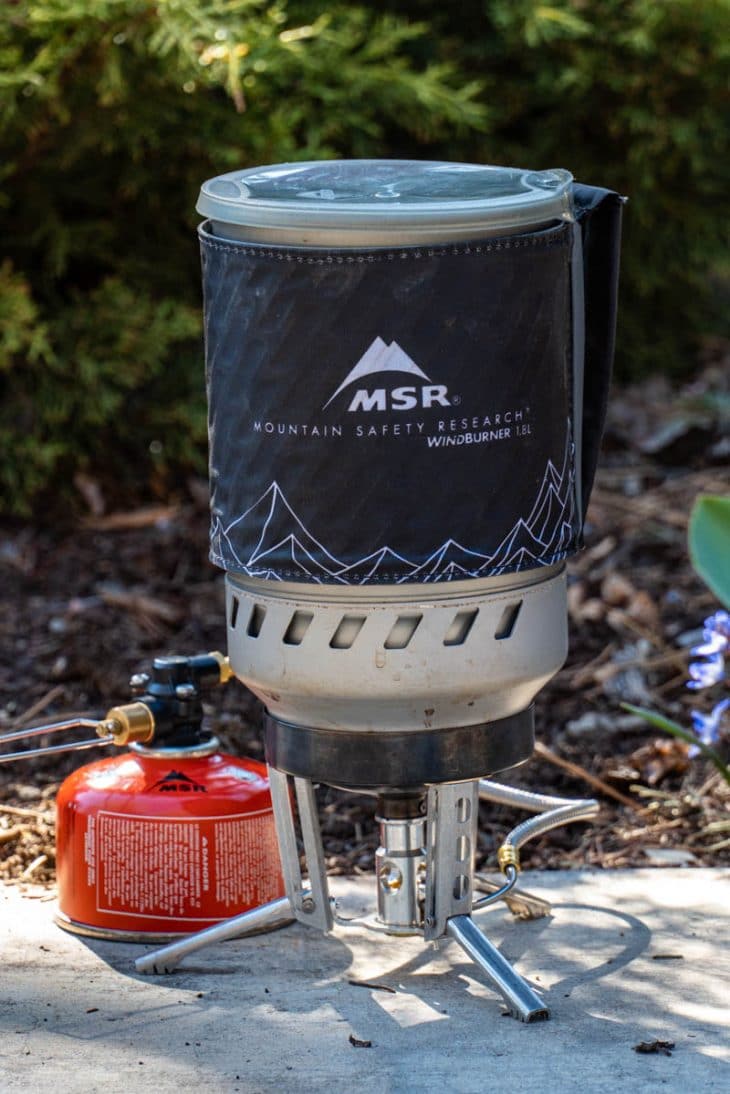
Best Wind Performance
MSR Windburner
MSRP: Solo $199.95; Duo $219.95
Weight: Solo 15.5 oz; Duo 21.78 oz
Fuel Delivery: Regulated
Avg. Boil Time: 3:40
Avg. Fuel Used: 7.4g
What We Liked: Unlike every other stove we tested, the MSR Windburner was the only stove system with a completely enclosed flame. While other stoves could be considered wind resistant at best, the Windburner is nearly windproof. Even with a box fan blowing directly on it, there was almost no effect on fuel efficiency or boil time.
What We Didn’t Like: The main disadvantages of this cooking system is the overall weight and cost. This is an expensive stove, and it is the heaviest integrated canister stove system we tested.
Bottom Line: If you are going to be in windy conditions with limited ability to make a shelter, this is hands down the best system out there. However, the weight and cost might not be worth it for more ideal conditions.
Compare current prices:
Why trust us?
Our recommendations are based on extensive first-hand experience. We ran each stove through a half-dozen back-to-back simulations, giving us a way to directly compare them to each other. During this hands-on testing, we made discoveries we never would have known had we just read the marketing material online.
Additionally, camp cooking is our gig. We’ve made literally hundreds of meals on various backpacking stoves. Over the years, we’ve developed backpacking meals for brands like REI, Backcountry, Outside Magazine, and Adventure Journal.
We have extensive experience with these particular backpacking stoves and understand how they fit into the broader backpacking cooking process.
Things to Consider When Choosing a Backpacking Stove
Deciding on the “right” stove for you will come down to a few factors. You’ll need to decide on which features are most important and best fit your cooking style on the trail. Below, we’ve outlined some of the most important considerations to factor into your decision.
Backpacking Cooking Style
In our opinion,the first step in finding the best backpacking stove is to identify your cooking style.
Just Add Boiling Water
This includes things like store-bought freeze-dried meals or home-dehydrated meals when using an insulated pot cozy. In either case, all you need to do is combine the food with the boiling water and wait.
For this cooking method, you need a stove that will boil water fast and efficiently.
This is where a rapid water boiler like the Jetboil Flash really shines.
Boil and Simmer
If you plan to cook from scratch or to rehydrate your own meals without a pot cozy, you’ll need a stove with adequate simmer control, as most home-dehydrated meals need to be cooked on low for several minutes.
In this case, a stove with good wind performance, like the Soto Windmaster or Jetboil MiniMo, would be your best choice.
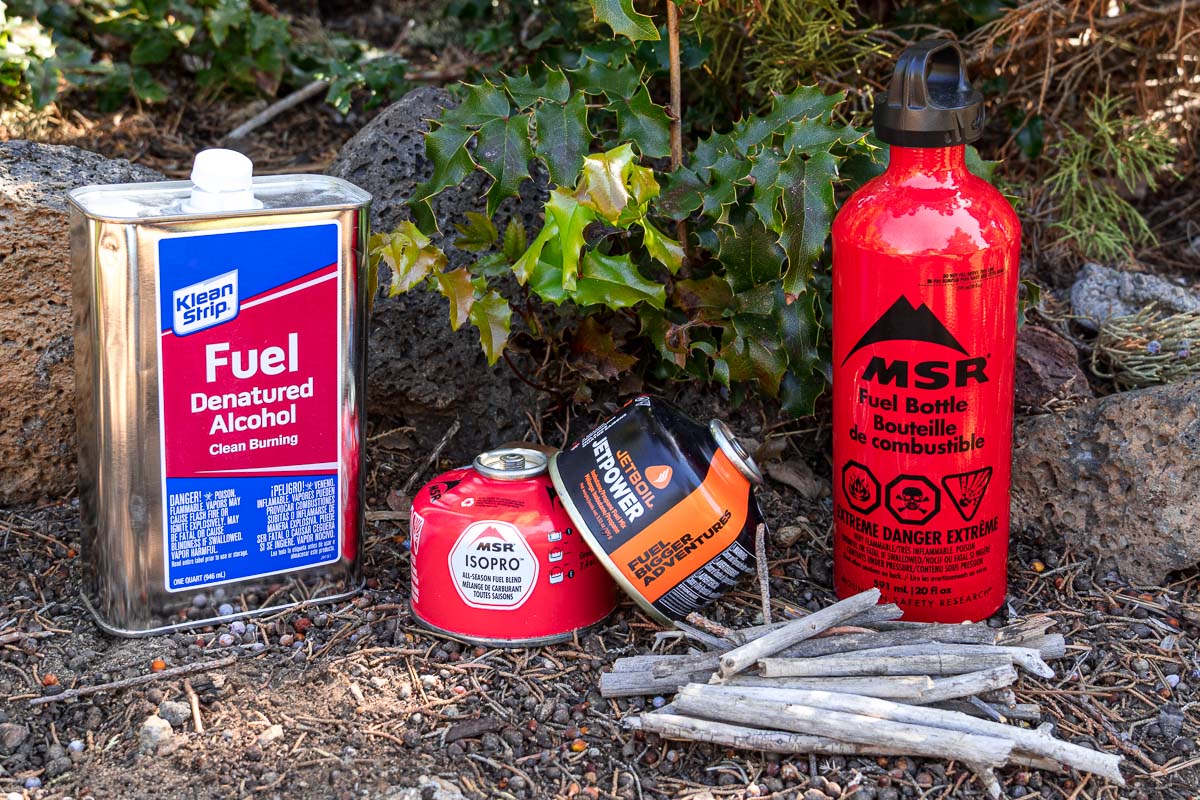
Fuel Types
What type of fuel you decide to use will depend on a few factors like available supply, cold weather performance, local fire restrictions, cost, and of course—weight. Here are the more common forms of backpacking fuel.
Canister (Isobutane/Propane Mix): Single-use backpacking fuel canisters contain a self-pressurized blend of isobutane and propane fuel (roughly 80% / 20%). They are widely available, easy to use, and approved in all but the most severe fire restrictions.
We feel that isobutane canisters are the best all-around fuel option for the vast majority of recreational backpacking trips in North America.
Liquid Gas: Reusable liquid multi-fuel stoves are manually pressurized and can burn a variety of widely available fuels (typically white gas, but also unleaded gasoline and kerosene). Ideal during cold winter conditions and internationally or in remote areas where fuel supplies might be scarce.
Alcohol: Popular among ultralight backpackers and thru-hikers, liquid alcohol stoves are extremely lightweight and are powered by cheap and widely available denatured alcohol. Liquid alcohol also frees you from the set units of canister fuel, allowing you to adjust how much fuel you bring for any particular trip.
Wood Stoves: Wood stoves burn found sticks and twigs inside an internal chamber. Since you don’t need to pack fuel, these stoves can be very lightweight. However, there must be an abundance of burnable fuel where you’re camping. Wood-burning stoves are also considered the same as a campfire under wildfire restrictions and therefore are one of the first things to be banned.
Backpacking Stove Features
After you identify your style of cooking and preferred fuel type, you can move on to all the other considerations when selecting a backpacking stove. The way you weigh each of these considerations will depend on the “typical use case” of how you’ll use your stove.
Group Size
Consider how many people are going to be sharing the stove. What size pot are you going to need? Some ultralight stoves like the BRS won’t work well with larger pots, while others with more robust pot stands, like the Soto WindMaster, will accommodate a larger, heavier pot.
Unregulated Or Regulated
An unregulated stove relies exclusively on the vapor pressure inside the canister to force the fuel out. This vapor pressure drops after each use, so towards the end of a canister, the vapor pressure will decrease and you’ll have less power. The colder the temperature, the worse the issue gets.
An integrated regulator will mitigate the pressure drop in a canister after each use. So a regulated stove will burn as strong even with a nearly spent canister or even in very cold conditions. However, regulators usually come at a weight and price premium.
Simmer Control
If you’re just boiling water, simmer control doesn’t really matter. Full blast is all you need. However, if you need to simmer, it’s important to be able to control the level of heat.
Some cheap stoves just have objectively inferior valves, which can make it hard to dial in a low setting. But for the most part, simmer control is largely determined by a stove’s ability to handle minor fluctuations in the wind. Nearly all stoves can be turned down very low, but it might only take a breath of air to blow the flame out.
Burner Size
The size of your stove’s burner will determine the heat profile. A small burner is lighter and more compact, but it will produce a tiny heat spot on the bottom of your pot. Not a problem if you’re just boiling water, but it can result in scorched food when cooking in a pot on the stove.
Cooking Platform
You want a good, solid cooking platform. This is a non-issue for integrated cooking systems, which are designed specifically to interconnect. But it’s worth considering when pairing a pot with a canister stove.
It’s important to make sure your pot diameter appropriately matches the size of your stove’s support. The number of supports also plays into pot stability.
Wind Protection
Windy (even breezy) conditions can dramatically affect your stove’s performance—both boil times and fuel efficiency. Regardless of the stove, it is always a good idea to try to block the wind the best you can, however, some designs are just better suited for the task than others.
Top-mounted canister stoves can use a partial windscreen but must allow enough ventilation so as not to overheat the fuel canister itself.
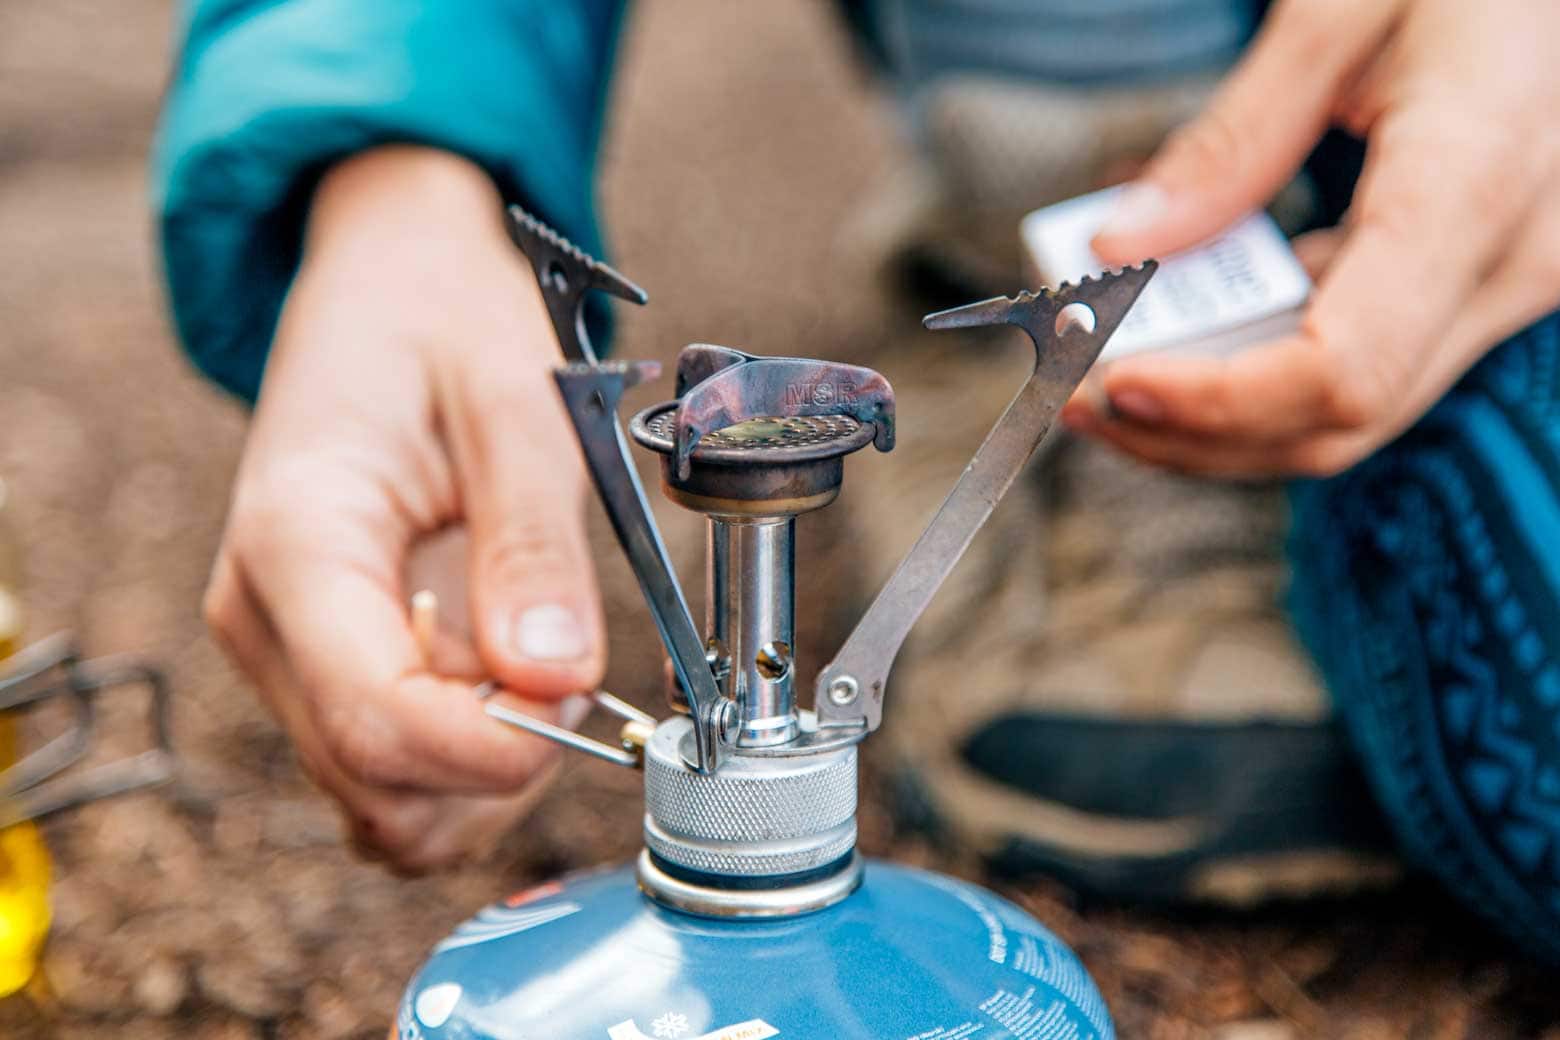
Integrated Ignition System
A piezo ignitor can be a very convenient feature. Especially on longer trips, it can save your thumbs from getting ripped up by using a lighter. However, you should always carry a backup fire starter—like a mini Bic lighter—just in case.
Weight
Weight: the ultimate consideration of every backpacker! So why not lead with it? Because the point is to find the lightest weight stove that has all the features you need. At the end of the day, your stove likely won’t be the heaviest item in your pack, so if you’re looking to save weight, other items (like your tent or backpack) are usually a more impactful place to start. The weight difference among canister stoves is generally only an ounce or two.
Alternatives to Canister Stoves
So far we have focused on canister stoves–which are the most versatile and easiest to use. However, there are a handful of alternative fuel stoves that have more niche uses: liquid fuel stoves, alcohol stoves, wood burning stoves, and solid fuel stoves.
Liquid Alcohol Stoves
Liquid alcohol stoves are a very popular option for ultralight hikers. They are very lightweight, cheap, simply constructed, and do an excellent job at boiling water.
They run off a variety of fuels, but most commonly denatured alcohol. HEET, Everclear, and even isopropyl alcohol can be used as well. Since the fuel is sold in bulk, you can portion out exactly how much you want to bring depending on your trip (freeing you from the fixed sizes of canister stoves).
The trade-off of alcohol stoves is that they are less fuel efficient as canister stoves, have limited/zero simmer control (depending on model), perform poorly in wind, need a pot stand (depending on model) and can be unsafe if handled improperly. Additionally, because these stoves don’t have a on/off valve, they can sometimes be banned while fire restrictions are in place.
Overall, alcohol stoves are just a little bit more finicky than canister stoves.
Alcohol stoves also have a DIY aura that surrounds them. While there are a few name brands like Solo Stove, Traiga, Toaks, and the Caldera System that makes alcohol stoves, many ultralight backpackers opt to construct their own stoves using soda cans, cat food cans, and a variety of other repurposed material.
Best Liquid Alcohol Stoves

TOAKS Siphon (0.7 oz)
Using a double-walled siphoning effect, fuel from the base is drawn up into the walls of the stove and then released through top-facing jets. This produces a strong flame and greatly increases fuel efficiency.
Caldera Cone System (cone: ~2.75 oz, stove: 0.6 oz)
The Caldera Cone system is a complete alcohol cook system designed to work with your specific cook pot. It pairs your choice of either a Kojin or 12-10 alcohol burner with a collapsible windscreen/pot stand that fits the dimensions of your cook pot. This blocks the wind, directs the heat upwards, and gives your pot a stable base.

Vargo Triad (1 oz)
This compact, jetted stove is one of the few alcohol stoves to have integrated pot supports. Three legs on the bottom hold the stove off the ground, while the three legs on the top hold your pot (or more likely a cup) off the burners to allow for airflow. Due to the fixed size of the pot supports, this stove is best paired with a narrow-bodied cup rather than a larger diameter pot.
Alcohol Stove Resources
There are just so many different alcohol stove designs that it’s hard to cover them all. Here are some additional resources that can provide some more context:
Build Your Own Alcohol Stove
Liquid Fuel Stoves
If you want the ability to burn variable fuel types or if often camp in very cold conditions, the best option for you will probably be a liquid fuel stove.
Liquid fuels allow you to burn a wide range of liquid fuels like white gas, unleaded gasoline, and even kerosene. This can be very important if traveling in remote areas (or internationally) for an extended period of time. Some multi fuel models, like the MSR WhisperLite Universal (13.7 oz—without the fuel bottle) have an adapter that allows you to burn isobutane canisters as well.
Since liquid fuel stoves are manually pressurized and are often designed with a regulator, they perform very well at high elevations and in cold temperatures. They are widely used on mountaineering expeditions, where melting snow is often the only way to procure water.
However, these stoves are on the heavier side, require maintenance, and are not as simple to use as canister stoves.
One of the most popular liquid fuel stoves is the MSR WhisperLite. It’s best for boiling water, but it has enough simmer control to cook soupy DIY meals when paired with a highly conductive pot.
For better simmer control and a larger cook surface, the MSR DragonFly (14 oz – without the fuel bottle) is a good option to check out as well. This would be a great option if you want ONE stove that you can use for both backpacking and cooking meals at a campsite, as it functions more like a single burner camp stove.
Wood burning backpacking stoves
The main advantage of a wood-burning stove is the ability to use sticks and twigs for fuel. No carrying fuel or buying fuel.
Wood-burning stoves come in two main categories: can-style and folding.
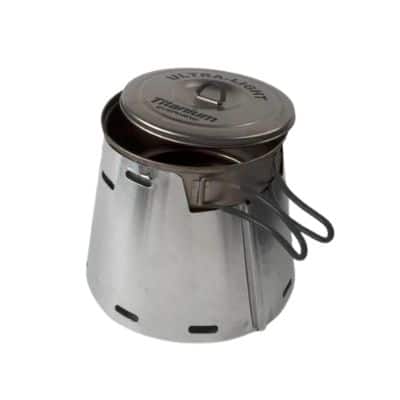
Can-Style Wood Stoves
The double-walled construction of can-style wood stoves allows them to have a two-stage burn cycle, burning both the wood itself as well as the expanding gas released by the wood.
This style of wood stove burns hotter and more efficiently, resulting in faster cook times.
The downside is that most can-style wood stoves need to be loaded from the top which, depending on the design, can interfere with your cooking vessel.
One of the more popular can-style wood stoves is the Solo Stove Lite (9 oz) which nests inside a titanium 900 mL pot ( 7.8 oz). Another option is the super lightweight TOAKS titanium wood stove (5.4 oz).
Folding Wood Stoves
Folding wood stoves can be lightweight and more compact, but their single-wall construction makes their burn cycle less efficient. However, most folding wood stoves have the ability to feed the fire from the bottom, so as not to interfere with your cooking vessel. Popular folding wood stoves are the Firebox Gen2 Nano (4 oz) or the Vargo Hexagon (4.1 oz).
While wood-burning stoves have some advantages, there are some major trade-offs to consider as well.
Disadvantages Of Wood Stoves
From an ease-of-use standpoint, they are by far the least convenient option out there. Gathering wood, getting it started, and continually tending the flame requires constant attention.
Easily combustible fuel is not always available in arid environments, above the tree line, or after heavy rain. An alcohol burner like the Solo Stove Alcohol Burner (3.5 oz) can be used in most wood stoves, giving you an insurance policy if suitable wood can’t be found.
The last major disadvantage is that wood-burning stoves are considered to be the same thing as a campfire under most fire restrictions, so wood-burning stoves are often banned in the summer in many locations.
Solid fuel stoves
Sold exclusively by Esbit, solid fuel tablets are another extremely lightweight option. The weight savings of this style of stove is incredible, but there are some serious downsides to consider as well.
One of Esbit’s solid fuel stoves weighs only 0.39 oz! The fuel itself is also fairly lightweight, with each tablet weighing 0.5 oz and offers around a 12 minute burn time. Tablets can be tamped out and reused at a later point.
The disadvantages of solid fuel are that it does have a distinct “fishy” odor when burned, it often leaves a sticky residue on the bottom of the pot, it’s not as efficient as other fuel types, and the tablets can be harder to find in stores. Additionally, although they are labeled “non-toxic”, they are made from some very funky chemicals. If you want, you can read more about it here.
Backpacking Stove Accessories
Jetboil Fuel Canister Stabilizer (.9 oz): This folding tripod attaches to the bottom of nearly all isobutane canisters, creating a lot more stability. This can be especially helpful if you plan on doing a lot of actual cooking, simmering, and stirring on your stove.
Windscreen & Heat Reflector (liquid fuel & alcohol): This extremely lightweight windscreen and heat reflector is designed to decrease boil times and increase fuel efficiency when used with any stove with a detached fuel reservoir.*
*If using top mounted isobutane canister stoves, using rocks or your pack to create a wind buffer to simulate “calm” conditions can dramatically improve performance. However, you should avoid tightly fitting windscreens and heat reflectors, which can overheat the attached fuel canister to the point of being dangerous.
Caldera Cone by Trail Designs: Trail Designs specializes in manufacturing integrated liquid alcohol stove systems. One of their most notable products is the Caldera Cone, which serves as both a windscreen and pot stand for an alcohol stove burner. If you’re considering an alcohol burner setup, this is definitely a system worth looking into.
What Type Of Cookware Will You Be Using?
If you’re considering a new backpacking stove, it’s also important to think about the type of cookware you plan on using it with. We could write an entirely separate article on this topic alone, but here are some of the main types of cookware.
Titanium Cookware: Super lightweight and super durable, titanium cookware is frequently used by weight-conscious backpackers. However, titanium cookware tends to scorch easily and has poor thermal conductivity, making it prone to heat spots. Titanium cookware, therefore, is great for boiling water or for rehydrating meals using a pot cozy, but not for doing much actual cooking.
Anodized Aluminum Cookware: Lightweight, superconductive, and semi non-stick, anodized aluminum has been electronically treated to make it non-reactive. This is a fairly versatile cookware option for those who want to boil water and cook some DIY meals.
Ceramic Coated Aluminum Cookware: Lightweight, superconductive, and super non-stick, ceramic coated aluminum is a relatively new type of backpacking cookware. While it is great if you plan to cook a lot of your own meals, the ceramic coating can not withstand sauteing at high heat, so a stove with decent simmer control is a must.
Favorite Backpacking Cookware
Soto New River Pot: This aluminum pot is our choice for solo adventures. It’s lightweight at less than 5 oz, and very packable with enough room for a small fuel canister, a stove, a small piece of spone, and a mini lighter. It also has a non-slip finish on the bottom so it’s less likely to slip off the stove burner.
MSR Ceramic Solo Pot: We use this 1.3L pot whenever we know we’re going to be doing any sort of cooking on the trail (like scrambling Ova Easy eggs for breakfast). The ceramic nonstick coating (PFOA & PTFE free) is absolutely incredible, making cleanup easy. The 1.3 capacity is perfect for two people.
TOAKS Titanium Cookware: Unbelievably lightweight titanium at a comparatively lower cost, we have always been impressed with TOAKS cookware. With so many different sizing options, you can really find the perfect-sized cup or pot for you.
See our complete backpacking cooking gear list here.
Hungry for more?
We hope that this article was helpful in choosing the best backpacking stove for your adventures! Next, be sure to dive into our extensive meal planning resources, including the best backpacking food, vegan backpacking food options, lightweight DIY backpacking recipes, or learn how to dehydrate your own backpacking food!
Very informative
Why would you set up a stove in the wind (whether real or artificial) and not use a wind screen? I guess that almost every backpacker makes that mistake once… but you guys did it over and over on every test! I would suggest that’s a very flat learning curve… like scary flat.
But if I ever have room in my backpack for an oscillating fan & a small generator I will be sure to look online for how to do that!
But teasing aside this is the best written stove review pretty much ever so it’s really sad that you didn’t include windscreen testing. Something MSR published 40 years ago and that really needs to be redone as the stove choices have really expanded since then.
So I really implore you to go back and retest, rewrite & republish, because the clarity of your writing skills is absolutely top notch & sorely needed.
GroundHog
We absolutely agree you should do everything you can to block the wind when out in the field. Whether that’s carrying a collapsible windscreen with you, using the natural environment (trees, rocks, etc) or even your own gear (backpack) to block the wind. We’ve used all these methods before, but we’ve also been in very windy conditions (open desert, exposed beach, high alpine) where the best we could do was mitigate the effects of the wind, not eliminate it. Especially if the wind wasn’t consistently coming from he same direction.
Our wind test was to simulate how each stove handled different fluctuations in the wind. Perhaps in a a future update we can include with/without a windscreen. Nevertheless, we still think it’s good to know how each stove design on its own handles various amounts of wind.
Cat can stove – 0.3 oz, costs $0.50. I feel like a 4 oz alcohol stove is insanity. Alcohol is heavier/unit energy than other fuels, so you’re already starting with that disadvantage.
We recently thru-hiked the JMT and saw a lot of alcohol fuel stoves. Some DIY, some manufactured. We want to revamp that section of our guide and perhaps do a deeper dive into alcohol fuel stoves in the future. Thanks for the info.
Thank you for mentioning that a small burner might be more fuel-efficient than a large one. My daughter and I are planning on going camping next weekend and we want to be able to cook a nice meal for ourselves. I’ll ask her what she wants to eat and decide what to get based off of that.
It’s a delicate balance between heat profile, simmer control, and fuel consumption. Smart idea to figure out what you want to be cooking first, before committing to a stove type.