Ice Cream in a Bag
This post may contain affiliate links.

Add a cool twist to your camping desserts with this Ice Cream in a Bag recipe! With just a few simple ingredients, you can enjoy freshly made ice cream on your next camping trip.

I loved making ice cream at summer camp. I can still remember all the excitement, anticipation, and magic of being able to make homemade ice cream at a campsite. Part dessert and part science project, this ice cream in a bag was always such a fun activity for kids and camp counselors alike.
It is also the only way to enjoy ice cream while camping (unless you camp in an RV with a freezer!).
That’s because keeping store-bought ice cream frozen while camping is nearly impossible. Even the best coolers can’t keep their contents below freezing temperatures. Everything inside is slowly melting. So ice cream placed inside will melt in a matter of hours. Trust us, we’ve tried!
So if you want ice cream, you’ve got to make it yourself. Thankfully, this is a simple recipe that uses just a handful of ingredients. No fancy ice cream maker or freezer is required! All you need to do is combine rock salt with ice to create a chemical reaction that melts ice below 32 degrees.
This ice cream in a bag recipe has a slight twist to make it more suitable for camping. Instead of placing one smaller bag inside of a larger bag, as a lot of home recipes call for, the ice cream recipe I used at camp calls for placing a small bag inside a coffee can. It’s much more durable and will prevent any tragic mishaps campsite.
This dessert is so fun to make, we hope you give it a try this summer!
Equipment Needed
Coffee Can: We did tests with steel, plastic, and foil-lined cardboard coffee cans – and all of them will work. Metal is obviously more durable, but will become very cold to the touch once you add the ice. You may want to use gloves. Foil-lined cardboard won’t get so cold on the outside, but you’ll want to be a little more gentle rolling it around.
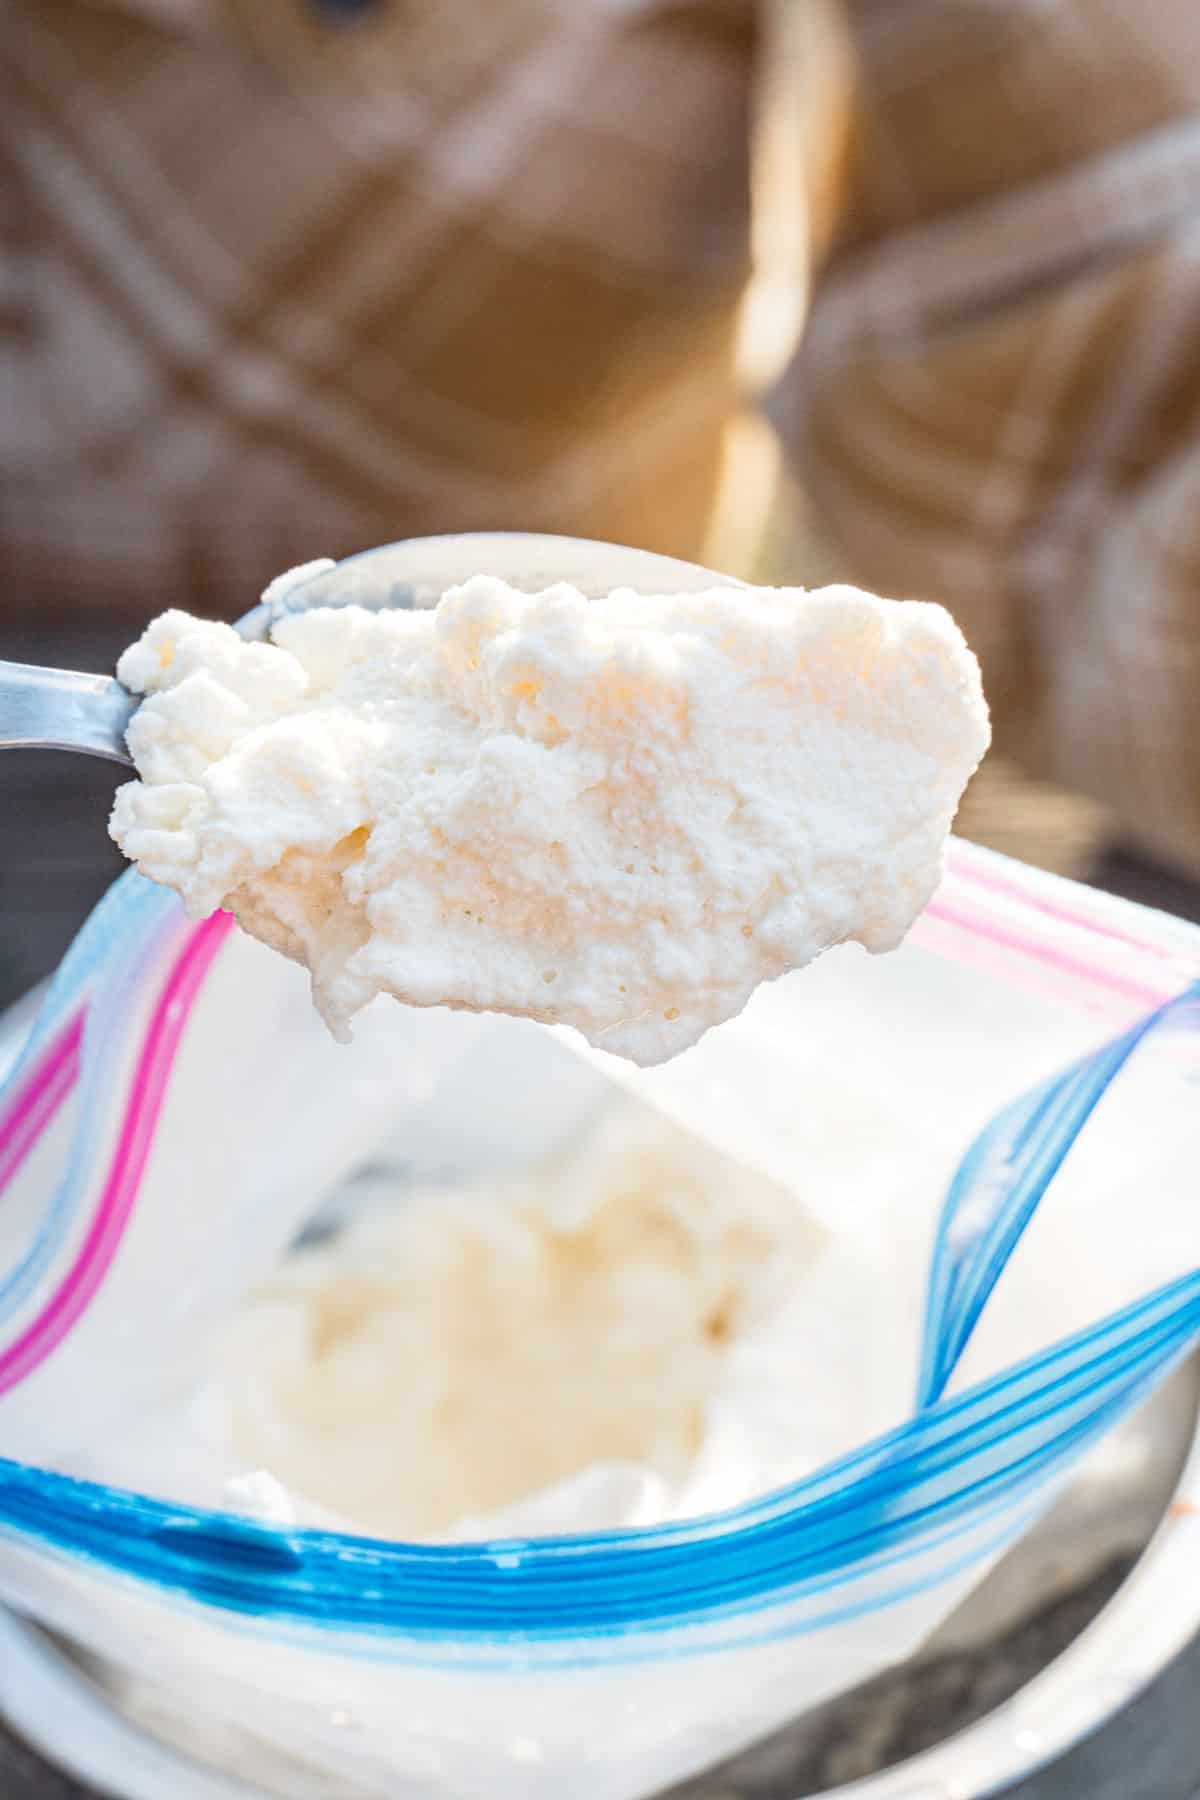
Plastic Bags with a sealable top: We tried a bunch of different containers for holding the ice cream mixture and found that a classic seal-top quart-sized sandwich bag produces the best ice cream. The thin plastic allows the ice to really churn up the half & half in a way that rigid-sided containers don’t.
Ice: Regular old ice cubes from the cooler is perfect.
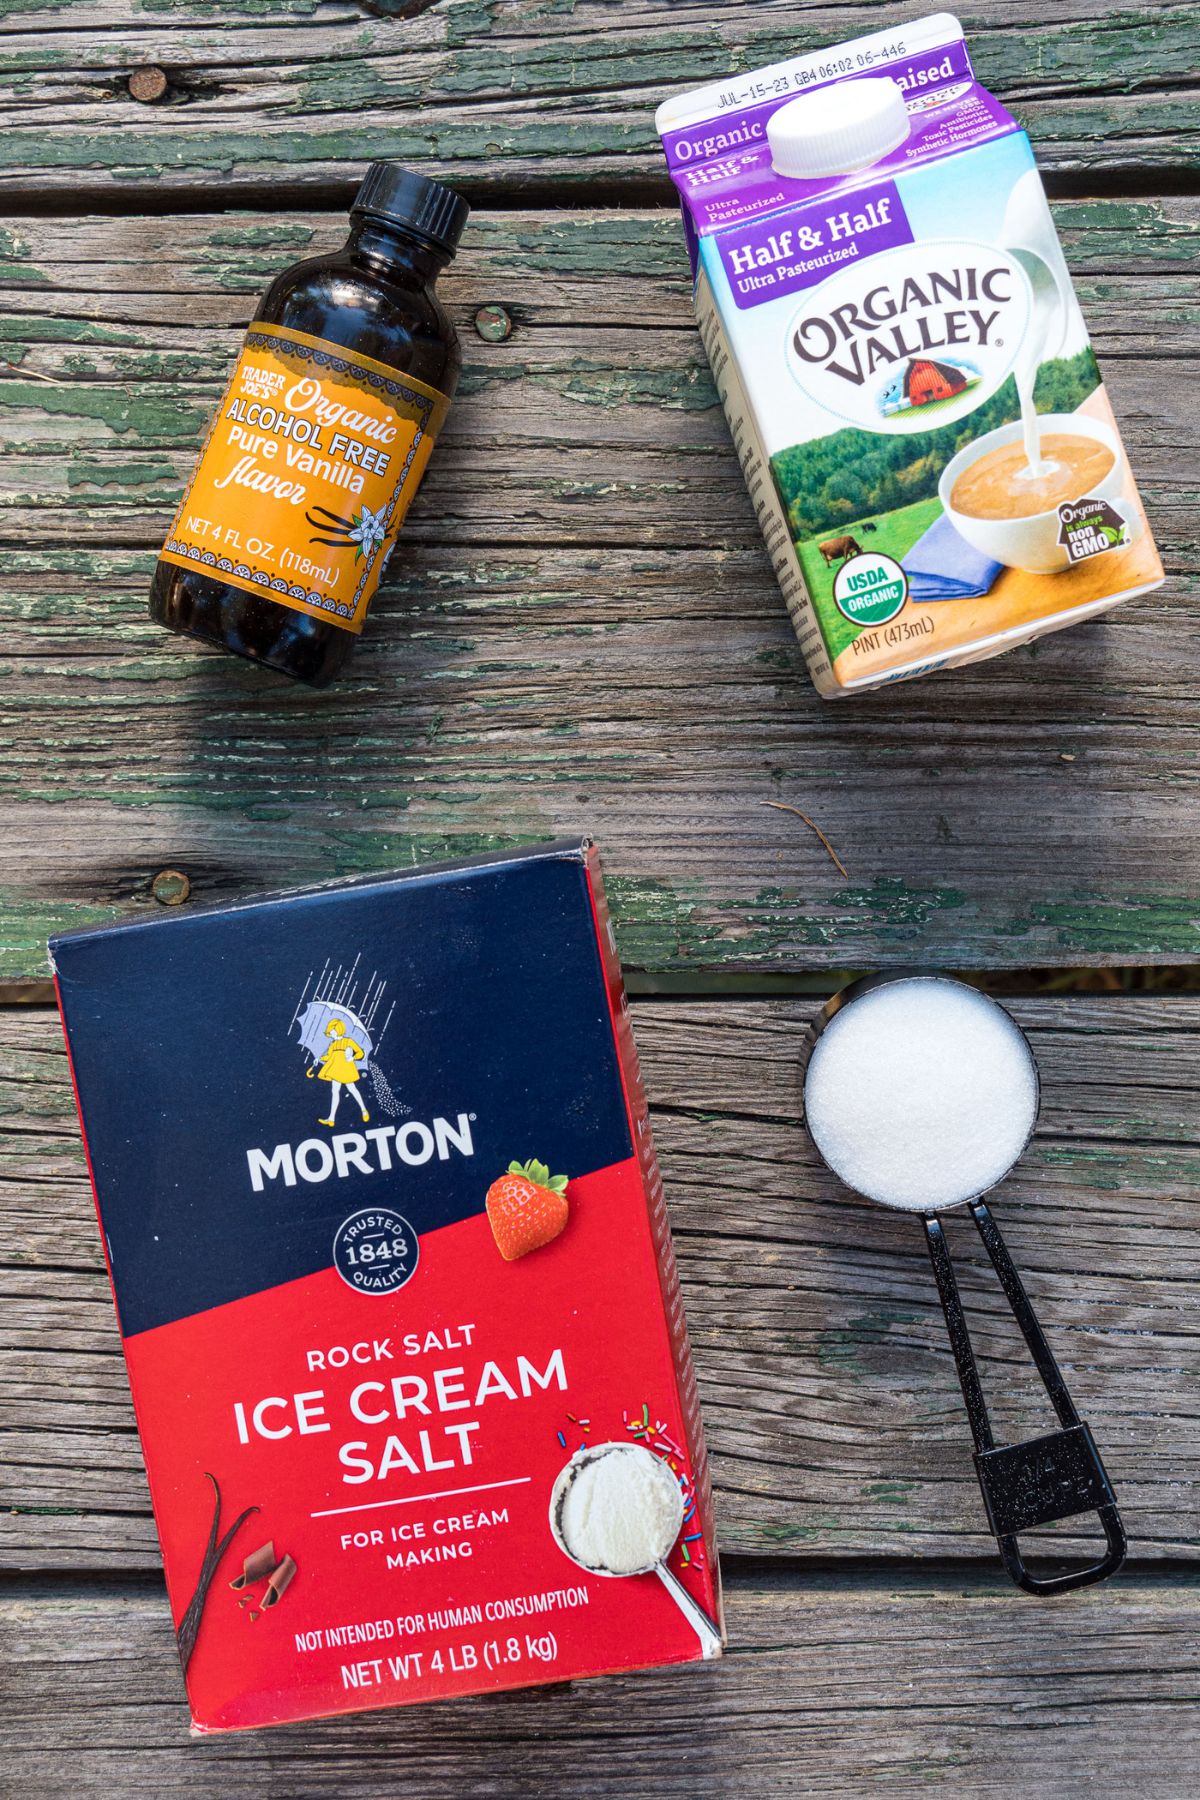
Rock Salts: This type of salt, often sold as Ice Cream salt, can usually be found in the baking section of your grocery store. Unlike table salt, rock salt crystals are large and coarse, making them ideal for altering the melting point of the ice.
The combination of ice and salt makes it possible to achieve temperatures below 31 F degrees.
Ice Cream in a Bag Ingredients
Half and half: We’ve seen recipes out there call for a 1:1 ratio of heavy cream and whole milk, which is just half and half. So instead of buying two separate containers, pick up one carton of half and half. In a pinch, you can just use whole milk, but it won’t have quite the same creamy texture
*Want to make this recipe vegan? Use a plant-based coffee creamer. We did a test with Trader Joe’s coconut milk creamer and it turned out pretty good! Soy, oat, and almond milk creamer are also options.
Sugar: White granulated sugar is what works best for making homemade ice cream.
Vanilla Extract: To make vanilla ice cream, use a small amount of vanilla extract.
*If plain vanilla ice cream isn’t your thing, feel free to add chocolate chips, sprinkles, or a little chocolate syrup.
How to Make Ice Cream in a Bag – Step by Step
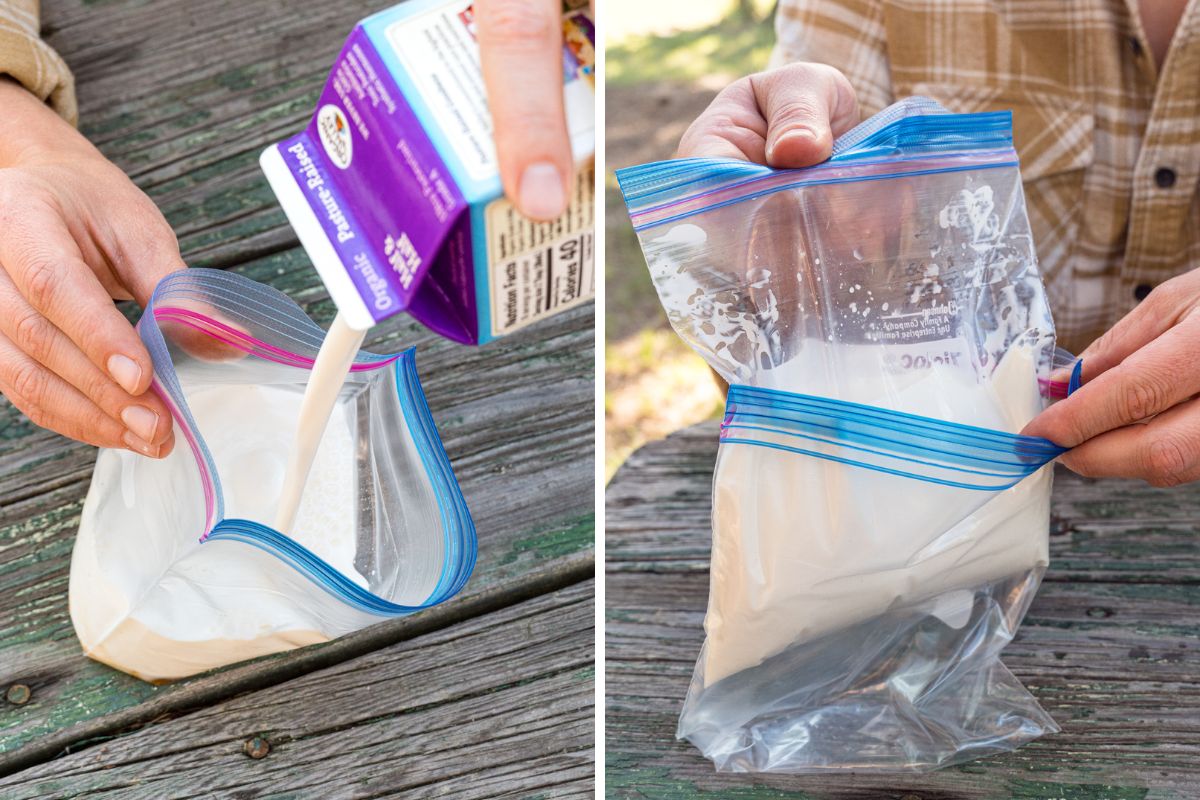
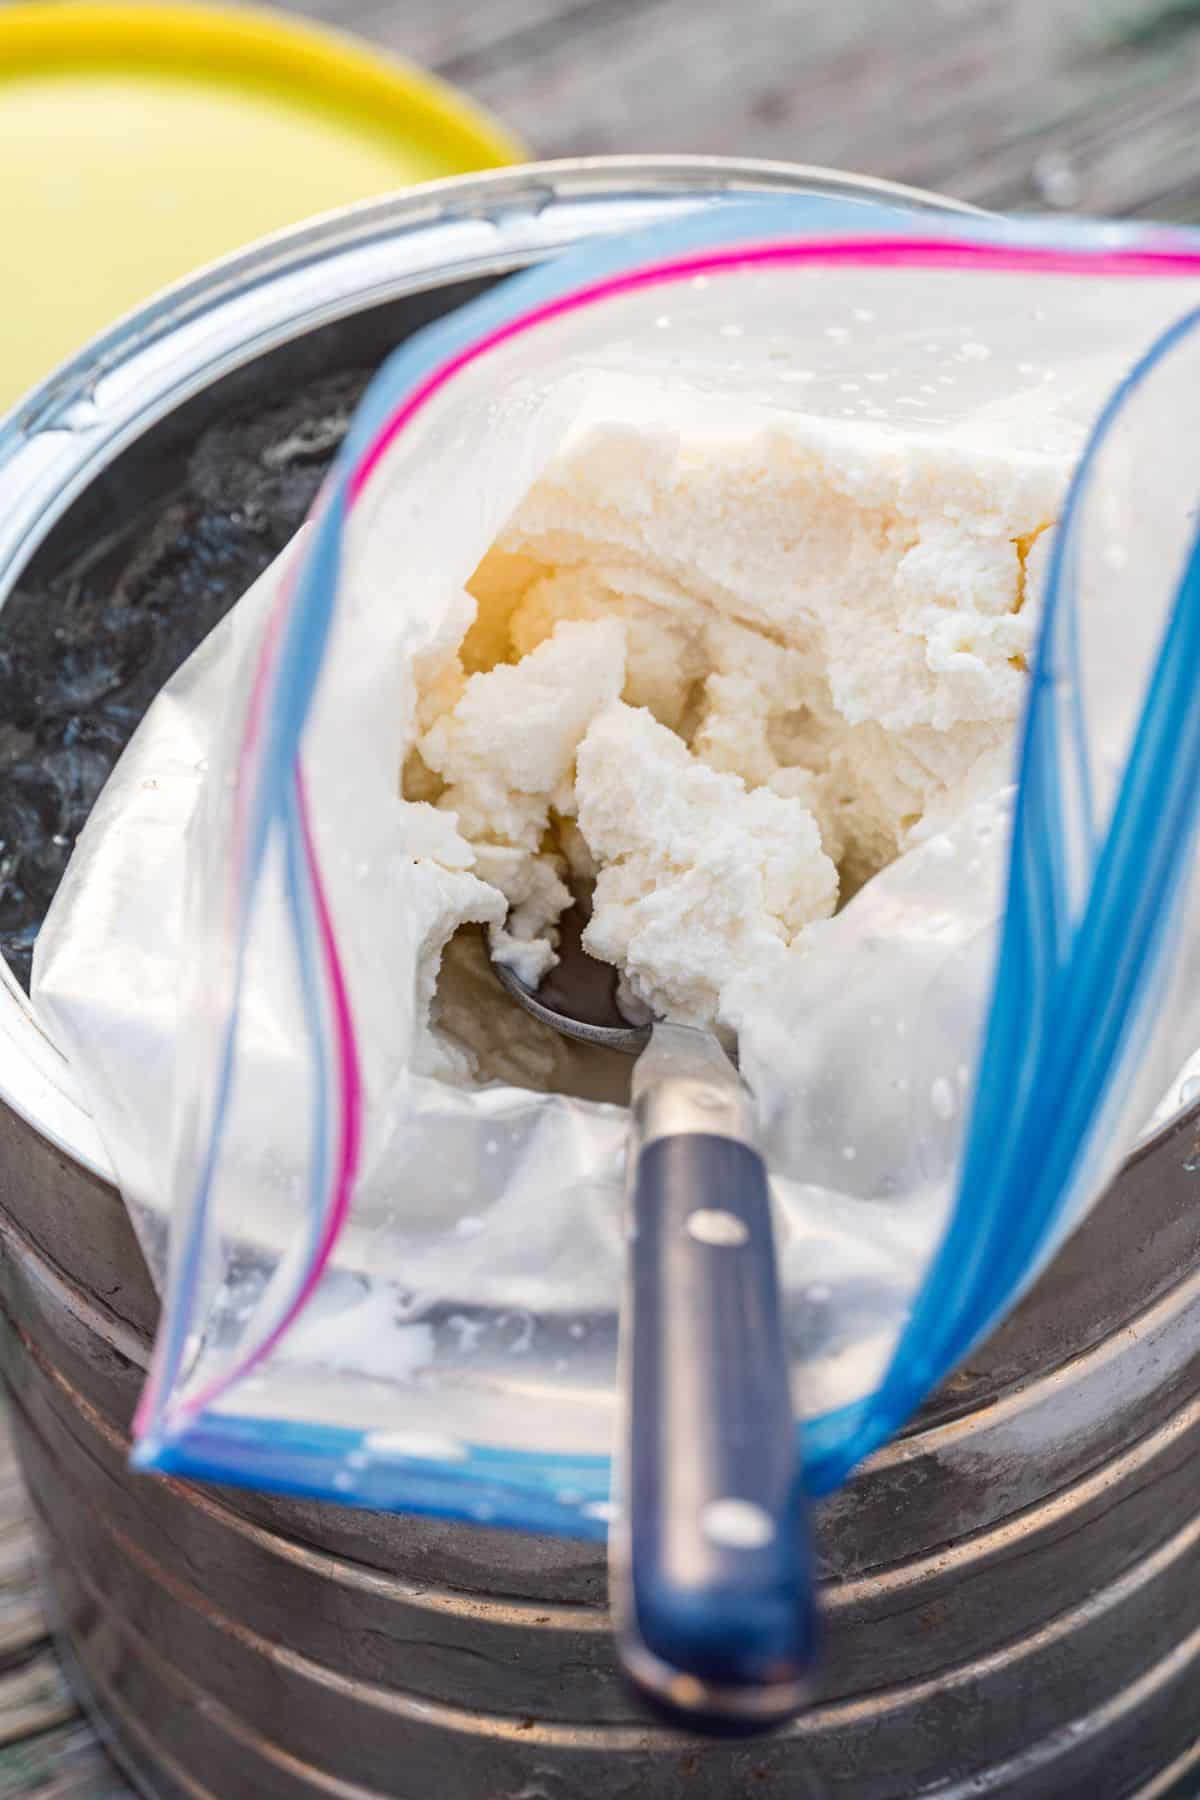
The first step is to combine the half-and-half, sugar, and vanilla inside a resealable plastic bag. Seal the bag and mix around until the sugar is fully dissolved. Try to get as much air out as possible. You might want to double bag to ensure you don’t get any surprise leaks.
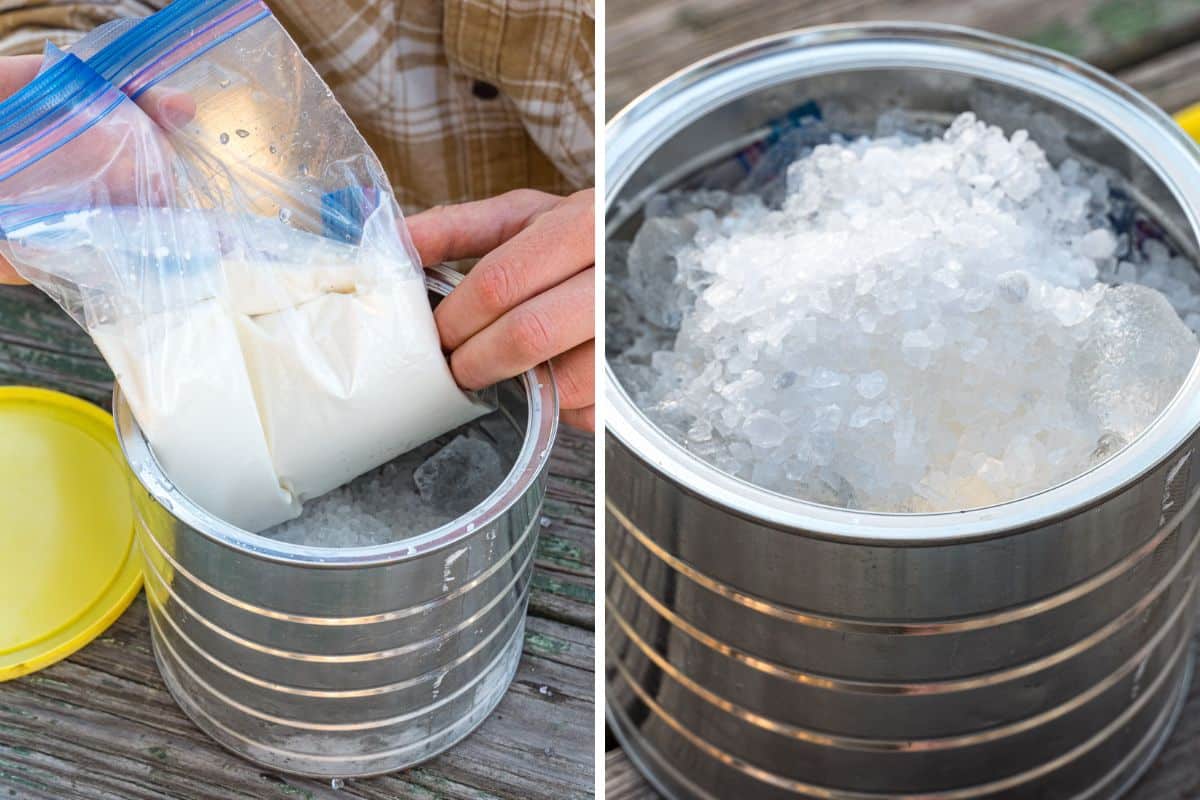
Place a few cups of ice and 1/2 cup of rock salt in the bottom of the coffee can. Next, place the double zip-top bag inside. Then, fill the remaining space on top with more ice and rock salt. Firmly place the lid back on the coffee can and start shaking!
Motion is a critical part of making ice cream and there are lots of creative ways to do it:
- Play “hot potato” by tossing it back and forth
- Roll it on the picnic table
- Gently dribble it like a soccer ball
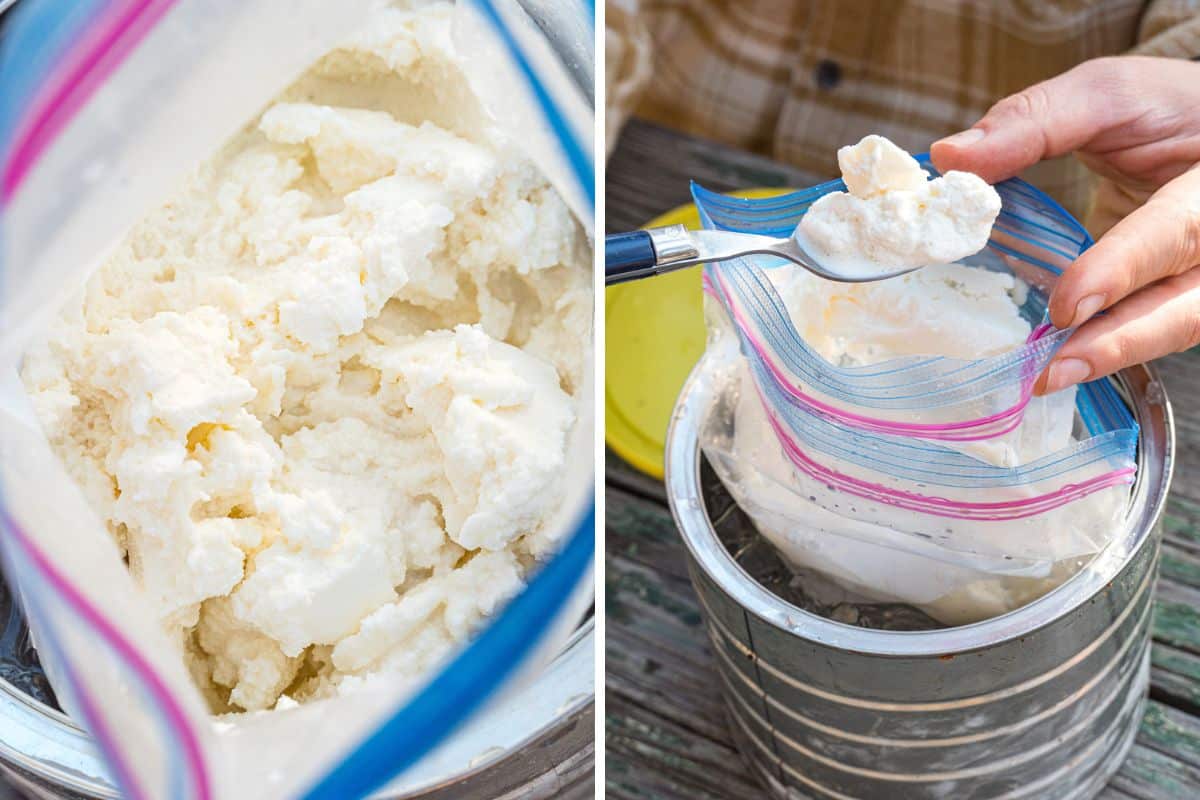
As the ice melts, you may need to add more ice and rock salt. You can start checking around 10-15 minutes.
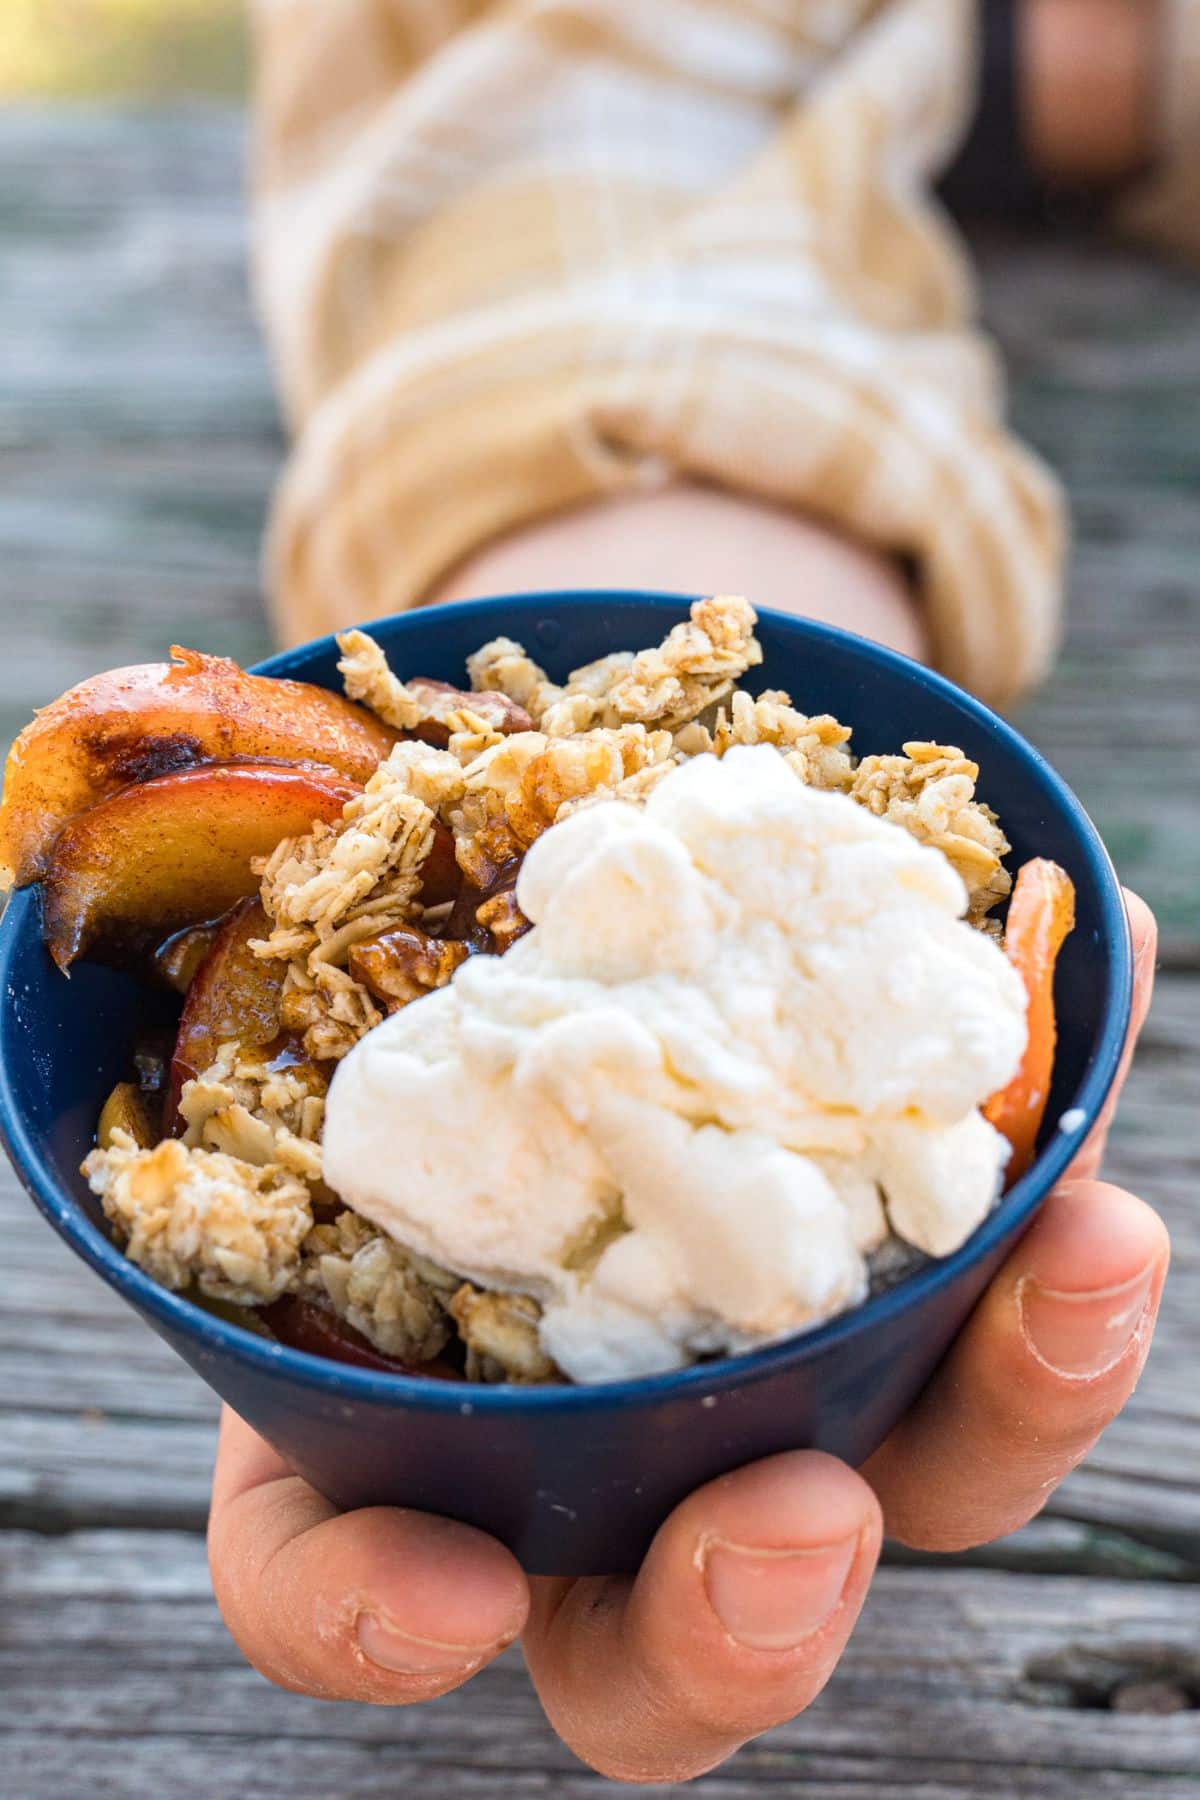
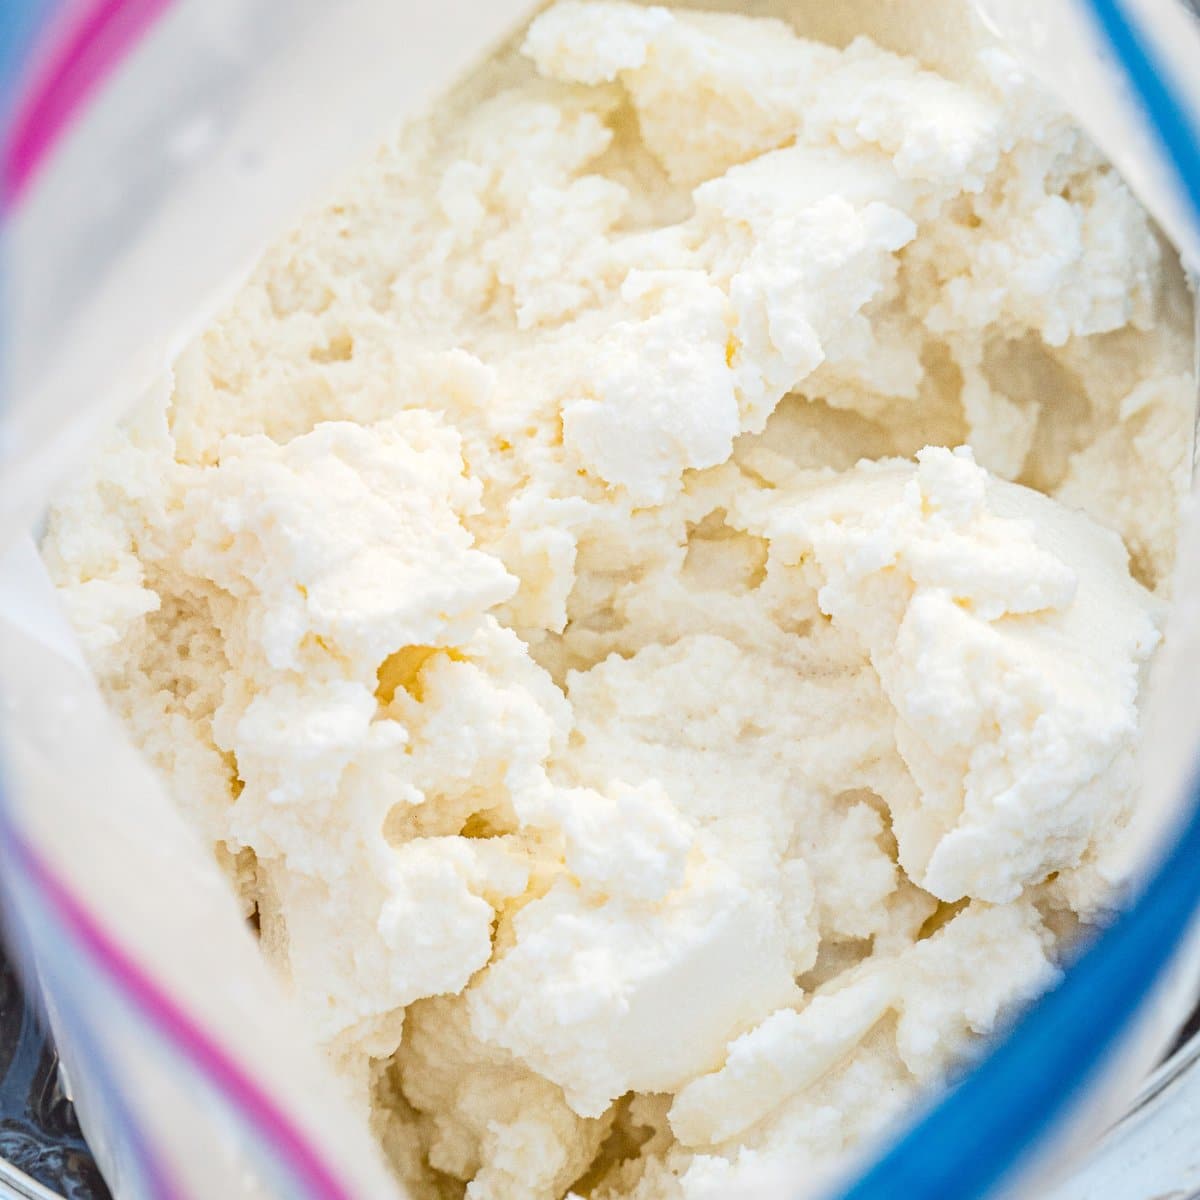
Once the ice cream has hardened, remove the ziplock bag, and serve immediately!
Serve it with…
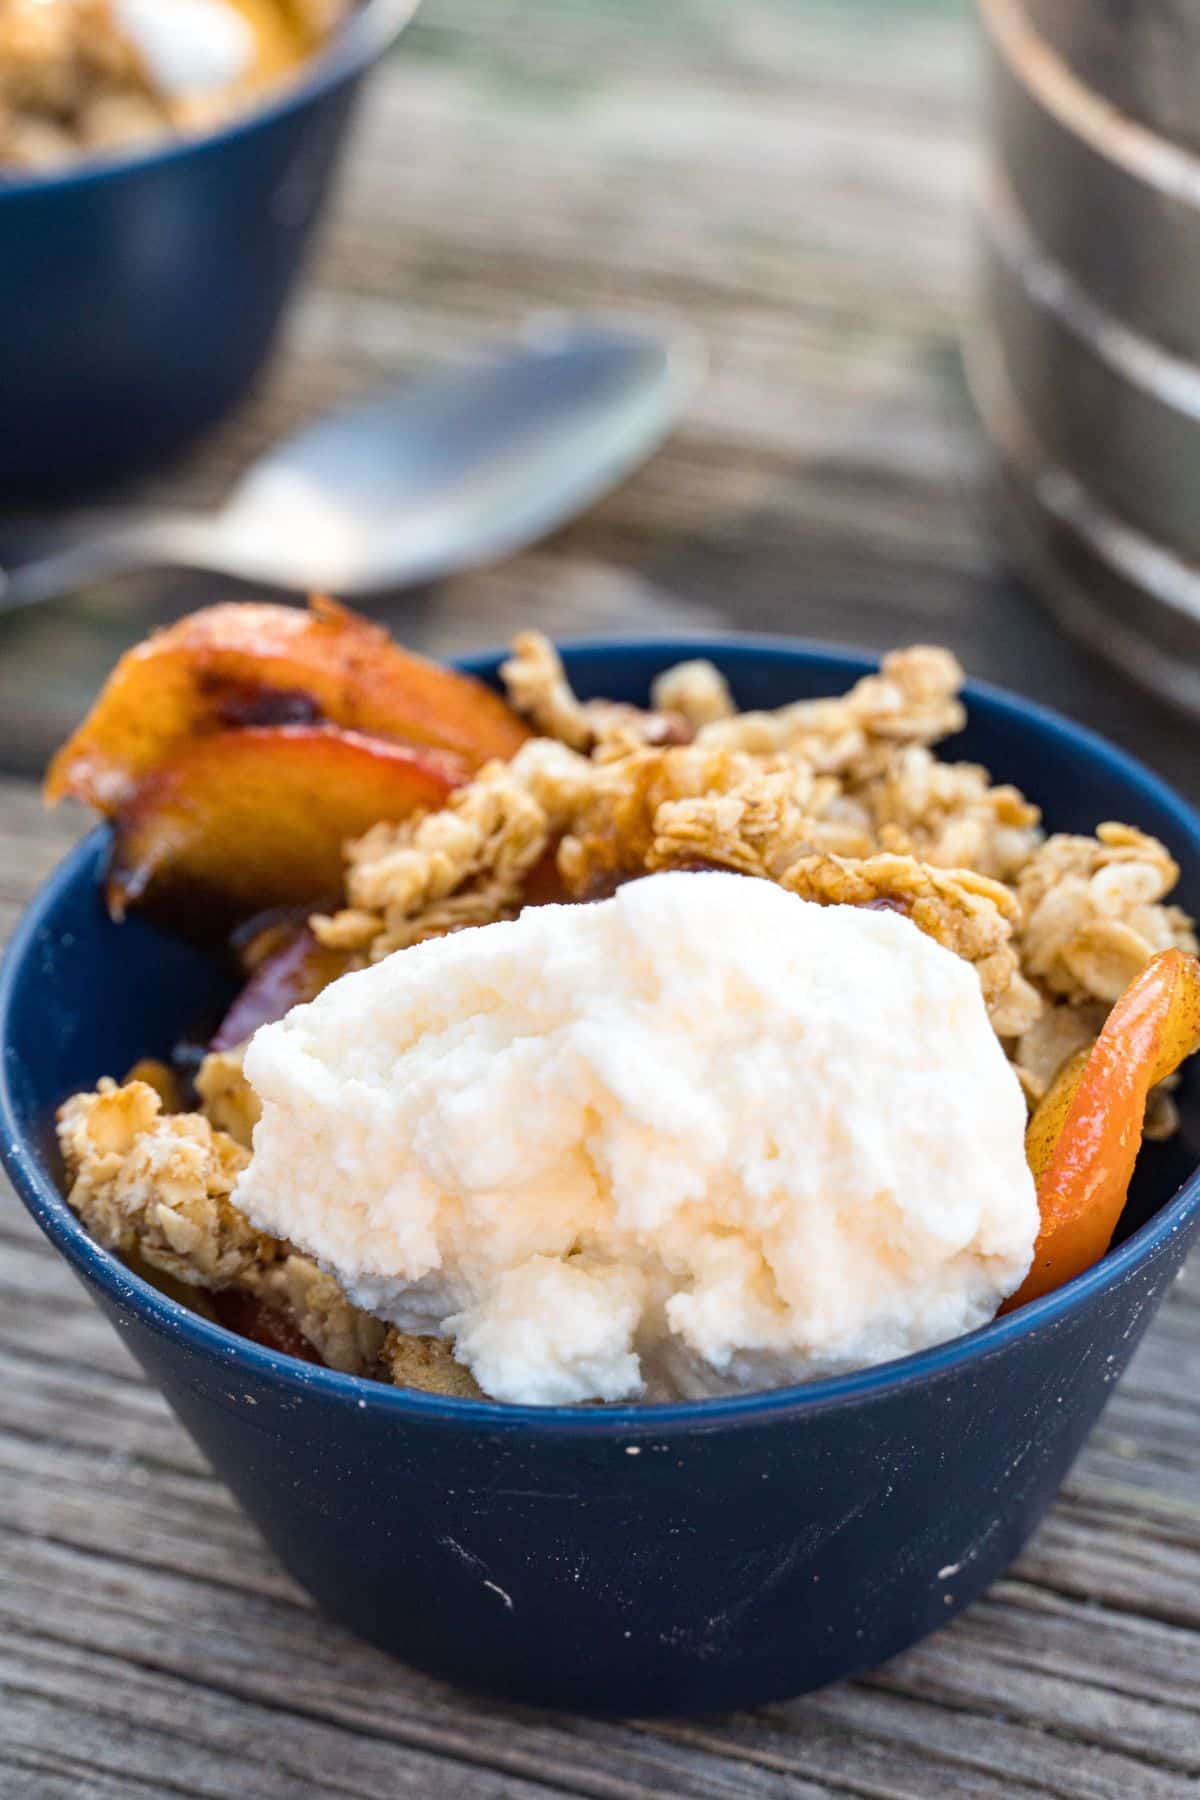
Of course, you can enjoy this ice cream on its own! But, it’s also perfect for scooping on top of Dutch oven peach cobbler (or apple cobbler), campfire baked apples, or alongside banana boats.
Ice Cream in a Bag
Ingredients
- 1 pint half & half
- ¼ cup sugar
- 1 teaspoon vanilla extract
- 1 cup rock salt also sold as "ice cream salt"
- ice
Equipment
Instructions
- Combine the half & half, sugar, and vanilla inside a zip-top bag. Mix around until the sugar is fully dissolved. It’s a smart idea to double bag to ensure you don’t get any surprise leaks.
- Place some ice and rock salt in the bottom of the coffee can. Next, place the double zip-top baggies into the middle. Then, fill the remaining space on top with more ice and rock salts.
- Firmly place the lid back on the coffee can and start shaking! Motion is a critical part of making ice cream and there are lots of creative ways to do it: Play “cold” potato by tossing it back and forth, roll it on the picnic table, or gently dribble it like a soccer ball.
- As the ice melts, you may need to add more ice and rock salt. After about 10-15 minutes, the ice cream should be ready!
Thanks for the wonderful idea! What size metal coffee can did you use for this recipe?
We used a 10oz and it was just the right size. Hope you have fun with it!
Love this idea- im gonna try it with my grandkids,,!
The first step is to combine the half-and-half, sugar, and vanilla inside a resealable plastic bag. Seal the bag and mix around until the sugar is fully dissolved. Try to get as much air as possible. You might want to double bag to ensure you don’t get any surprise leaks.
I assume you mean try to get as much air as possible OUT OF THE BAGS, or do you need air for expansion
Good catch, Ken! Yes, get as much air out as possible. I’ve fixed the post 🙂
TOTALLY AWESOME YOU GUYS!!! My family was STOKED that we got ice cream with our left over, warmed up french toast. Oh my, this technique works! Just follow the instructions and wallah!!
I was a camp counselor and an after school counselor this activity helps break the ice and bring unity to any group
I love this idea we can’t wait to try it!