How to Pack a Cooler like a Pro
This post may contain affiliate links.
Don’t let the summer heat get you down! We’re sharing our tips and tricks for packing a cooler for camping so your food and drinks stay colder, longer.
“How hard can it be? Just put your food in the cooler and throw ice on it, right?”
This is how we used to think about packing our cooler, that is to say: not very much. But after a miscalculation left us eating questionably refrigerated food, we decided to get serious about our cooler situation.
After doing a bunch of research and trying out a couple of techniques, we’ve compiled some best practices for packing a cooler: Ways to make your ice last longer, optimal organizational strategies, and a pre-trip checklist.
By the end of this post, you’ll know how to pack your cooler like a pro!
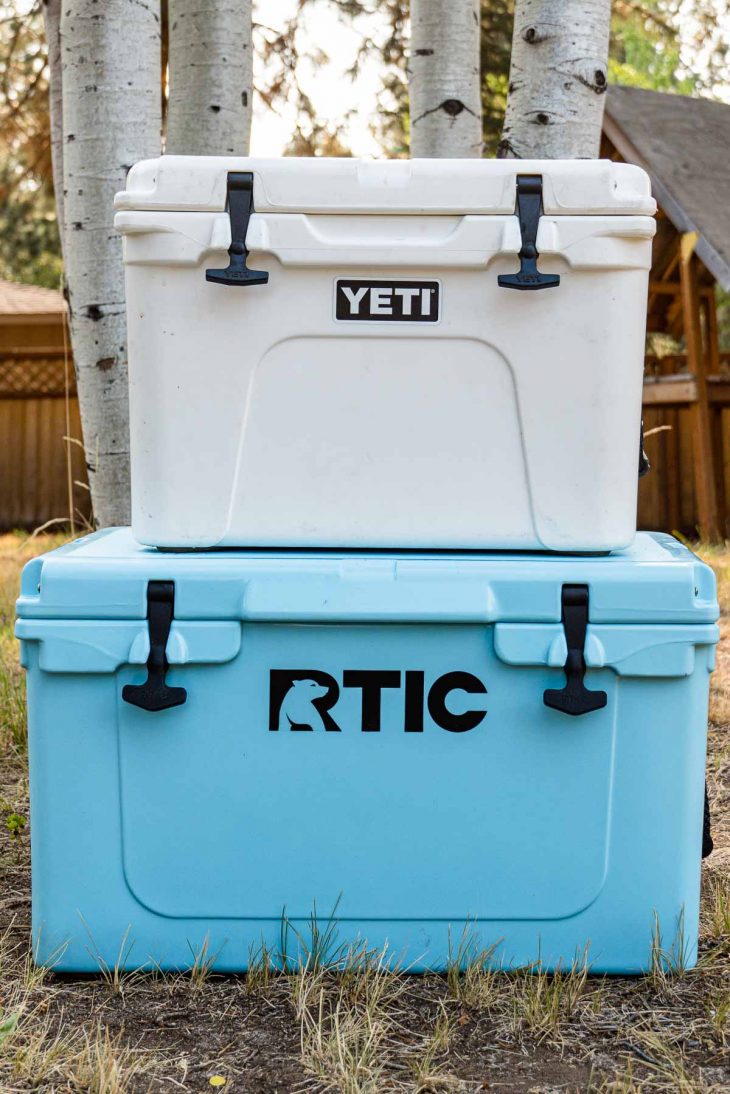
How to select the BEST cooler (for you)
The first step to improving your cooler performance is to make sure you have the right cooler for your particular needs.
Consider upgrading your cooler
Cooler insulation has improved dramatically over the past couple of years. If you’re using one you picked up at a discount years ago, you might want to consider upgrading to a newer, better-insulated model.
New coolers feature better insulating material, better construction methods, and details like freezer-style gaskets and tighter-fitting lids. These features can go a long way towards keeping in the cold.
Properly sizing your cooler
Nobody talks about this, but properly sizing your cooler is perhaps the most important factor when it comes to cooler performance. We will get into this in more detail a little later, but for optimal performance, your cooler should have an ice-to-content ratio of at least 2:1.
If you want a premium-brand cooler but, due to sticker shock, decide to opt for a smaller model, you will inevitably find yourself shortchanging the ice—and in doing so, ruining any performance advantage you might have gained.
We recommend getting a cooler slightly larger than you think (you can always fill the extra space with ice). But you don’t want to have to cut back on food to keep the ice ratio in line.
Our Take: This is the exact mistake we made! We initially bought a 35-quart cooler when we really should have gotten a 45-50 quart cooler.
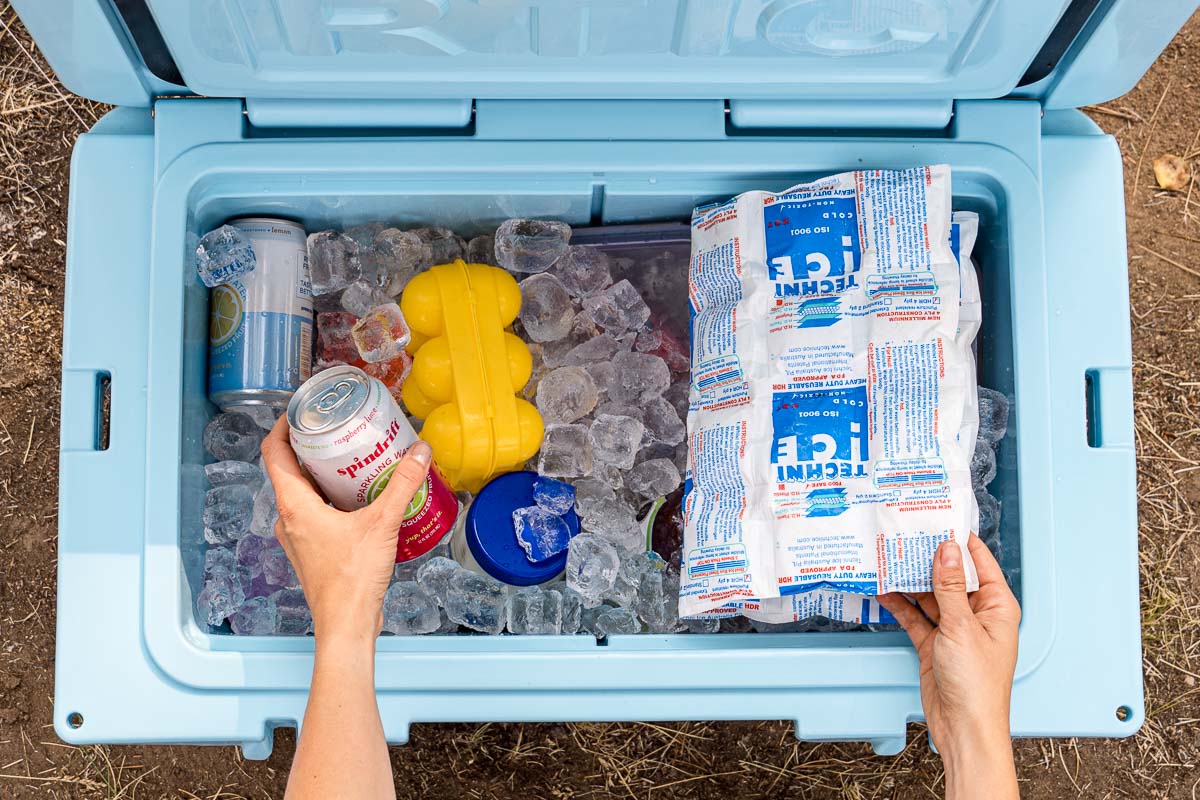
Don’t get too hung up on brand names
Yes, cooler insulation has improved, but no one brand has a complete lock on proprietary game-changing technology. It’s a very competitive industry (valued at over 1 billion in the US alone), and there are a lot of very good products on the market.
Consider a two-cooler system
Depending on your group size and your budget there’s a strong argument to be made for having one cooler for food and one cooler for drinks.
The drinks cooler is going to be opened a lot more frequently and will, therefore, warm more rapidly. Digging underneath your food to find a cold beer at the bottom is not only a hassle but a major waste of energy.
In our opinion, the drinks cooler can be a more inexpensive model or perhaps a semi-retired older cooler. When it comes to food safety, there is a greater margin of error for drinks than there is for food. A less-than-chilled beer isn’t a big deal, but lukewarm chicken is a major problem.
So, if you can swing it, a two-cooler system can really help your perishable food items stay colder and safer for a lot longer.
Cooler prep
There are a few things you can do to prepare your cooler for success the day before your camping trip. This is how we prepare our cooler before a big trip.
Bring your cooler inside
If you store your cooler in a hot attic, shed, or garage, bring it inside at least a day before your trip. You don’t want to start with a hot cooler.
Clean thoroughly
If you are like us, there is a good chance you didn’t do a great job cleaning the cooler after your last trip. Take a moment now and wash it down with a disinfectant spray. One of the best ways to increase food safety is to start with a squeaky-clean cooler.
Pre-chill
This step is optional, but if you’re really trying to maximize performance, consider pre-chilling your cooler with cold water and/or sacrificial ice a few hours prior to your trip. Dump this ice/water mixture right before you’re ready to start packing the cooler and then reload with fresh ice. This step will chill the interior of your cooler, so it starts off freezing cold.
Food prep
The prep work you do here will make the rest of your camp cooking experience so much easier and enjoyable. Here is how we prepare our food before it goes into the cooler.
Prep food
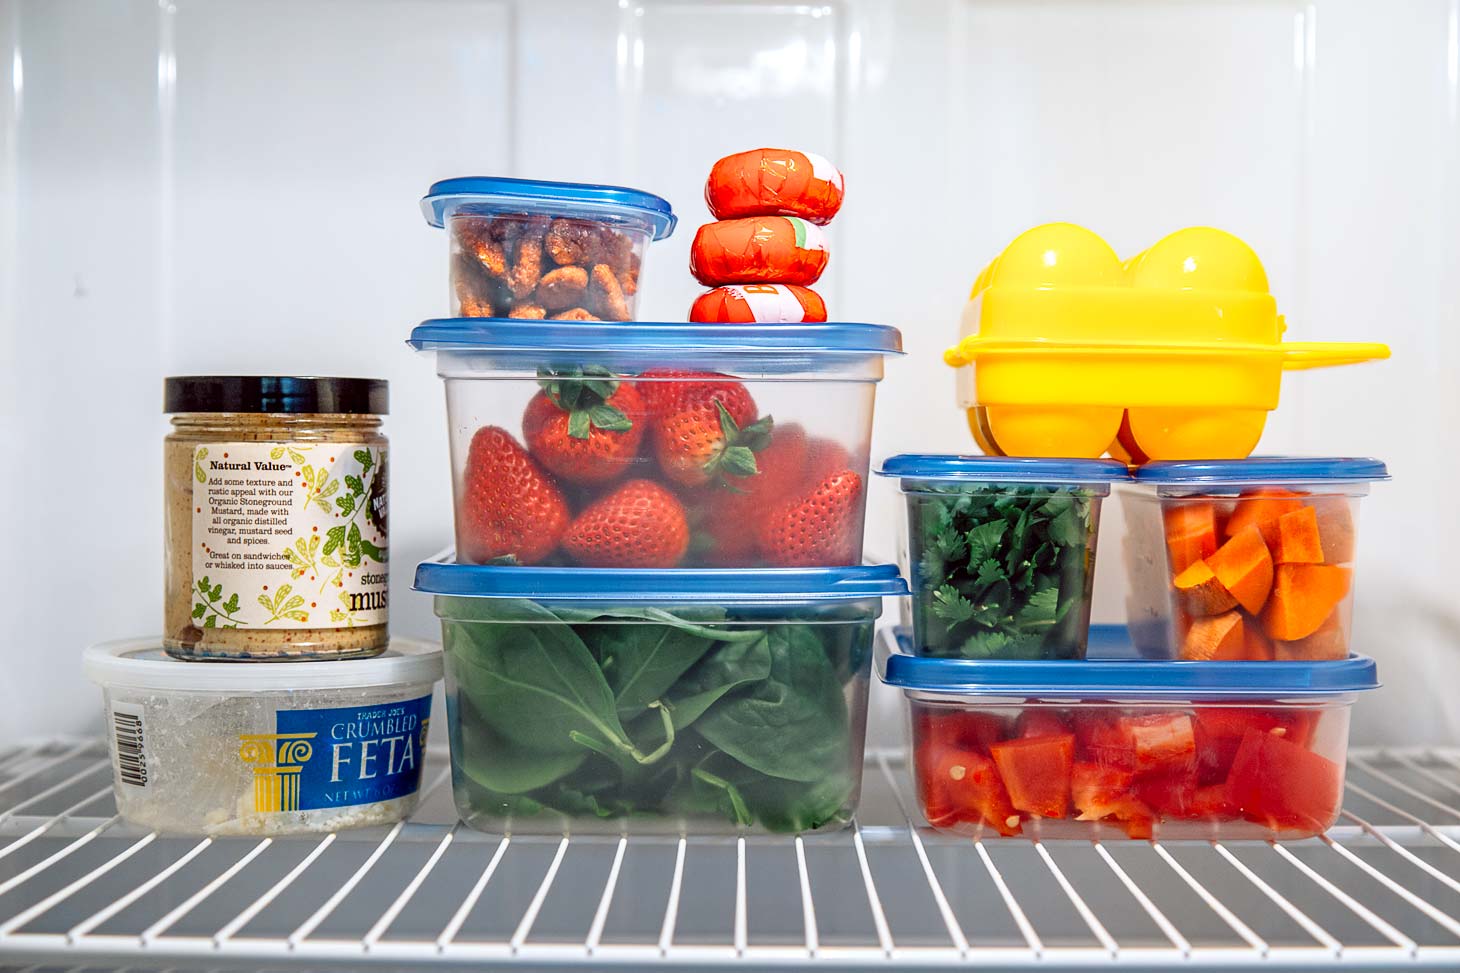
To save space, you will want to prepare as much of your camping food at home. Pre-chop your veggies and make marinades ahead of time. Portion out condiments into smaller vessels if you don’t need the whole bottle. The less space the food takes up in the cooler, the more room there is for ice.
Remove excess packaging
Store packaging takes up a lot of extra space and usually isn’t watertight— so remove what you can. There’s no need to bring a whole carton of eggs if you only need six. Likewise, you don’t need the cardboard box that comes with a six-pack of beer. It’s just going to get soggy and need to be thrown out at camp.
Transfer to watertight containers
Another reason to remove store packaging is that it’s usually not resealable. Assume everything in your cooler is going to get wet (because it will). So unless you want your half-opened packet of hot dogs floating around, we suggest transferring everything into reusable, watertight containers.
Freeze what you can
For longer trips, you will want to freeze as much of your food as possible. Obviously, don’t freeze food you’ll need to eat on the first night (or food that shouldn’t be frozen like eggs, dairy products, mayo, etc)
But any meat that isn’t going to be used on the first day can—and should—be frozen. (FYI, this frozen meat counts as ice when you’re doing your 2:1 ice ratio calculations.)
Refrigerate the rest
Everything that is not being frozen should be refrigerated before being packed. That includes resealable food containers.
Nothing should go into the cooler that’s at room temperature, otherwise, you waste your ice making warm things cold instead of keeping cold things cold.
Ice prep
With a little forethought, you can save a bunch of money by making your own ice ahead of time. Even if you still need to supplement with store-bought ice, it’s still worth it to make as much of your own ice as you can. Particularly block ice…
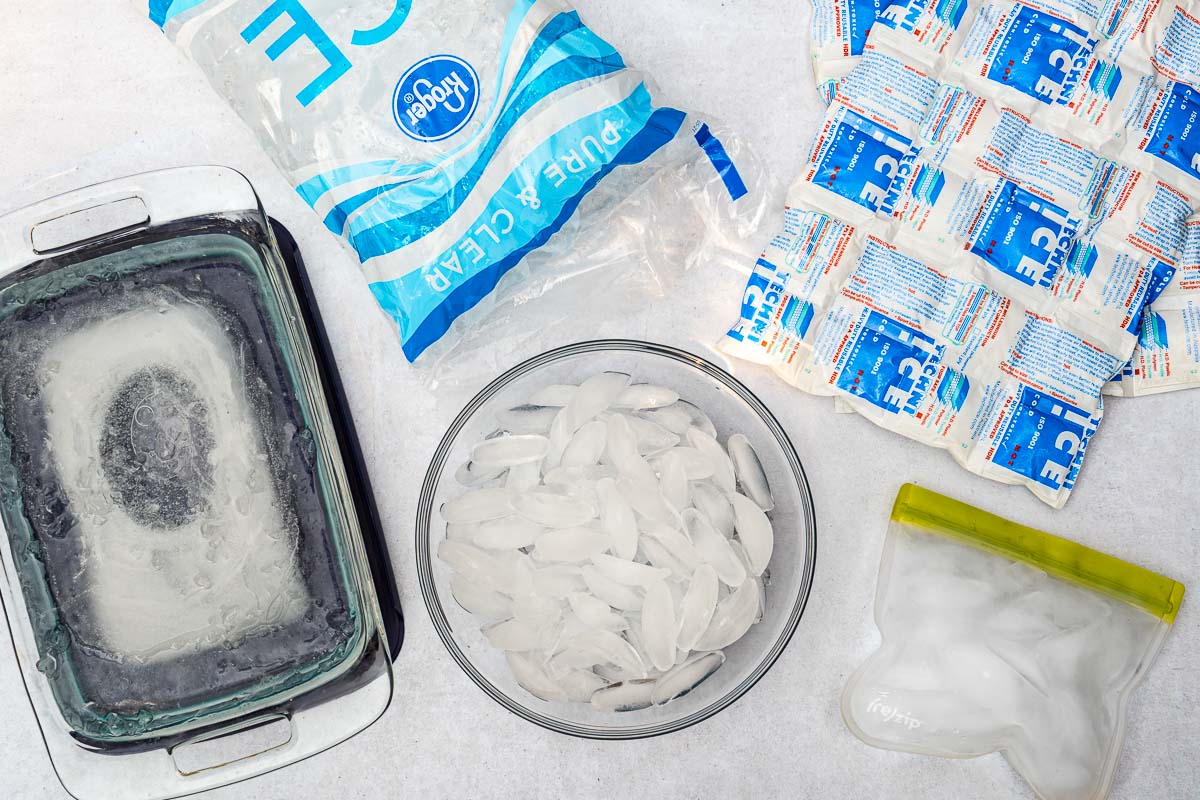
Block ice
Quite literally a block of solid ice, block ice has less surface area than crushed or cubed ice, which means it will last much, much longer. While block ice is hard to find for sale, it’s very easy to make at home.
You can freeze water in any loaf pan, casserole dish, or large reusable container. Depending on the size of the water you’re trying to freeze, this process can take some time, so start a day or two before your trip.
Cubed or crushed ice
If your refrigerator has an ice maker, crank it up to Party Mode and start hoarding as much as you can. Or use the old-fashioned trays. Cubed or crushed ice is great for filling in the air gaps between food containers and drinks.
Our Take: Cubed ice is also great for cocktails, but we suggest putting your drinking ice cubes in a ziplock baggie. You don’t want your VIP ice mixing with the general admission ice.
Ice or reusable freezer packs
Whether or not you decide to use ice or reusable freezer packs often depends on trip duration and space considerations.
Weekender (2-4 days)
If you’re going out for less than four days, we suggest looking into using reusable freezer packs. There are some really incredible products on the market, like ice freezer sheets or Arctic Ice Freezer Packs, that will actually last longer than ice. Plus, everything in your cooler won’t get wet with melted water.
Week-Longer (4+ days)
If you are going to be road-tripping for a few weeks, then your best bet will be to use ice. You can drain out the meltwater and replenish the cooler with purchased ice from grocery stores, gas stations, or campgrounds.
Or—if you are going on a long trip but have the extra space, you might consider starting with reusable freezer packs, removing them after a few days, and then switching to ice if necessary.
Ideal cooler-to-ice ratio
When packing your cooler, you should aim for an ice-to-content ratio of 2:1.
That means you want TWICE as much ice as you have food and drinks. To maximize food space, you can count any food that you freeze towards the “ice” part of the ratio.
Adding more ice can improve your cooler’s performance, but only up to a certain point, after which you’ll see diminishing returns.
But anything less than 2:1 and you’ll notice an exponential drop off. There just isn’t enough 32F degree material to keep everything cold.
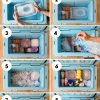
Packing your cooler
When packing your cooler, there are some important orders of operations to follow. Setting up your cooler in the right order will not only improve its performance but also make life a whole lot easier at camp.
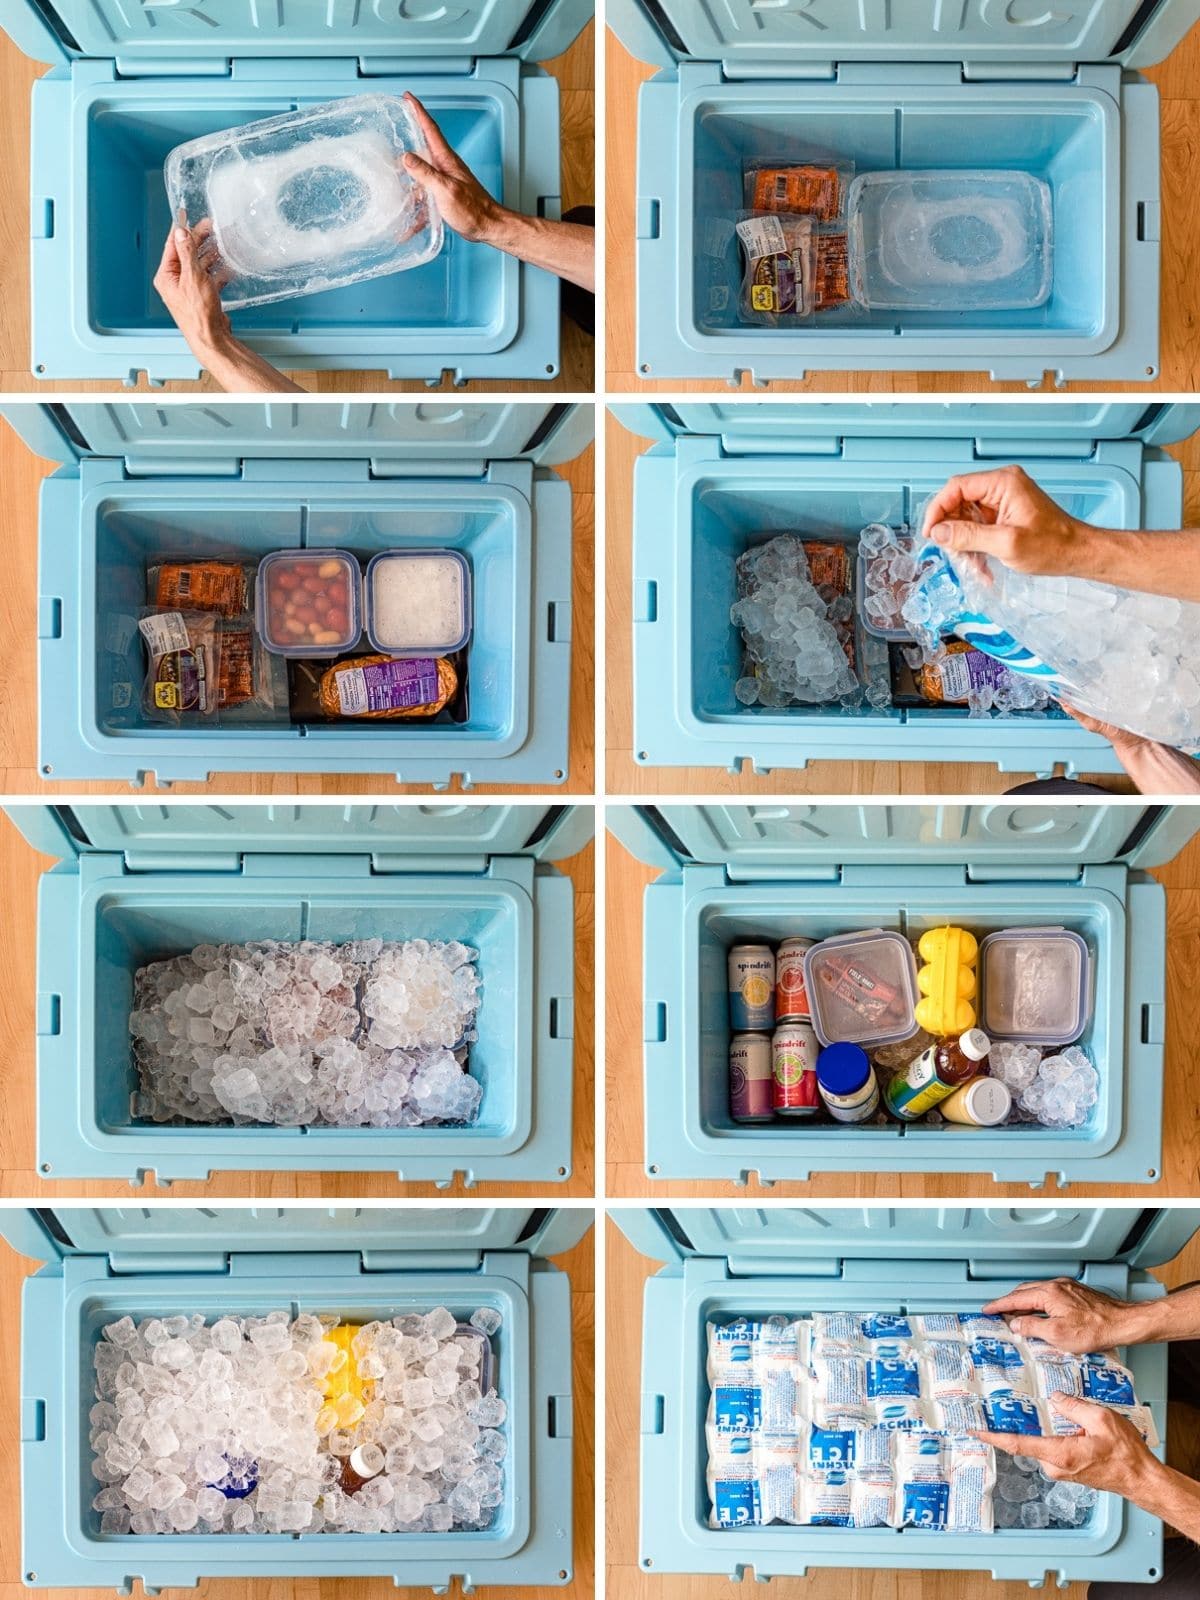
Block ice on the bottom
Begin with a layer of casserole dish depth block ice on the bottom (or frozen food items), then back in food items in the reverse order that you plan on using them. Starting with the last day’s food on the bottom, work your way up so the first day’s food is sitting on top.
Fill it up with ice
Air is the enemy. Large pockets of air inside your cooler will accelerate ice melt. Fill up as much of that space as you can with ice cubes and/or crushed ice. Ideally, there should be no “extra” space in your cooler. It should be completely filled with food, drinks, and ice.
We find that the best way to achieve this is to pack one layer of food, then a layer of ice, and repeat until the cooler is full.
Top with a reusable freezer sheet
With the cooler packed nearly to the brim, we like to place a few frozen ice sheets on top. These reusable and foldable freezer packs do a great job of trapping the cold and preventing warm outside air from spilling into the cooler when opened.
Since they are foldable you can lift one side up to access just a portion of the cooler without exposing all the ice to the outside air.
If you don’t own a freezer sheet, you could also use a damp towel.
Meal categories
If you have space, consider packing breakfast foods to the left and dinner foods to the right. That way you’re not searching all over for your ingredients when it’s time to cook.
Make a cooler map
If you have a particularly large cooler, it helps to make a quick cooler map so you know where things are located (minimizing the time your cooler is left open while you search for what you’re looking for).
Best practices
The way you transport and store your cooler will affect its performance. Follow a few of these best practices to get the most out of your cooler.
Transportation
When loading your vehicle, keep the cooler inside the car with you if possible. Avoid putting it in a hot trunk or strapped to the roof where it is apt to sit in the direct sunlight.
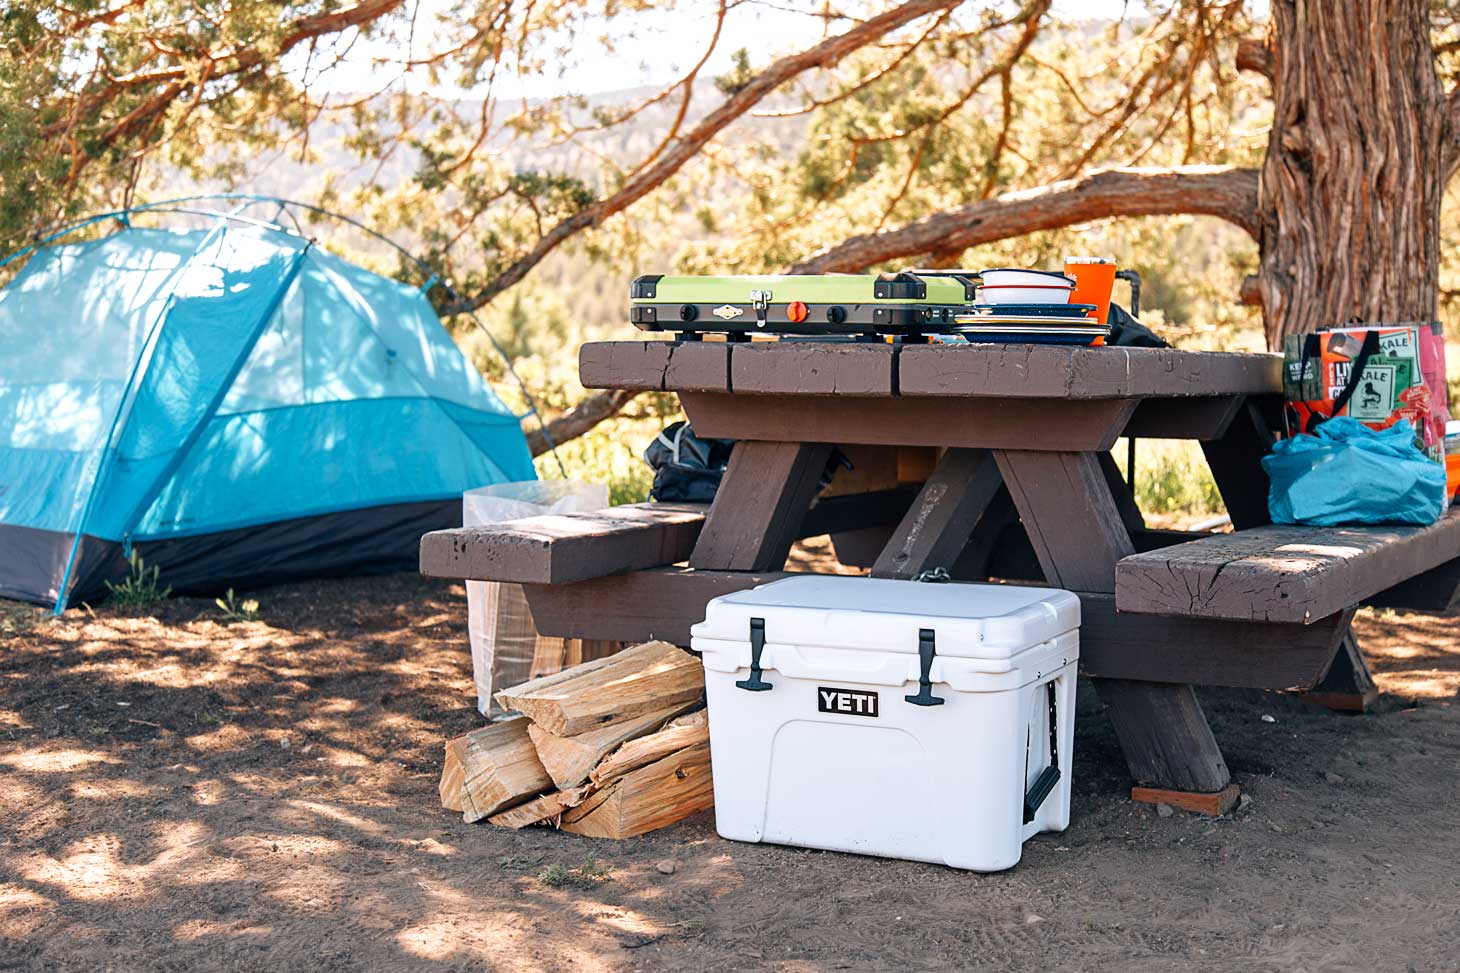
Keep it shaded
At the campsite, place your cooler under a picnic table or somewhere else shaded. The sun is a heat source, and you’ll want to avoid direct sunlight as much as possible. Taping a piece of Reflectix to the lid can also be helpful.
Keep it closed
One of the single biggest factors in how long the ice in your cooler will last is how often it is opened and exposed to outside air temperatures. Keeping it closed keeps it cold.
Don’t drain the meltwater (except when you should)
If you are looking to extend your cooler’s “cooling” power, it is better to leave the meltwater in the cooler than to drain it. This is because water has a much higher thermal density than air, meaning it won’t change as rapidly.
However, if you plan on refreshing your ice supply shortly, there is no harm in draining the meltwater to make the cooler lighter to carry.
Cooler accessories
Here are a few of the cooler accessories we personally use when camping.
Cooler Thermometer
If you really want to know what’s going on inside your cooler, consider buying a small food thermometer and attaching it inside. That way, you’ll know at a glance whether food is being stored safely (temperature below 40F) or not.
We stuck one of these thermometer strips to the inside of our cooler. These can read down to 39F, so we’re able to see when our cooler temperature is starting to creep into the danger zone.
Techni Ice
These are the best reusable freezer sheets we have used. They literally stay frozen for days (far longer than regular ice). They are foldable and lay flat in your cooler.
When we use only reusable freezer sheets, we put one or two on the bottom and one or two on the top to sandwich in the cold. This method is super effective for upwards of four days.

Conclusions
So much of your cooler’s performance comes down to how to use it. While owning a high-quality well-constructed cooler will certainly help, there is a lot you can do to improve the performance of whatever cooler you own!
This post was first published on May 25, 2017, and last updated on June 3, 2024.
For this tip there’s no substitute. It’s not just about buying a rotomolded cooler but knowing how to properly pack your cooler. That’s what matters most!
I like to use zip lock freezer bags, rather than containers for frozen food. Think tamale pie filling. It can either lay flat or stand up along a wall. My goal is to not pack any air, ever. Then you don’t have to figure out where there is room for the empty container. The empty bag becomes your trash bag for the night, or a place to store leftovers.
Also, found something on Pinterest for tiny amounts. Use plastic drinking straws for spices, toothpaste (single use) and such. Pinch end with needle nose pliers, use flame to seal, fill, seal other end, and label. Fat shake straws hold more. Have not tried it yet, but sounds good.
These are great suggestions! Thank you so much for sharing. Agreed with trying to pack a little air as possible. Ziplock bags would definitely offer more versatility in stacking/organizing. We’ll have to give it a try.
The bags sound like a great idea. I don’t like single use items but for camping, sometimes I make exceptions. The leftover plan is great! I reuse the tupperware I bring for this but if there are no leftovers, I have an empty container to find a place for. The trash bag becomes the perfect re-use option. I do some backpacking and they have some great, very small items for spices. Some have several sections for different varieties. I use those, but the straw is good if you have some to make use of. Another item I’ve eliminated from my home.
Flaming plastic straws releases toxic chemicals, and so, I’d advise not to do so. Side note: dry ice can be purchased at most grocery stores in 1 or 2 lb flat blocks which are perfect for coolers.
We use wide-mouth plastic containers, preferably squarish in shape (the kind in which rice blends or nuts come in), to make ice blocks before we leave – the fresh water can be transferred into our water jug as it melts; the containers can then be easily refilled with ice cubes along the way, keeping the melt water off the food in the cooler. We also use large freezer bags to hold pre-frozen homemade chili, pasta sauce, beef stew, butter chicken, pulled pork, etc. for the same reason as Linda does. We’ve had our coolers (one large and one medium-sized) for years, thanks for the tip about recent improvements – we’ll be looking into that.
And if/when we take eggs, we crack them into zip lock bags. 3 per baggie for me, 2 per baggie for her. Leave the shells at home. Pour into the hot pan at the campsite/Basecamp… shredded cheese, onions and green peppers and mushrooms added to a bag or two with the eggs for an “instant omelet” meal.
I prep our scrambled eggs and freeze. Lightly beat the number of eggs, put in a bag/container then freeze. It works great! We’ve also tried omelets in a bag, prep everything at home in a freezer ziploc, freeze(or not), at campsite boil some water and place the omelet bag in the water approx 10min. Quick clean up and the hot water is ready to do dishes.
Make sure to leave out the mushrooms till you’re at the campsite! A bag omelet left with mushrooms sitting in it will turn a pukish gray… Bleh.
Here’s a pretty thorough comparison of coolers from the folks at Overland Journal.
https://expeditionportal.com/the-big-chill-overland-journals-cooler-test/
How to pack a cooler like a pro? A cooler is a MUST have in every camping trip. You must select the perfect cooler base on the number of days you’ll go camping, the things that you will bring, the activities that you plan to do, and so much more.
Helpful tips. Thanks for sharing. I think YETI coolers are best for keeping foods for longer time. I am using one and it is really great.
YETI (and really any of those roto-molded high-end coolers) are in a league of their own. WAY better than the old school coolers we used to use.