How to Dehydrate Beans
This post may contain affiliate links.
Dehydrated beans are a lightweight source of plant-based protein that can be easily rehydrated in just a few minutes, making them ideal for pantry or backpacking meals.
Store-bought canned beans and bulk dried beans are both pretty shelf-stable to start with, but the former is bulky and heavy and the latter can take upwards of one hour of simmering to fully cook. Neither are good options for backpacking.
However, by dehydrating beans at home you can make beans that are lightweight, packable, shelf-stable, and fast cooking! Perfect for tossing into a backpacking meal.
Beans are a versatile source of plant-based protein and can easily be incorporated into nearly every type of cuisine. No matter what you’re making (Mexican to Italian to Middle Eastern to Indian), you can probably find a bean that will work!
If you’re interested in dehydrating your own beans we’ve got everything you need to know down below! So, let’s get into it!
Why Dehydrate beans?
The most common reason to dehydrate beans is to add to backpacking meals. But dehydrating your own beans is a smart idea for anyone who wants lightweight and fast cooking beans that don’t require bulky packaging. For ideas on how to use dehydrated beans, scroll down to the end of this post.
What type of beans can you dehydrate?
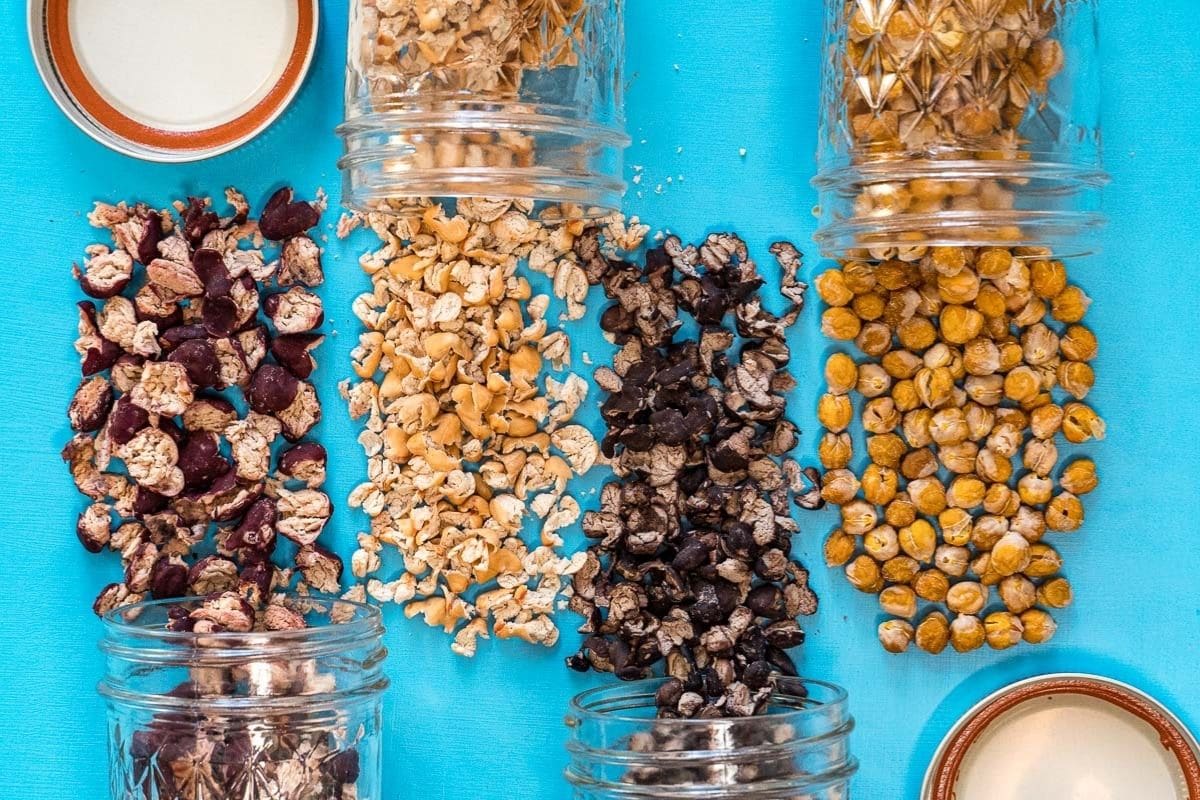
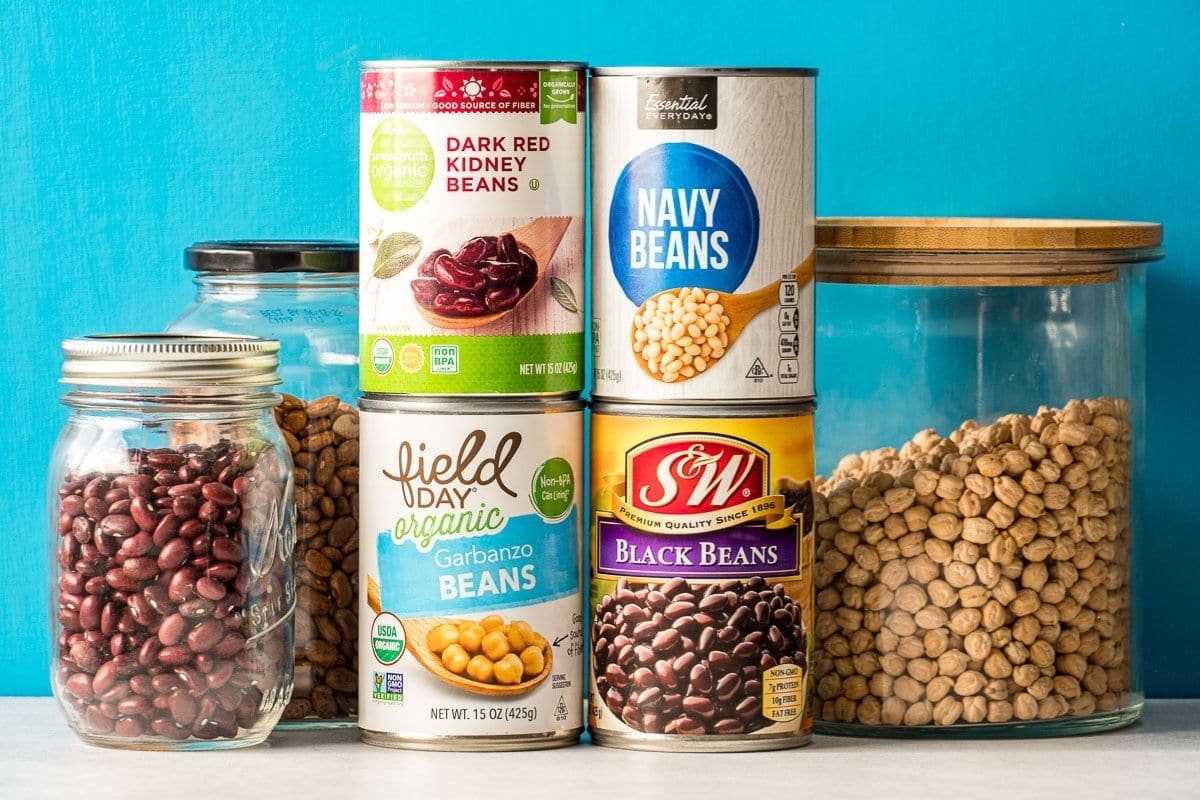
Any type of bean can be dehydrated. Black, red, pinto, white, garbanzo, butter beans, you name it! They all work.
Store-bought canned beans are the easiest as they’re come fully cooked in the can, but if you cook your own dried beans at home (either stovetop or Instant Pot/pressure cooker) they will work just as well.
Prepping beans for dehydrating
The beans should be fully cooked and thoroughly rinsed in order to remove any excess liquid. We typically place them in a mesh colander and run them under cold water until the wash water turns clear.
Equipment Spotlight: Dehydrators
If you’re in the market for a dehydrator, we recommend buying one with an adjustable temperature. This will allow you to dial in the drying temp to give you the best results for individual ingredients. The dehydrator we recommend (and use) most often is the COSORI dehydrator. You can also check out our best dehydrators post for a comparison of all the dehydrators we’ve used and would recommend.

How to dehydrate beans
Dehydrating beans is incredibly simple–a perfect ingredient for beginners! All you need to do before you begin is make sure your equipment and hands are clean.
- Spread the beans out on a mesh liner or parchment paper into an even layer. You don’t need to individually space out each bean by hand, but you do want to avoid any large clumps.
- Dehydrate at 125ºF (52ºC) for 8-12 hours until the beans are dry and hard—they should not be soft or squishy.
- Depending on your machine, you may need to rotate the trays every so often to promote even drying.
Why did my beans split?
Beans frequently split open during the dehydrating process and that’s totally fine! In fact, it actually helps them rehydrate faster. Aside from looking a little different, there is nothing wrong if your beans split.
And honestly, there’s not much you can do about it. We’ve tried slightly undercooking our beans in a pressure cooker as well as dehydrating them at a lower temperature. They still have a tendency to split! So, you just have to embrace it.

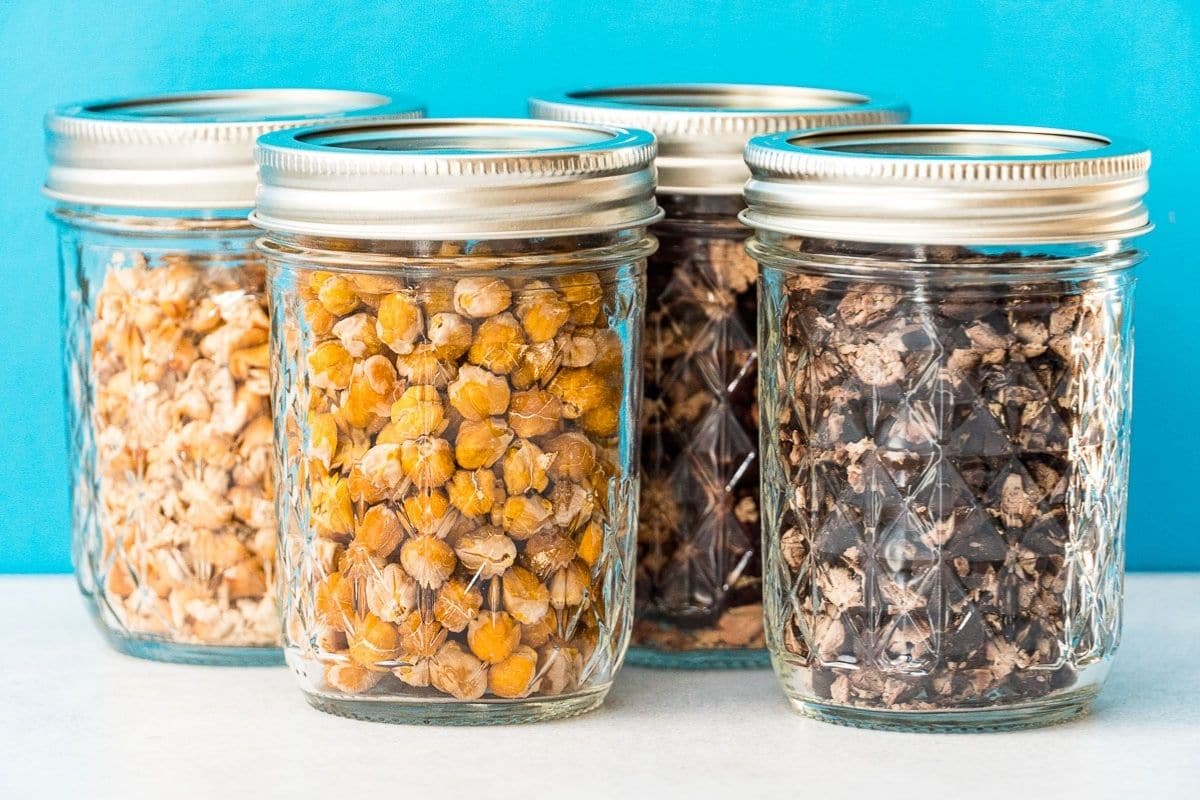
How to store dehydrated beans
If you’re dehydrating beans for shorter-term storage and plan on using them within a week or two, you can store them in a sealed container or zip-top bag on the counter or in your pantry. Just let them cool and place them in a sealed container. We like to use these reusable ReZip bags or mason jars.
However, when properly dried and stored, dehydrated beans can last up to a year. Here are our tips for long term storage:
- Let the beans cool completely before transferring them.
- Condition: Loosely pack the beans in a transparent airtight container. Check it daily for a week to check for signs of moisture or condensation, and shake to help prevent the beans from sticking together. If signs of moisture appear, stick them back into the dehydrator (as long as there’s no mold—in that case, toss the batch). After a week, if there’s no signs of moisture or mold, you can package them for long-term storage.
- Store in a clean, airtight container. For longer shelf life, vacuum seal.
- Use a moisture absorbing desiccant packet if you anticipate opening the container often, or if you live in an area with high humidity.
- Label the container with the date and any other important details
- Place the container in a cool, dark, and dry place—inside of a pantry cabinet works well.
Vacuum Sealing Tips
We like to store our dehydrated food in mason jars that have been vacuum-sealed using this handheld FoodSaver vacuum sealer along with these jar sealing attachments. This gives us the benefit of vacuum sealing without the waste (and expense) of plastic vacuum sealing bags. Since the jars are clear we make sure we store them in a dark spot in our pantry to keep them out of direct light.
How to use
To rehydrate beans, cover with water and bring to a bowl. Remove from the heat and let them sit, covered, for 10-15 minutes until tender. Drain any remaining liquid.
- There are endless options for combining dehydrated beans with rice (either Minute Rice or dehydrated rice)
- Add to soups for extra protein
- Add dehydrated chickpeas to any Indian, Middle Eastern, or Mediterranean fare
- Add dehydrated black beans or pinto beans to any Latin American food like burrito bowls
- Grind dehydrated chickpeas in a food processor to make instant hummus
- Likewise, grind black beans or pinto beans in a food processor to make instant bean dip
- Dehydrated beans are perfect in dehydrated chili
- Backpacking meals that use dehydrate beans
Fresh to dry conversions
Black beans: 1 (15oz) can of beans / 1½ cups cooked beans = ¾ cup (75g) dehydrated beans
Garbanzo beans: 1 (15oz) can of beans / 1½ cups cooked beans = ¾ cup (90g) dehydrated beans
Dehydrated Beans
Ingredients
- 1 can beans see note 1
Equipment
Instructions
- Start with clean hands, equipment, and countertops.
- Drain and rinse beans under cold water.
- Arrange the beans on dehydrator trays, utilizing a mesh liner to prevent the beans from falling through the holes as they shrink.
- Dehydrate at 125ºF (52ºC) for 6-12 hours until the beans are dry and brittle (see note 2).
Storage Tips
- Let the dried beans cool completely before storing.
- Short-term storage: If beans will be consumed within a few weeks, store in a ziptop bag or sealed container on the counter or in a pantry.
- Long-term storage: Condition by loosely packing the dried beans in a transparent, airtight container. Leave it on the counter for a week and check it daily for signs of moisture. If condensation appears, return the beans to the dehydrator (unless there are signs of mold—then, throw out the whole batch). Shake occasionally to keep the beans from sticking together.
- After conditioning, store in an airtight container in a cool, dark place for up to a year. Vacuum sealing will help extend the shelf life and quality of the peas.
Cooking and then dehydrating dry beans is a good thing to do in case we lose power, or there are water shortages/rationing in emergency situations. You just add a small amount of boiling water to the dehydrated beans (equal amounts water to beans), cover with foil, and place on a folded towel for 10 to 15 minutes. You can also dehydrate cooked rice and reconstitute the same way. This saves on water and fuel and time. Cooking dry beans takes a lot of water and you often need to cook the beans for an hour or two or even more so pre-cooking and dehydrating is enormously efficient.