Dehydrated Roasted Pepper Hummus
This post may contain affiliate links.
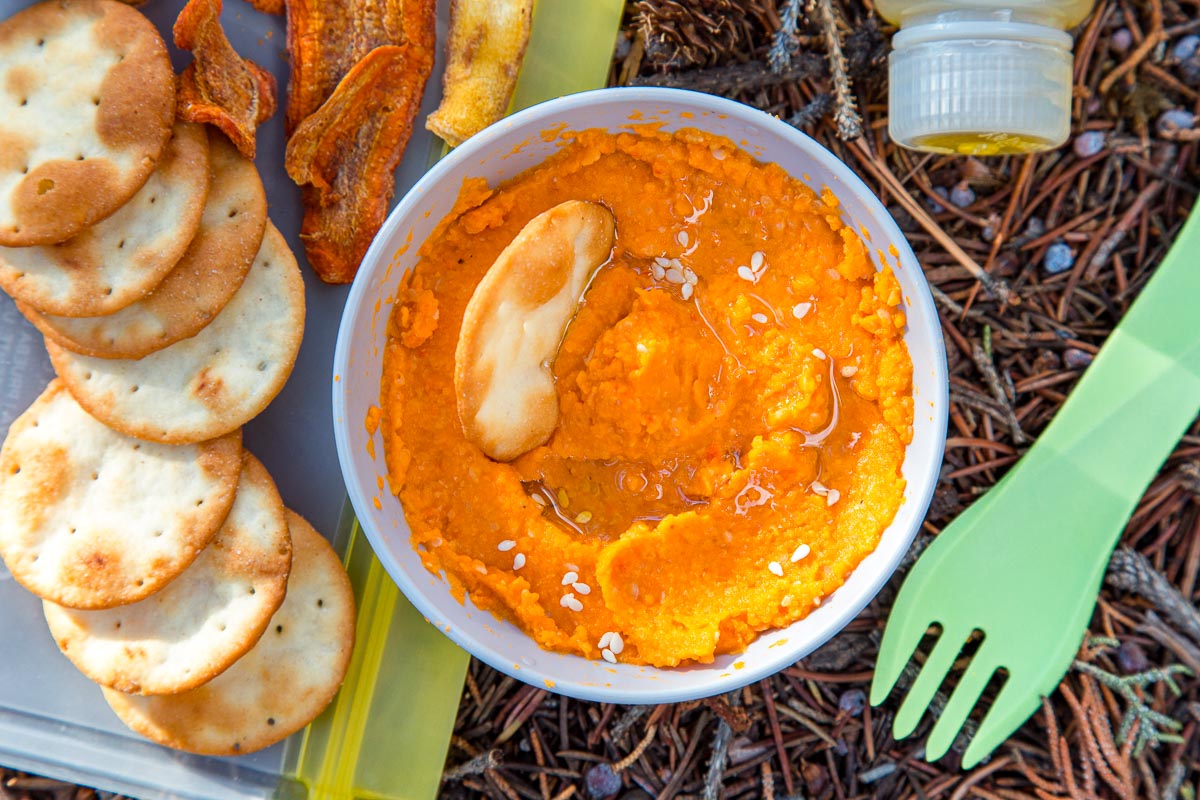
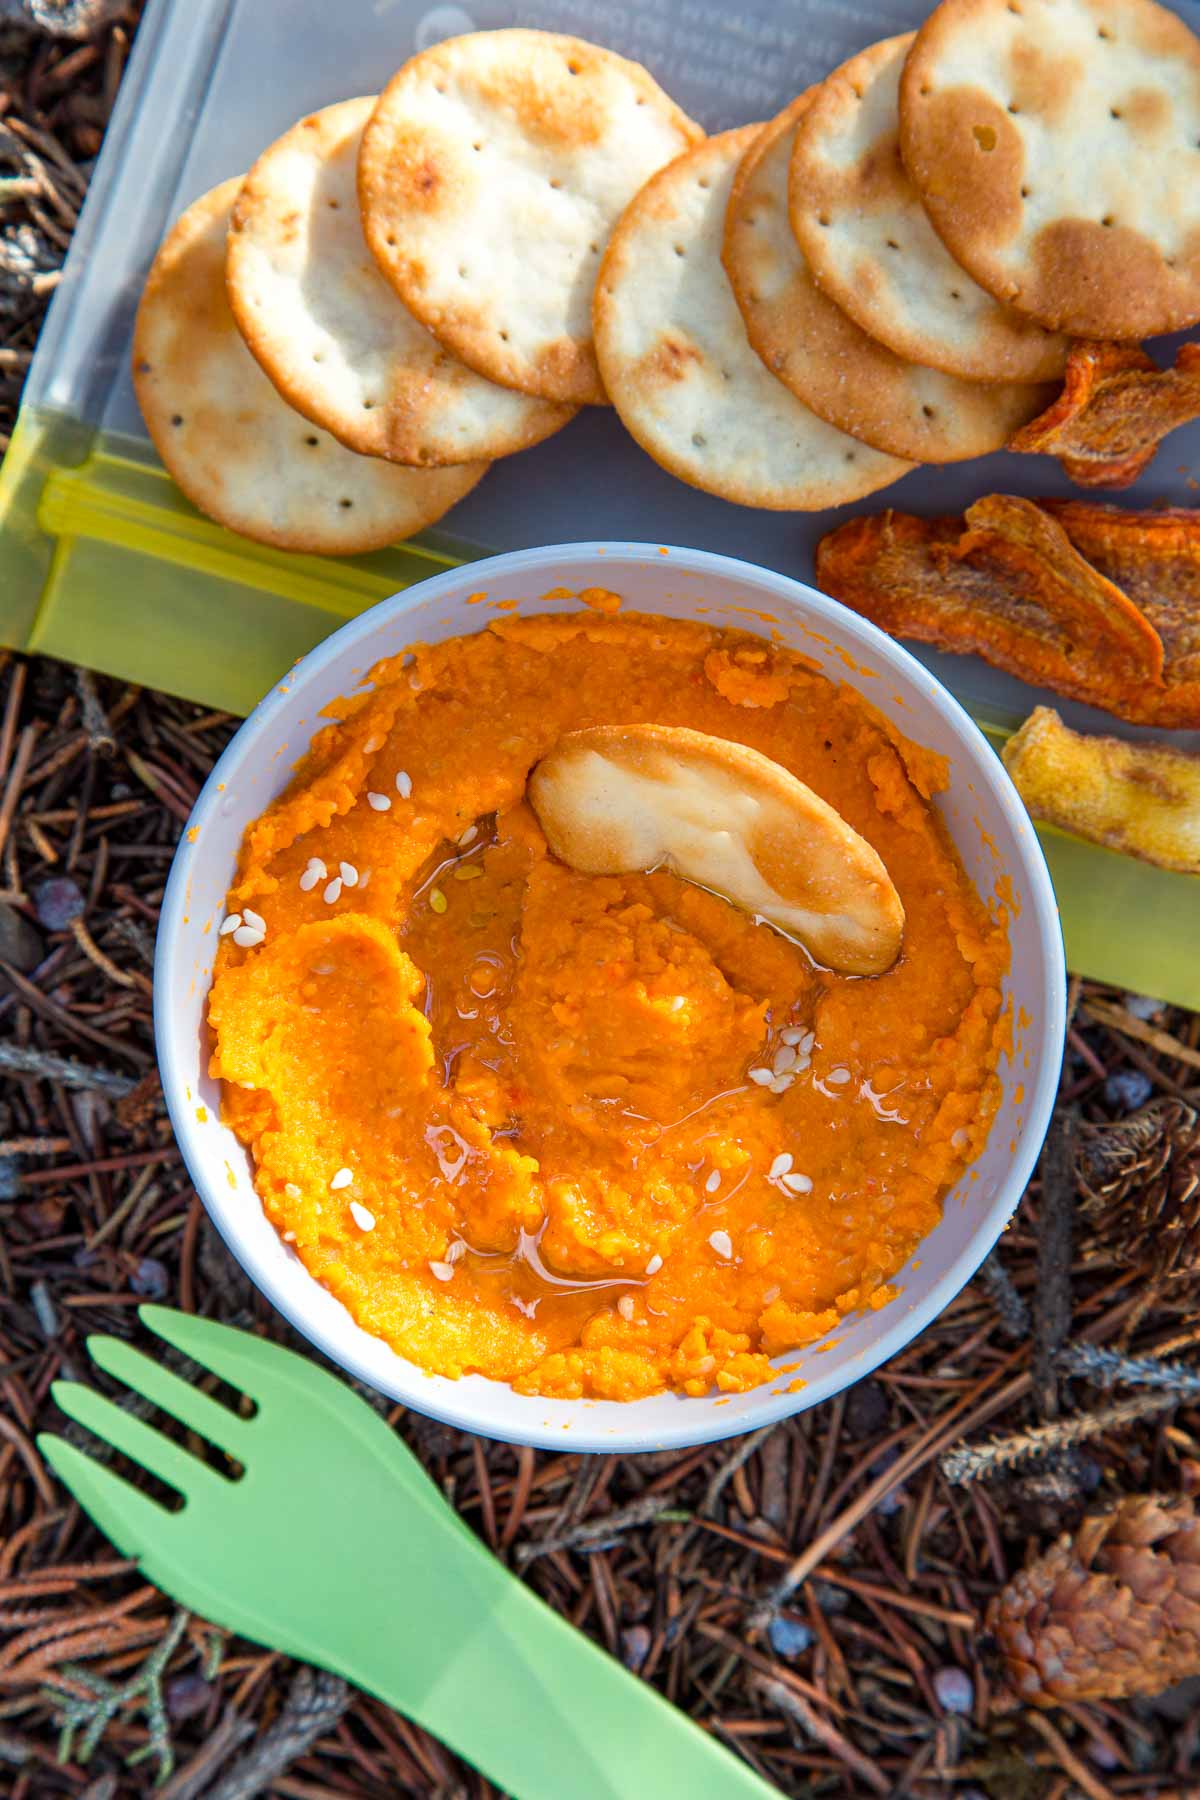
Dehydrated at home, rehydrated on trail, this rich and creamy roasted pepper hummus is a great no-cook backpacking lunch idea.
Backpacking lunches can be a real challenge. They should be nutritious enough to power you through the rest of the day, but simple enough that you don’t need to break out your cooking setup.
We often resort to a “snack buffet.” One of the easiest additions to our spread is this dehydrated hummus with roasted red peppers, served with crackers, veggie chips, jumbo pretzel sticks, bread, or tortillas.
Store-bought hummus is obviously not well suited for the backcountry. It’s heavy and needs to be refrigerated. But by making your own hummus and dehydrating it at home, you can reduce the weight and make it shelf-stable in the process! Then all you have to do is rehydrate with some cold water and olive oil, and you’ve got a delicious, creamy dip.

Why We Love Dehydrated Hummus
- Solves the eternal question of what’s for lunch?
- Feel a gourmet, but doesn’t require any cooking
- Open to a lot of different flavor variations
- Adding olive oil can really scale up the calories
If you’re looking to switch up your backpacking lunch routine, consider making dehydrated hummus. We’ll show you how!
If you’re new to dehydrating, read our complete guide to dehydrating food for backpacking to learn all the ins and outs!
Equipment needed
Dehydrator: Any dehydrator that has an adjustable temperature setting will work. We own both the Nesco Snackmaster (budget-friendly) and a Cosori (more features and dries faster) and recommend both.
Food processor: A high-powered blender would also work.
Offset spatula: This little tool makes easy work of spreading the hummus onto the trays in an even layer.
Reusable bags: In our bid to reduce our disposable ziplock bag consumption, we’ve started packing our dehydrated meals in reusable baggies. ReZip is a great option, balancing durability with weight. Most of their bags weigh between ½ – 1 oz.

Ingredient notes
Chickpeas/Garbanzo beans: This recipe calls for one can of chickpeas—though you can substitute with 1 ½ cup of home-cooked beans if you prefer. Drain and rinse canned chickpeas.
Roasted red peppers: We use jarred roasted red peppers for convenience. Make sure yours are packed in water, not oil. If you want to make your own, remove the core of a red bell pepper and roast it in your oven at 450F for 15-20 minutes, or until the skin is charred and blistered. Remove from the oven and place it in a covered bowl to cool, then rub the skin off. Discard any remaining seeds.
Sesame seeds: In lieu of tahini, the traditional ingredient in hummus, we start with whole sesame seeds that are blitzed in the food processor. Unfortunately, tahini is just too oily and fatty to dehydrate well, and using it would dramatically shorten the shelf life of the dehydrated hummus. If you really want to use tahini, omit the sesame seeds and then pack along a tahini squeeze pack to add on the trail.
Olive oil: To up the calories and give this hummus a rich flavor, pack along some olive oil. You can either bring a small container of oil (we like this one), or pack single-serve packets.
How to make dehydrated hummus
At home, start with clean, sanitized equipment, hands, and work area. This is super important for food safety when dehydrating, so wash up with soap and hot water!
Place the sesame seeds into a food processor and pulse into a powder. Then add the chickpeas, roasted red peppers, garlic, lemon juice, salt, and ½ cup water. Process this until smooth. You may need to add some water to keep it moving and/or push down the sides with a spatula.

This is a great time to give it taste and see if you think it needs anything else? A little more salt? Perhaps some more lemon juice to brighten it up?
Once you’re satisfied with the taste, spread even layers of the hummus (an offset spatula will be very helpful here!) onto your solid dehydrator sheets. Don’t have solid dehydrator sheets? You can line the trays with parchment paper (not wax paper) to prevent it from dripping through the trays.

Dehydrate at 125 F for 4-6 hours or until the hummus is completely dry and turns powdery when rubbed between your fingers.
Transfer the dry hummus bark to a clean and dry food processor and pulse until it turns into a powder. This step isn’t necessary for rehydration purposes, but it does decrease the packed volume. Store in an air-tight container. (Read more storage tips in the section below)

To pack for the trail, package in airtight containers or zip-top bags, dividing into individual servings if desired. Pack olive oil in a separate, sealed container, or bring olive oil packets. Package any “dippers” in a separate bag—we like Mary’s Gone Crackers, veggie chips, jumbo pretzel sticks, and bread or tortillas.
On trail, stir water into the hummus powder until it reaches your desired consistency. You can do this in the bag, or in your mug or pot. Finish with a generous drizzle of olive oil and serve with your favorite snacks.
Read this next: Here are dozens of lightweight backpacking recipes to try on your next backpacking trip!
Trail weight & nutrition
This recipe makes three 35g servings (dry weight), clocking in at 181 cal/oz once you add the olive oil (assuming 1 olive oil packet per serving). Each serving provides:
- 290 calories
- 17g fat
- 27g carbohydrates
- 11g protein
Feel free to package the dehydrated hummus in larger or smaller portions depending on your appetite! For more information about how much food to eat while backpacking, check out our backpacking meals post.
(Disclaimer: Nutrition was calculated based on the ingredients we used, so yours may vary slightly.)
Dehydrated Roasted Pepper Hummus
Ingredients
- 3 tablespoons sesame seeds (24g)
- 14 oz can chickpeas drained & peeled**
- ½ cup roasted red peppers (100g)
- 2 cloves garlic roughly chopped
- Juice from ½ lemon (4 teaspoons/20mL)
- 1 teaspoon sea salt (6g)
Packed separately:
- Olive oil 1 tablespoon (15mL) per serving
- Snacks for dipping – crackers, veggie chips, pretzels, etc.
Instructions
At home
- Place the sesame seeds in a food processor and pulse until they turn into a powder. Add the chickpeas, roasted red peppers, garlic, lemon juice, salt, and ½ cup water. Process until smooth, adding more water as needed to keep it all moving.
- Spread in an even layer on your dehydrator trays that have been lined with a fruit leather insert or parchment paper. Dehydrate at 125F for 4-6 hours, or until the hummus is completely dry and turns powdery if rubbed between your fingers. Optionally, transfer the dried hummus to a blender and pulse a few times until it becomes a powder.
To pack for the trail
- Package in airtight containers or zip-top bags, dividing into individual servings if desired. Pack olive oil in a separate, sealed container, or bring olive oil packets. Package any “dippers” in a separate bag—hearty crackers, vegetable chips, pretzel sticks, or anything else you like.
On trail
- Stir water into the hummus powder until it reaches your desired consistency. Finish with a generous drizzle of olive oil and serve with your snacks!
Notes
Storage tips
There are a few environmental factors that affect the shelf life of dehydrated foods:
- Temperature: Even when properly dried and sealed, temperature will still affect the shelf life of your food. For example, food stored at 60F has twice the shelf life as food stored at 80F (source: NCHFP).
- Moisture: The whole point of dehydrating food is to remove as much moisture as possible so that the food can be safely stored without it spoiling, so the last thing you want to do is re-introduce moisture during the storage process!
- Oxygen: Oxidation will cause your food to break down, lose flavor, and shorten the shelf life.
- Light: Like oxygen, light will break down the food and cause off-flavors, loss of nutrients, and shorten the shelf life.
The solution is to store your dehydrated food in airtight containers in a cool, dry, dark place with good ventilation. Let the food cool completely before transferring to a storage container, which will help prevent condensation.
Sanitize your hands and containers before handling food for storage and make sure everything is completely dry.
Resealable container: If you’re making food for an upcoming trip, you can store it in a zip-top bag. This method is not suitable for long-term storage since these types of bags are not truly “airtight”. For this, we really like these reusable bags from ReZip.
Airtight Containers: Properly dried food can be stored in an airtight glass or hard plastic container that has an airtight seal, such as canning jars. Store in a cool, dark, dry place. We use Ball Mason Jars.
Vacuum Sealing: This method is good for long-term storage. The process removes all the oxygen from the container to extend the shelf life of the food. There are two ways of accomplishing this:
- Vacuum Sealing (bags): Vacuum sealing your meals in vacuum seal bags is a good option for long term storage, such as sending with resupply boxes. Food Saver makes a wide range of vacuum sealing products.
- Vacuum Sealing (jars): A great option for storing larger quantities of dehydrated meals or ingredients until you’re ready to assemble and portion them out into individual meals. If you’re going to open and reseal the jars, we’d recommend adding a desiccant packet (be sure to re-vacuum seal after each time you open the jar!) to absorb any moisture re-introduced while the jar was unsealed.
Mylar Bags (with O2 absorber for longer-term storage): This is a good option if you want to store your food for longer time periods, but don’t want to invest in a vacuum sealer.
Desiccant Packets Vs Oxygen Absorber Packets
Depending on your storage method, you might consider including either a desiccant packet or oxygen absorber packet.
Desiccant packs remove moisture. Can be used when vacuum sealing (especially jars that will be opened and resealed), but not necessarily required if the ingredients are properly dried and handled.
Oxygen absorbers remove oxygen. They are good to use in heat-sealed mylar bags or in canning jars if you don’t have a vacuum sealer.