Campfire Banana Splits
This post may contain affiliate links.
Looking for a new camping dessert? How about a Campfire Banana Split! Banana, chocolate, mini marshmallows, whipped cream, and cherries!
Sponsored by Endangered Species Chocolate
One of our favorite (non-s’more) campfire desserts are Banana Boats. Basically slice a banana down the middle, stuff it with chocolate, marshmallows, and other goodies, wrap it up in foil, and place it in the campfire embers.
The result is a delicious, gooey, chocolate-y dessert that you can eat with a spoon! This Banana Split variation takes it one step further, by using caramel chocolate and adding whipped cream and cherries.
So if you’re looking to switch up your campfire dessert options, give this foil-wrapped Banana Split a try!
Ingredients:
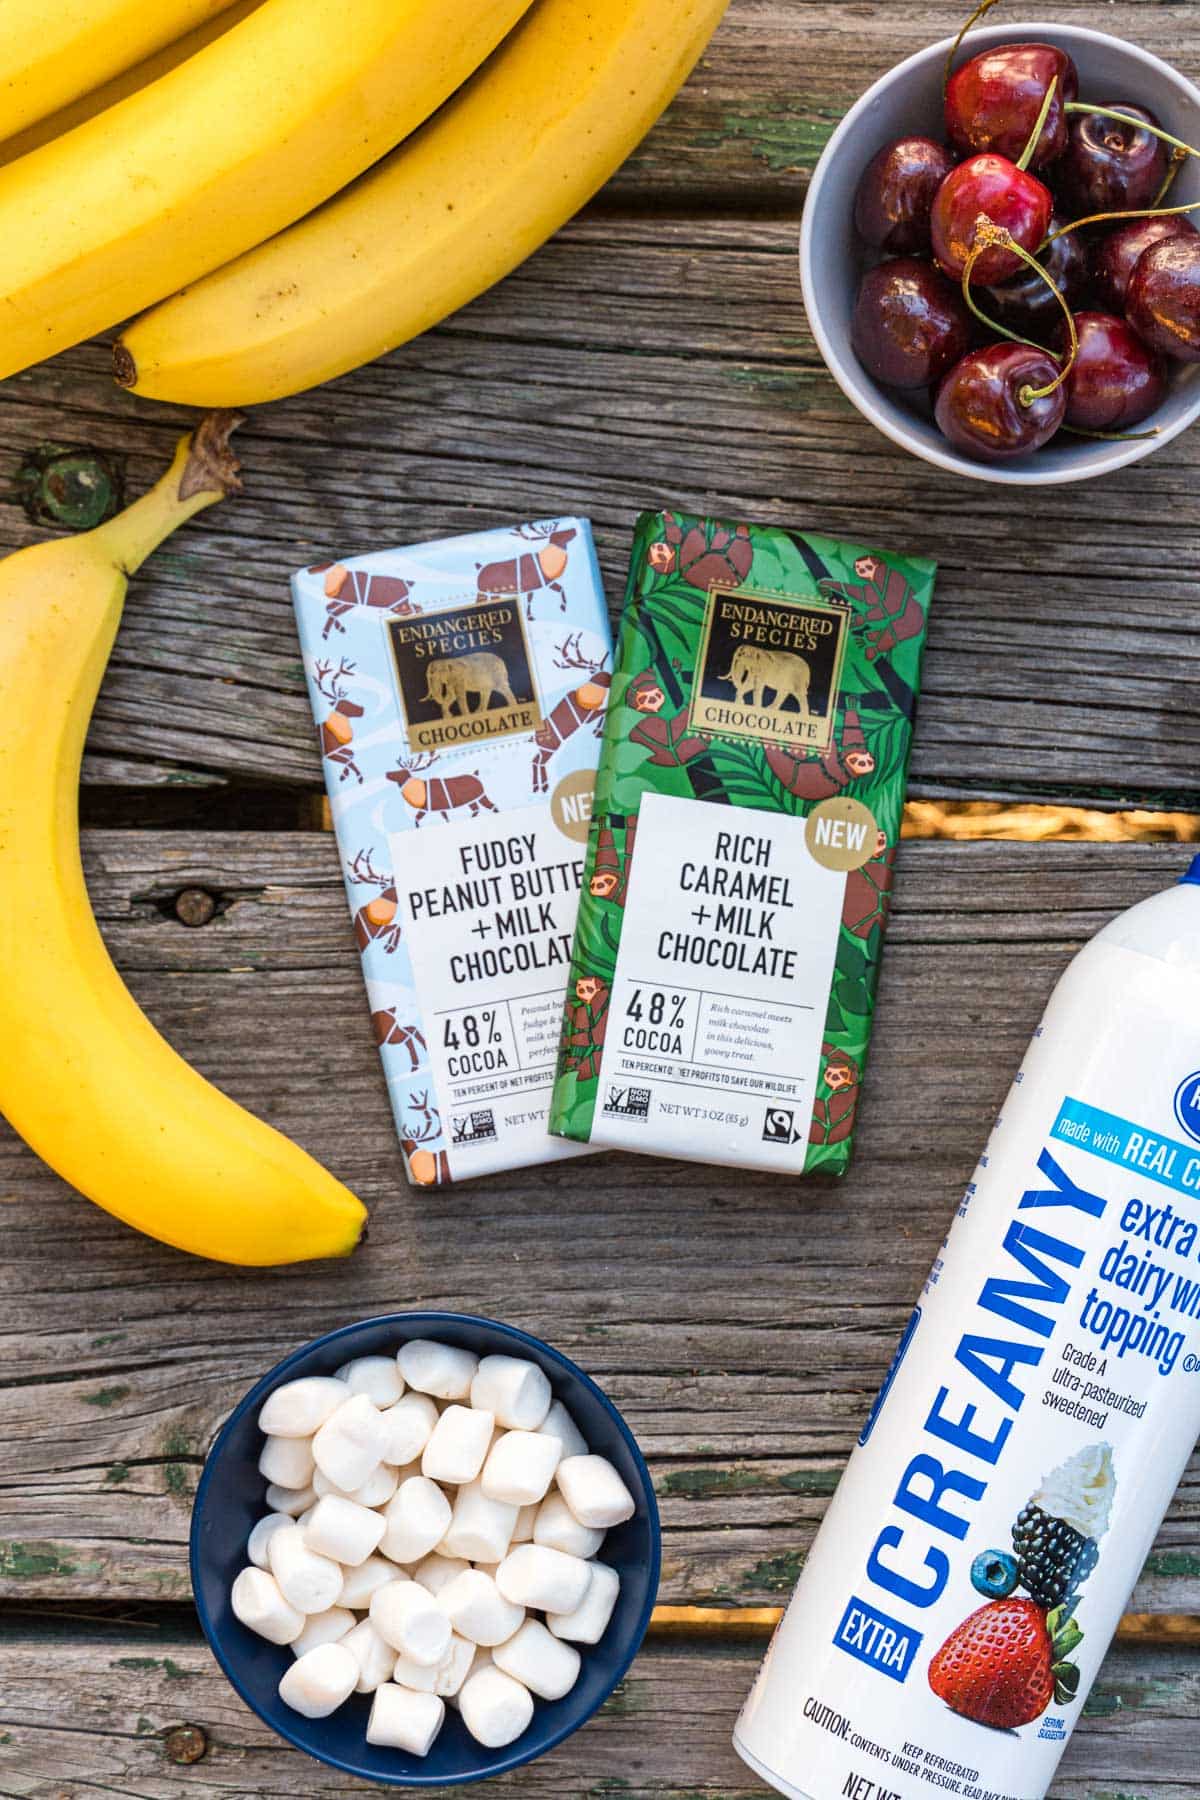
Banana: The ideal banana for making a banana boat is one that is uniformly yellow. Not under-ripped (green sections) or over-ripped (brown spots), just a solid evenly ripened yellow.
Chocolate: We used Endangered Species chocolate bars because we love all the great varieties they offer, plus really love their mission of giving back to support animal conservation. We used the Caramel + Milk Chocolate for this particular recipe (the Fudgy Peanut Butter bar is another favorite).
Mini Marshmallows (optional): Marshmallows aren’t usually a part of a banana split, but it just felt right.
Whipped Cream: Whipped cream is a great camping substitute for ice cream since it won’t melt. Go for the extra creamy stuff for a more ice cream -esque experience. Or, try making our ice cream in a bag recipe while the bananas cook!
Cherries: You can pack along a jar of bright red maraschino cherries if you want, but we opted for fresh cherries instead. You’ll only need a couple, and fresh cherries are better for snacking on a campsite.
Equipment:
Aluminum Foil: To “bake” the bananas, wrap them in aluminum foil. The banana peel contains a lot of moisture, so it’s hard to overcook them, but the foil helps keep everything together.
Parchment Paper: We like to use a parchment paper line for most of our foil packet recipes, but for this particular recipe, it’s kind of optional. The banana peel provides separation from the aluminum foil.
Long-Handled Tongs: A pair of long-handled tongs is the best tool for placing and adjusting these banana boats on a bed of hot embers.

How to Make Campfire Banana Split
Preparing the banana
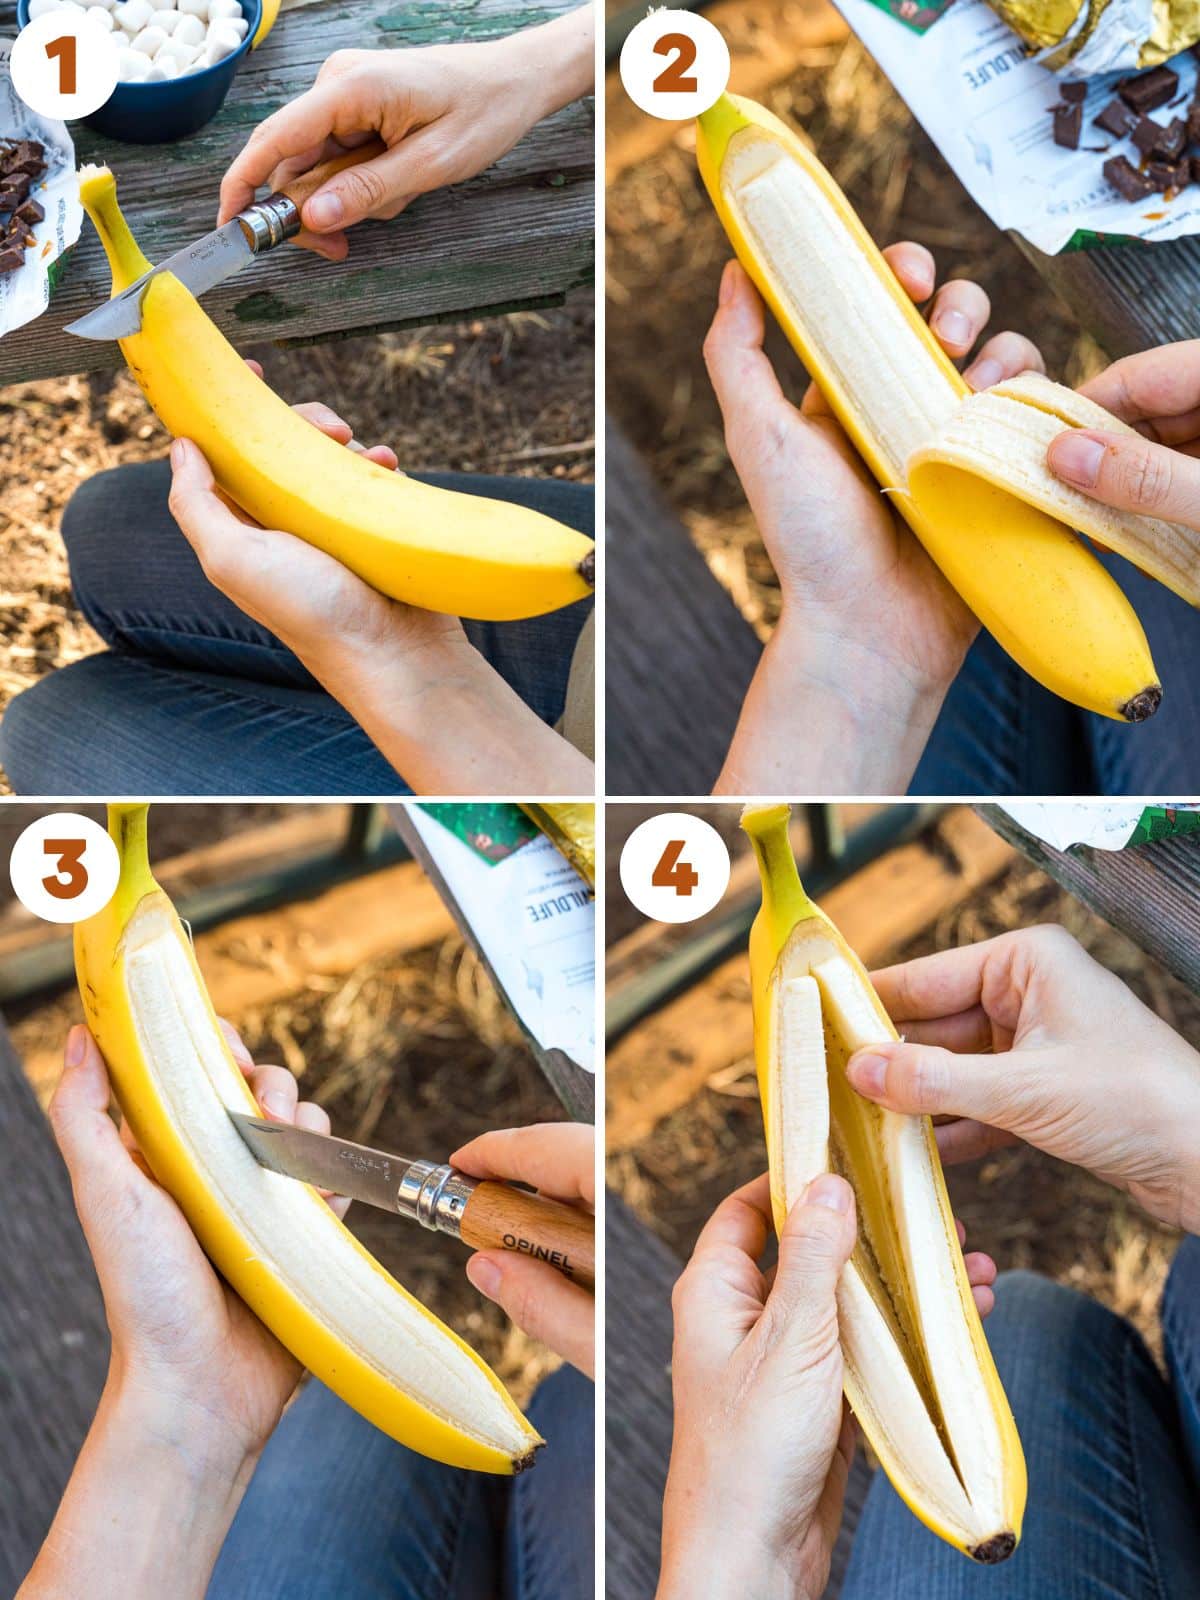
Cut a small notch into the banana peel near the top. Use this incision to peel away a narrow stripe of the banana peel.
Using a knife, carefully cut a line down the center of the now-exposed banana. You want to cut all the way through the banana but not through the peel in the back.
Gently compress the banana to flex open the cut line
Stuff the Banana
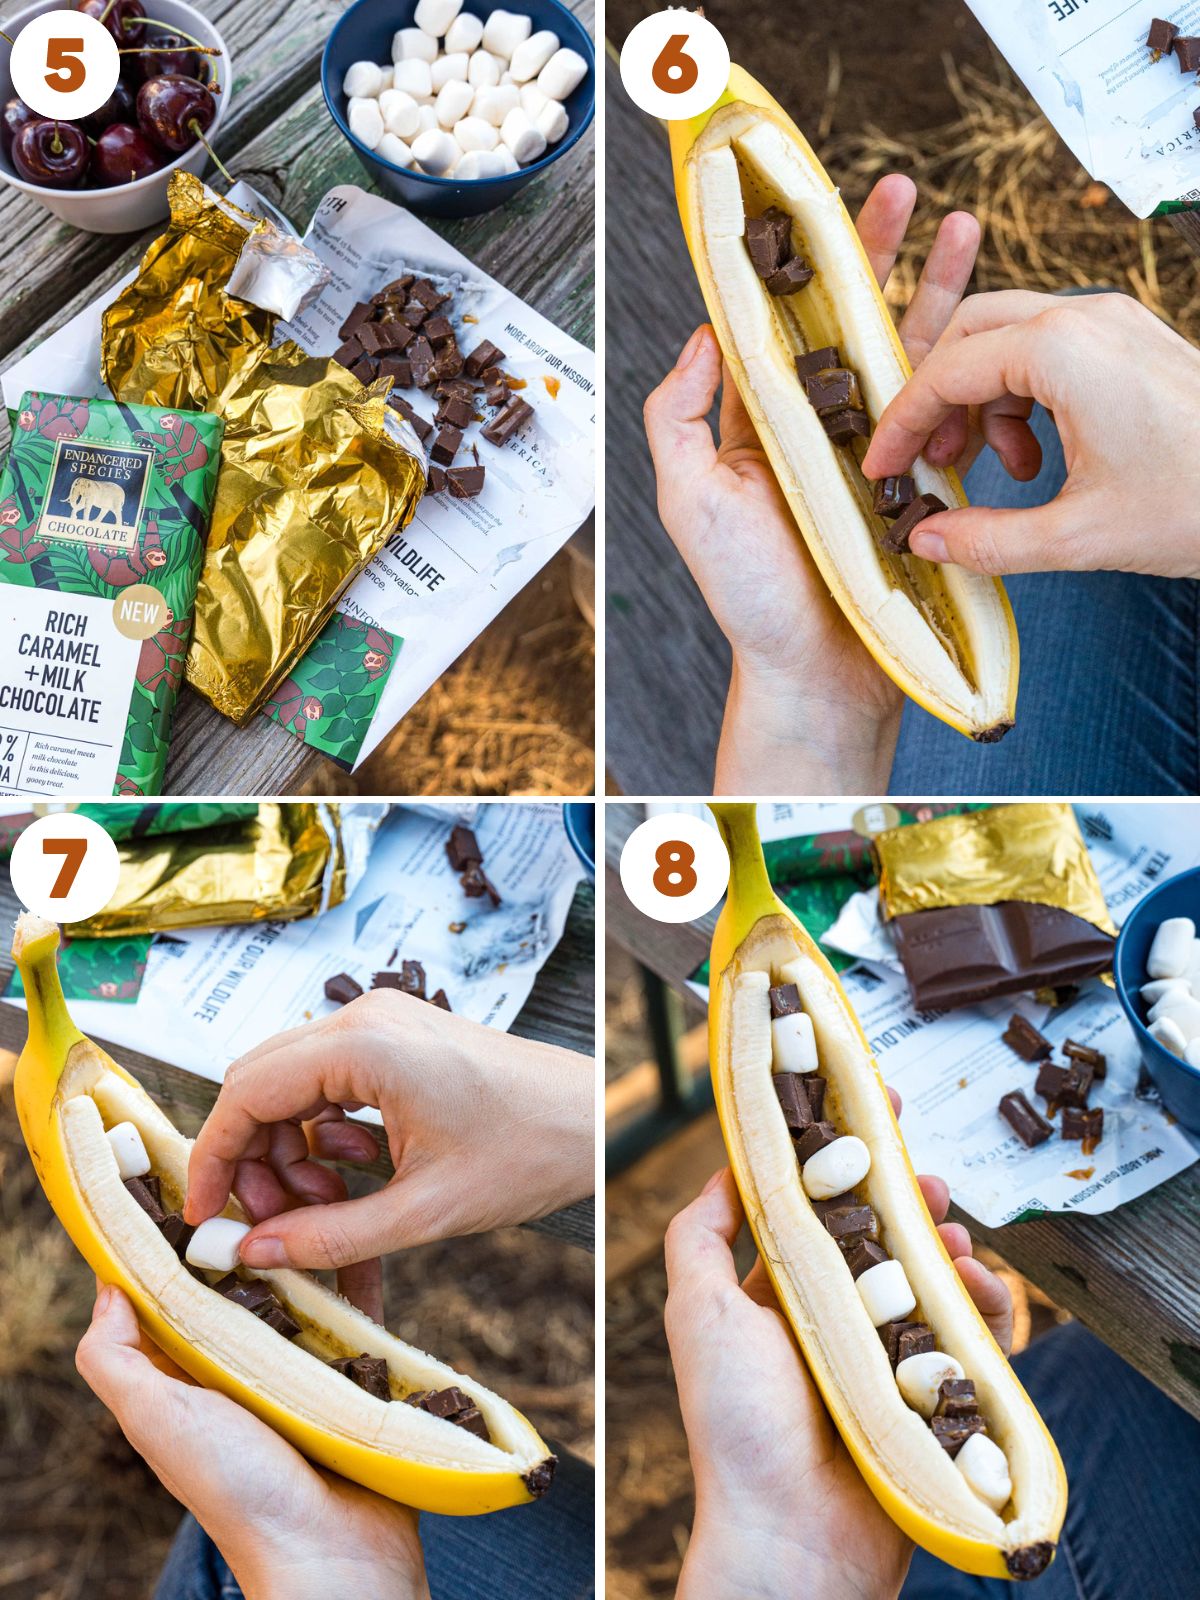
You can now stuff your banana with chunks of chocolate and marshmallows. Over stuffing is totally fine because as the chocolate melts it will more uniformly fill the crack.
Once you have your banana filled with all the chocolate you want, it’s time to prepare it for the campfire.
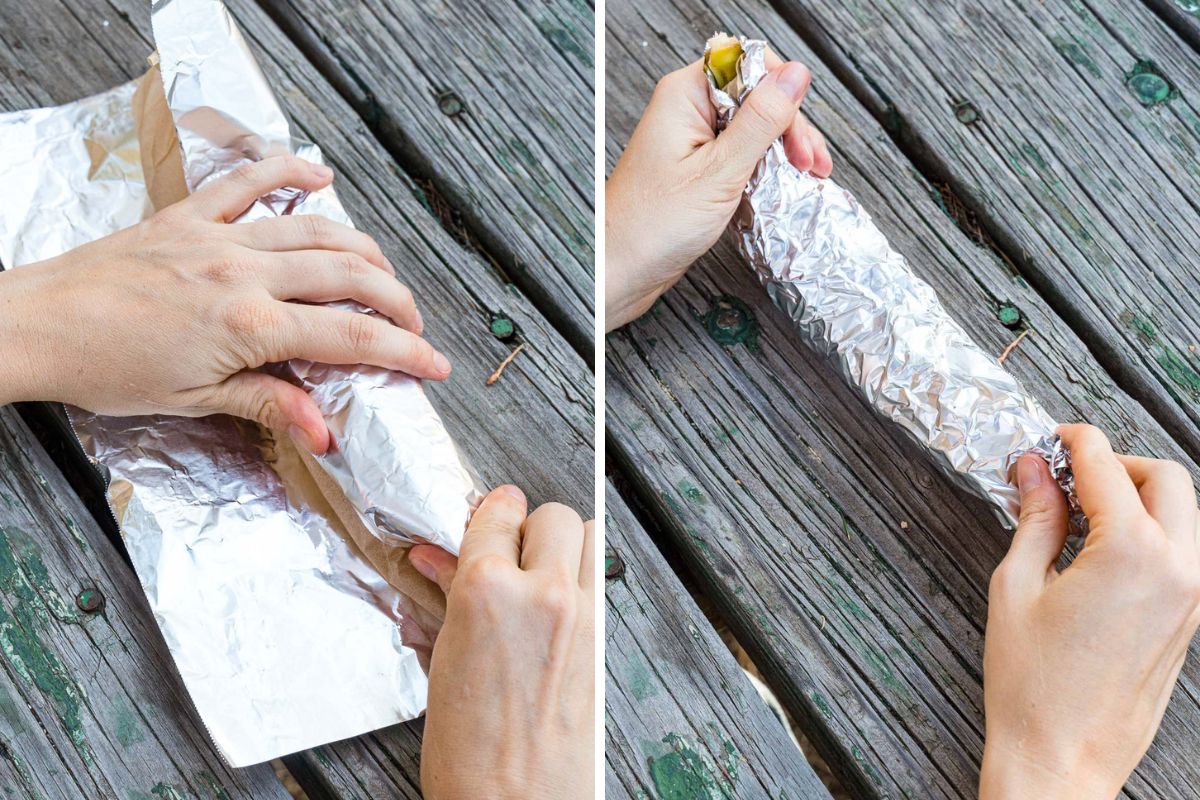
Wrapping the Banana
As we mentioned above, the parchment paper step is totally optional, but we’ll show you how to do it here.
Cut a square of parchment paper and a square of aluminum foil. Wrap the banana in parchment paper, and then while still holding it closed with one hand, begin to wrap it with the aluminum foil (which will hold it closed).
No need to worry about covering the top stem.
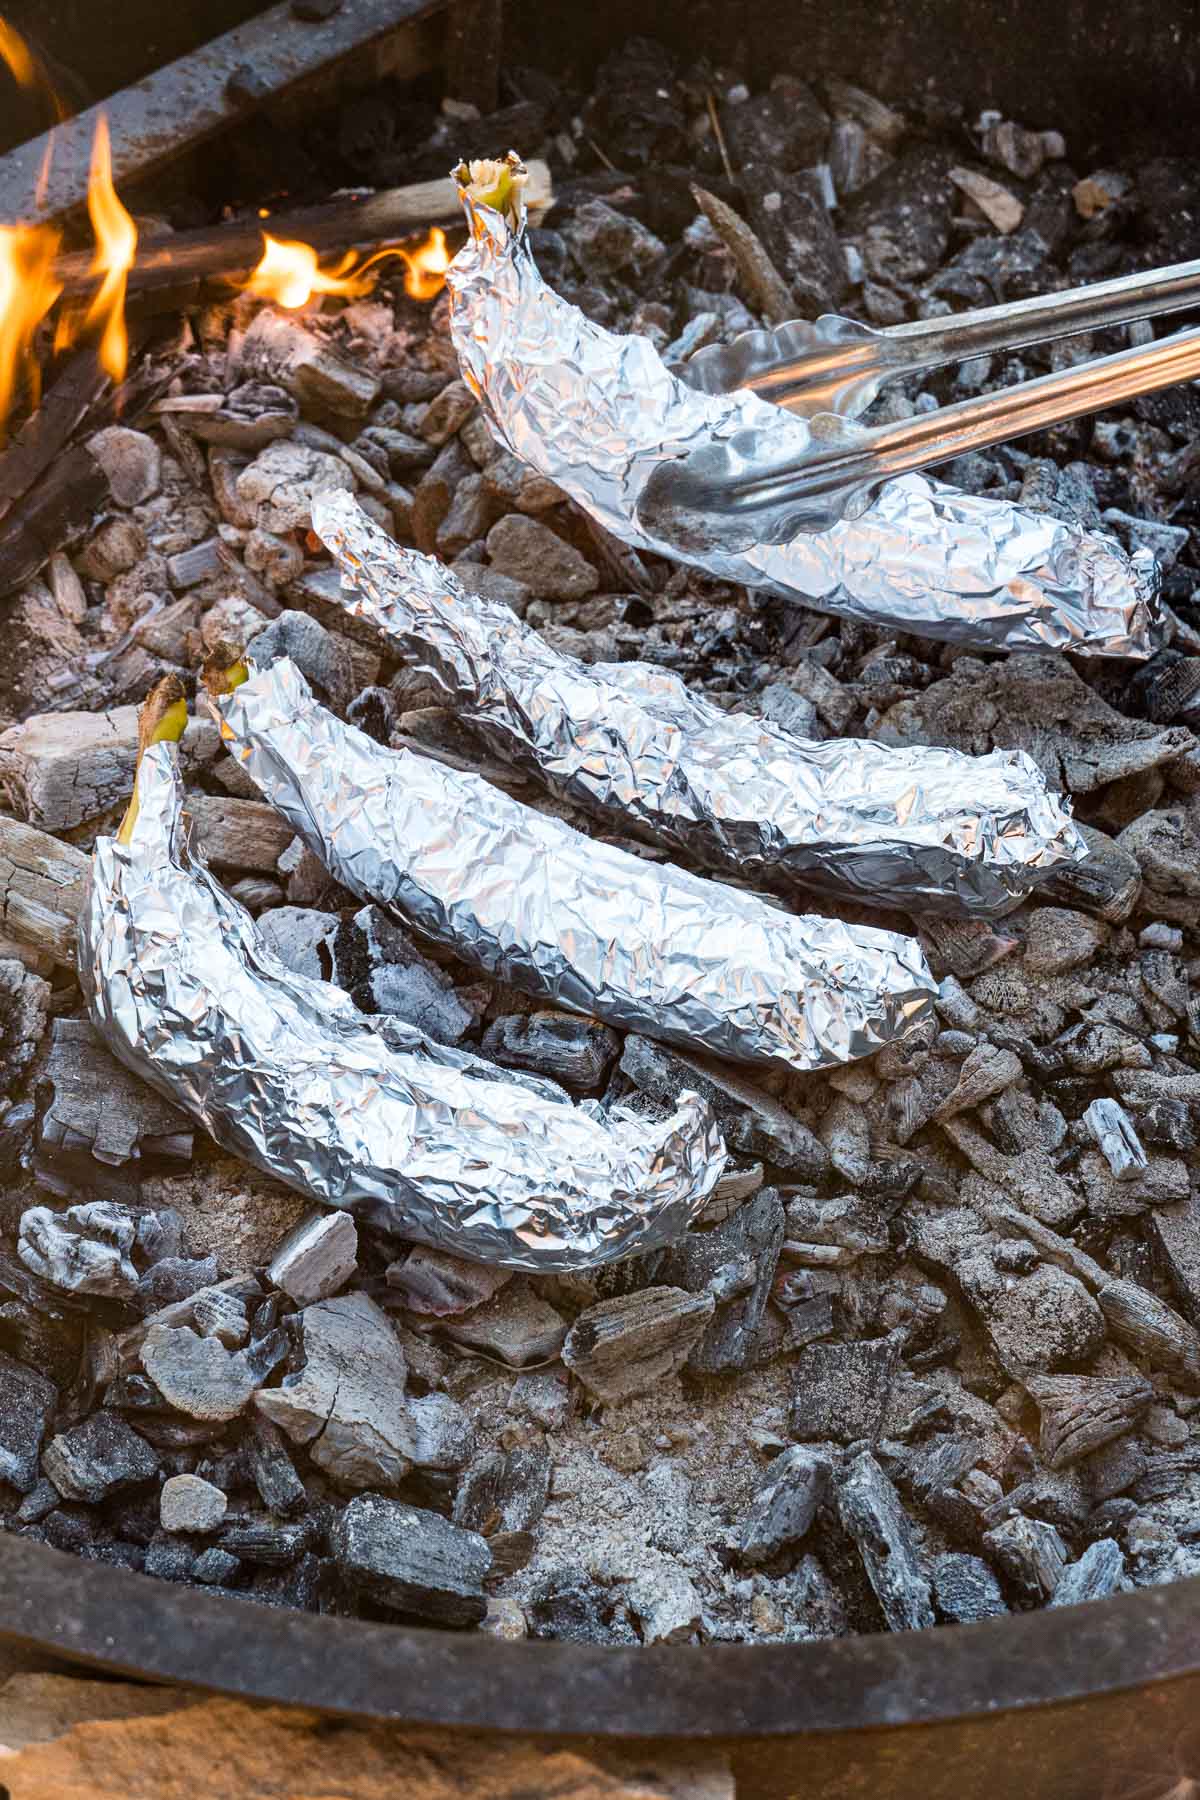
Fire Placement
The best way to roast these banana boats is to place them on their backs in a bed of hot embers or coal. The aluminum foil should keep all the contents contained, but you will probably want to avoid inverting them at any point, lest the chocolate and marshmallows melt out.
The even, consistent heat of the embers will ensure that they cook evenly without developing any intense hot spots.
All they need is a few minutes on the embers (4-6 minutes) and they should be ready to eat.
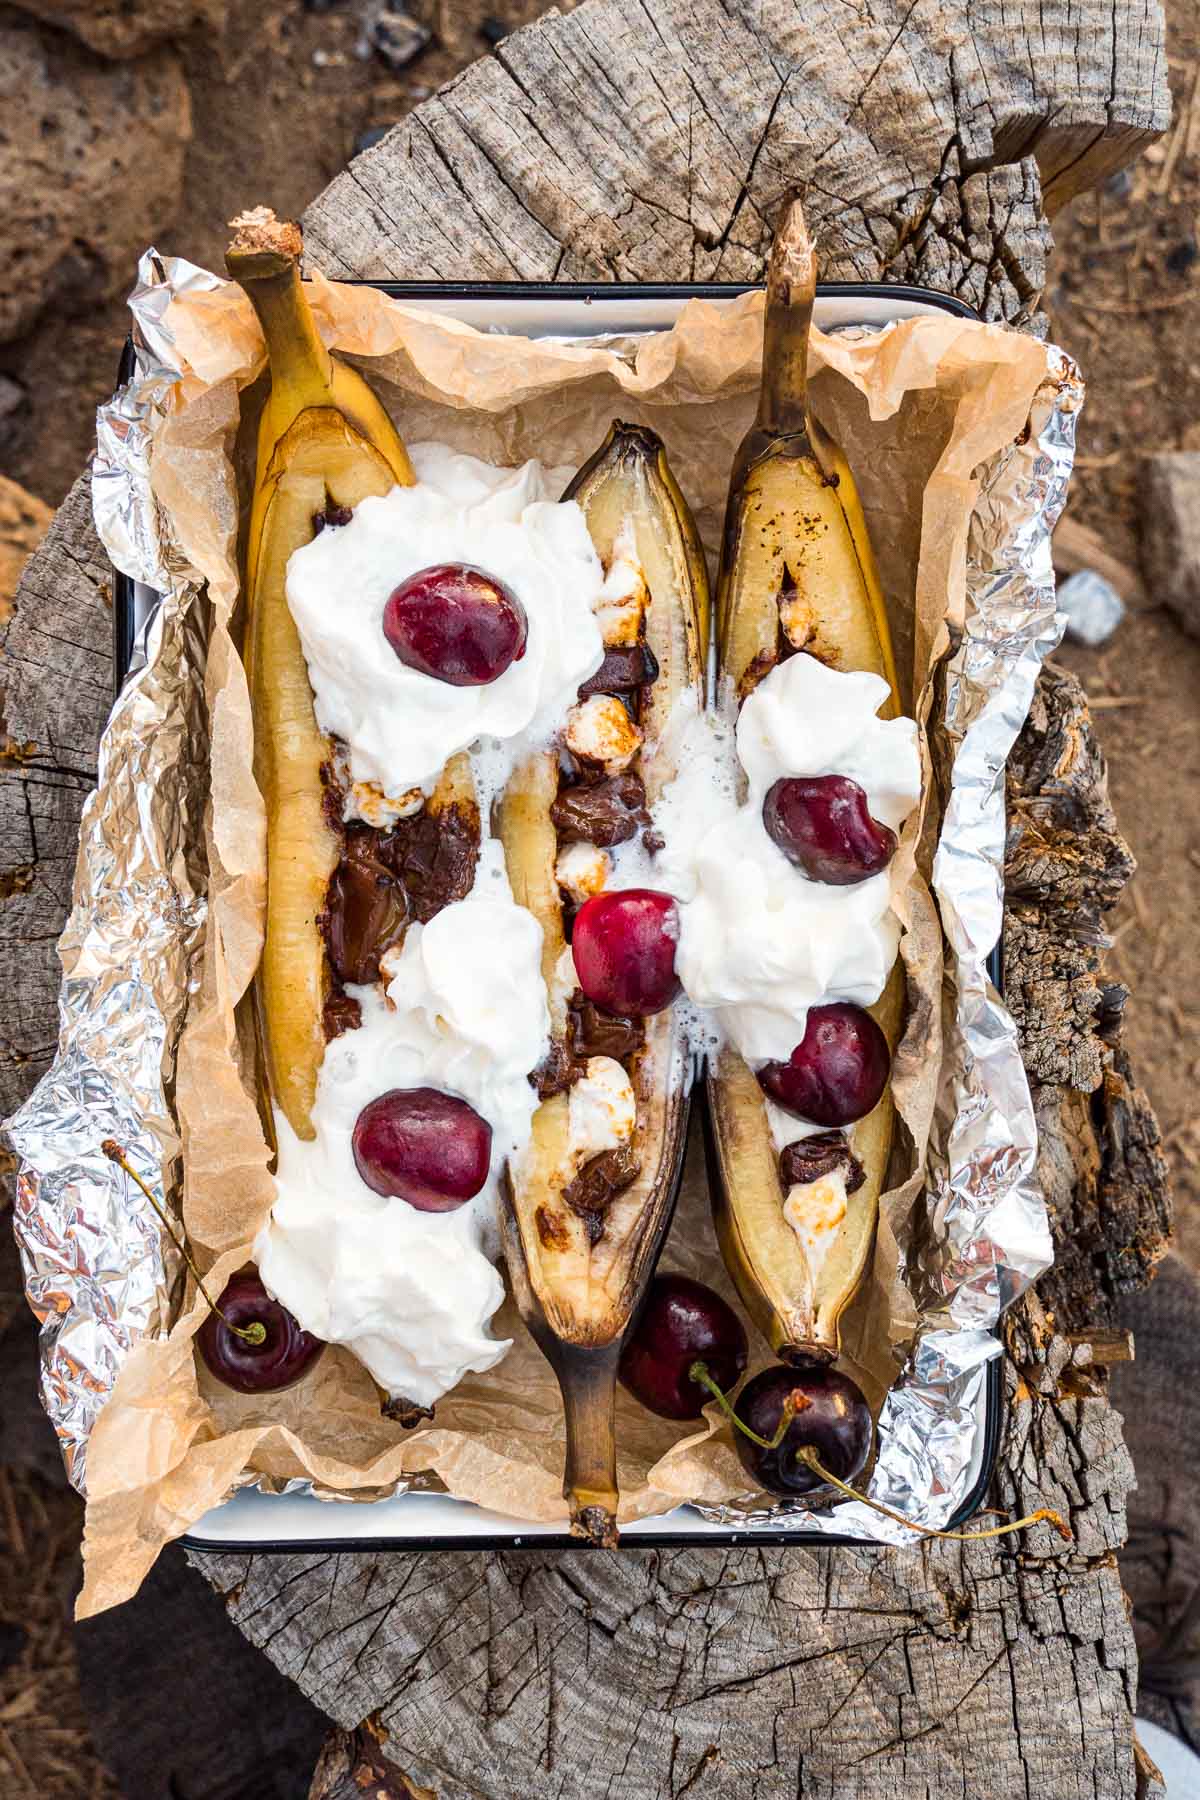
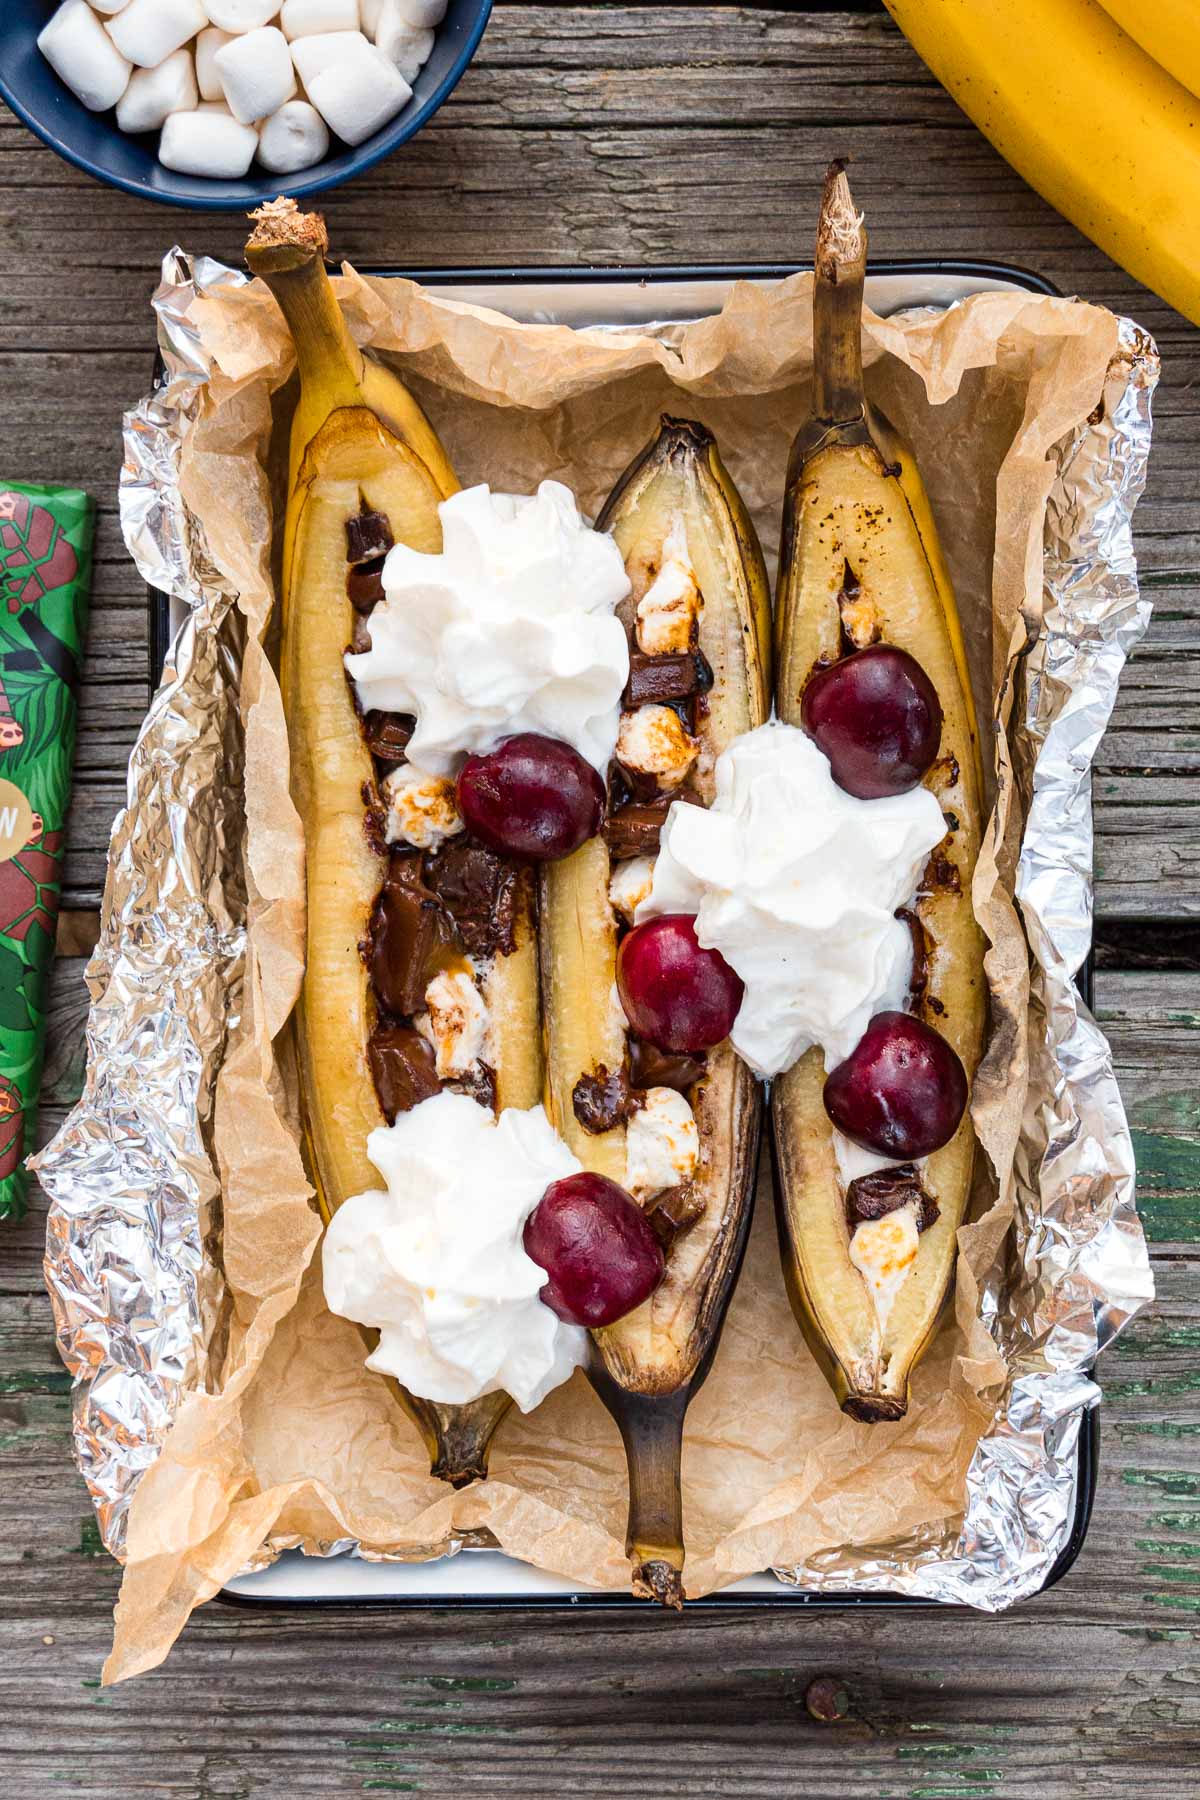
Final Toppings
Once they come out of the fire, the banana’s will need a few minutes to cool down. Then you can unwrap them, add a dollop or two of whipped cream, and top with a few cherries. That’s it!
Grab a spoon and dig in!
Campfire Banana Splits
Ingredients
- 4 bananas
- 1 Endangered Species Caramel Chocolate bar
- ½ cup mini marshmallows
- 8 cherries pitted and chopped
- Whipped cream
Instructions
- Take a banana with its peel still on and cut it down the middle (along the concave side). Not all the way through, but until the tip of your knife just grazes the peel on the other side. Pull the peel and banana slightly apart.
- Stuff the chocolate and mini marshmallows into the center of the banana.
- Wrap the banana in foil. Place on a campfire or grill until the chocolate has melted and the banana has warmed through, about 10 minutes.
- Unwrap banana and top with whipped cream and cherries. Enjoy!