Simple Beef Jerky Recipe
This post may contain affiliate links.

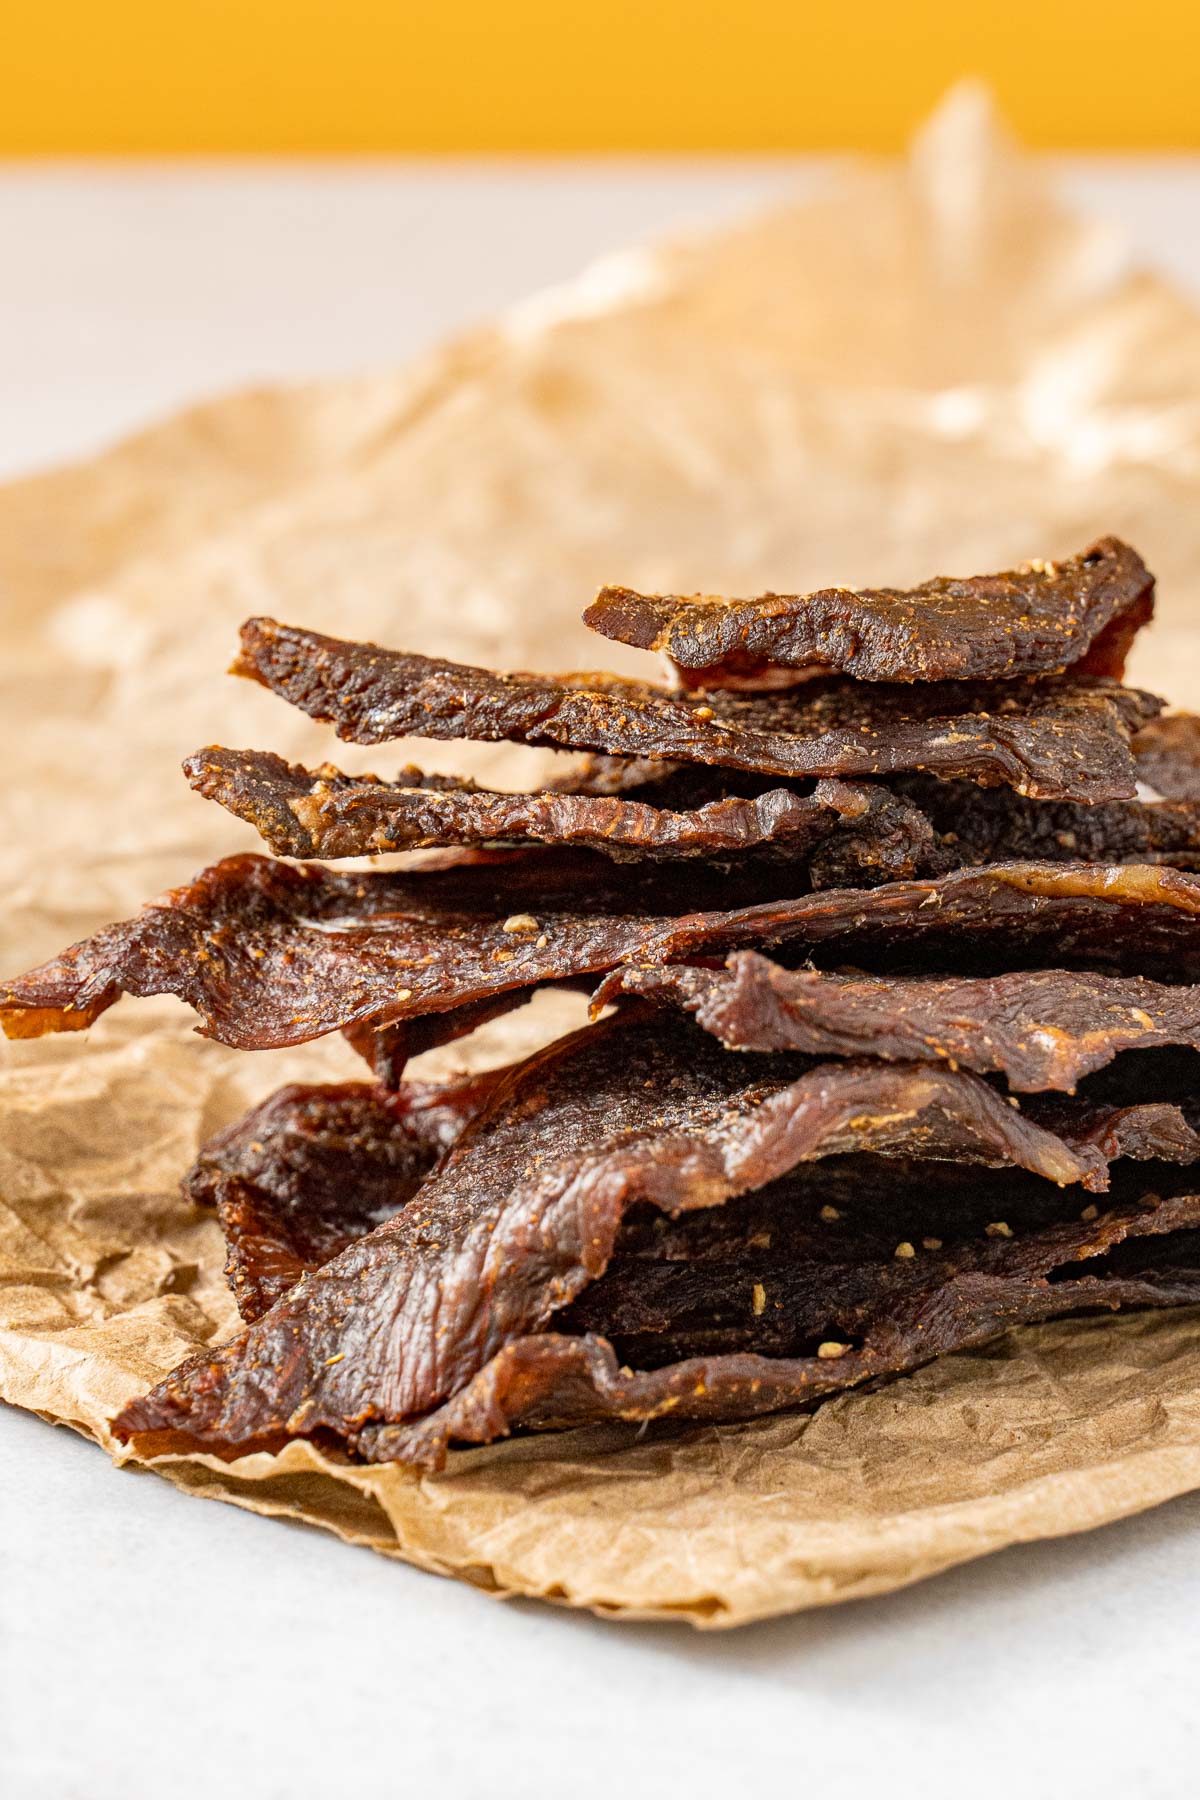
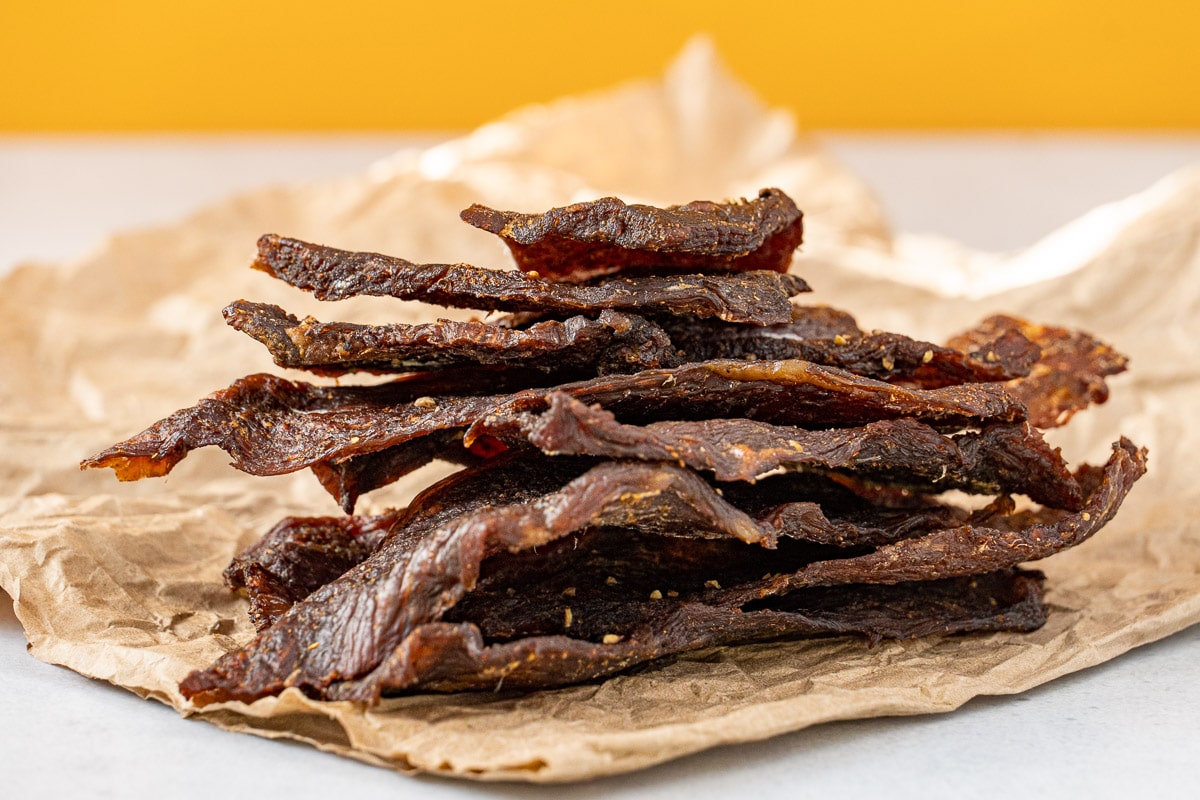
Homemade beef jerky might just be the perfect snack! After making countless batches, we’ve learned a lot about how to make jerky, settling on a marinade we love, and using many tips and tricks we’ve learned over the years. This simple beef jerky recipe makes tender, full-of-flavor jerky, and it’s so easy, too!
Protein-packed beef jerky has powered us through many hikes, camping trips, road trips, and busy afternoons. It’s super portable, which makes it one of the best camping snacks around.
Unfortunately, the store-bought stuff can get expensive. Luckily, homemade beef jerky tastes way better than store-bought; you know exactly what goes into it, and it’s incredibly easy to make!
When it comes to homemade beef jerky, using a dehydrator is, in our opinion, the easiest and best way to make the tender and smoky beef jerky of your dreams. Once your jerky is on your dehydrator trays, the process is almost completely hands-off.
Simple DIY Beef Jerky
Ingredients
- 2 pounds beef (lean cuts are best & will keep longer–see note 1)
- ¼ cup soy sauce
- 2 tablespoons worcestershire sauce
- 2 tablespoons brown sugar
- 2 teaspoons salt
- 1 teaspoon garlic powder
- 1 teaspoon onion powder
- 1 teaspoon smoked paprika
- 1 teaspoon black pepper
- 1 teaspoon meat tenderizer *optional
Instructions
- Thinly slice the meat and cut off all visible fat. (see Note 2)2 pounds beef
- Pound slices with a meat tenderizer mallet until pieces are uniform thickness (aprox nickel width).
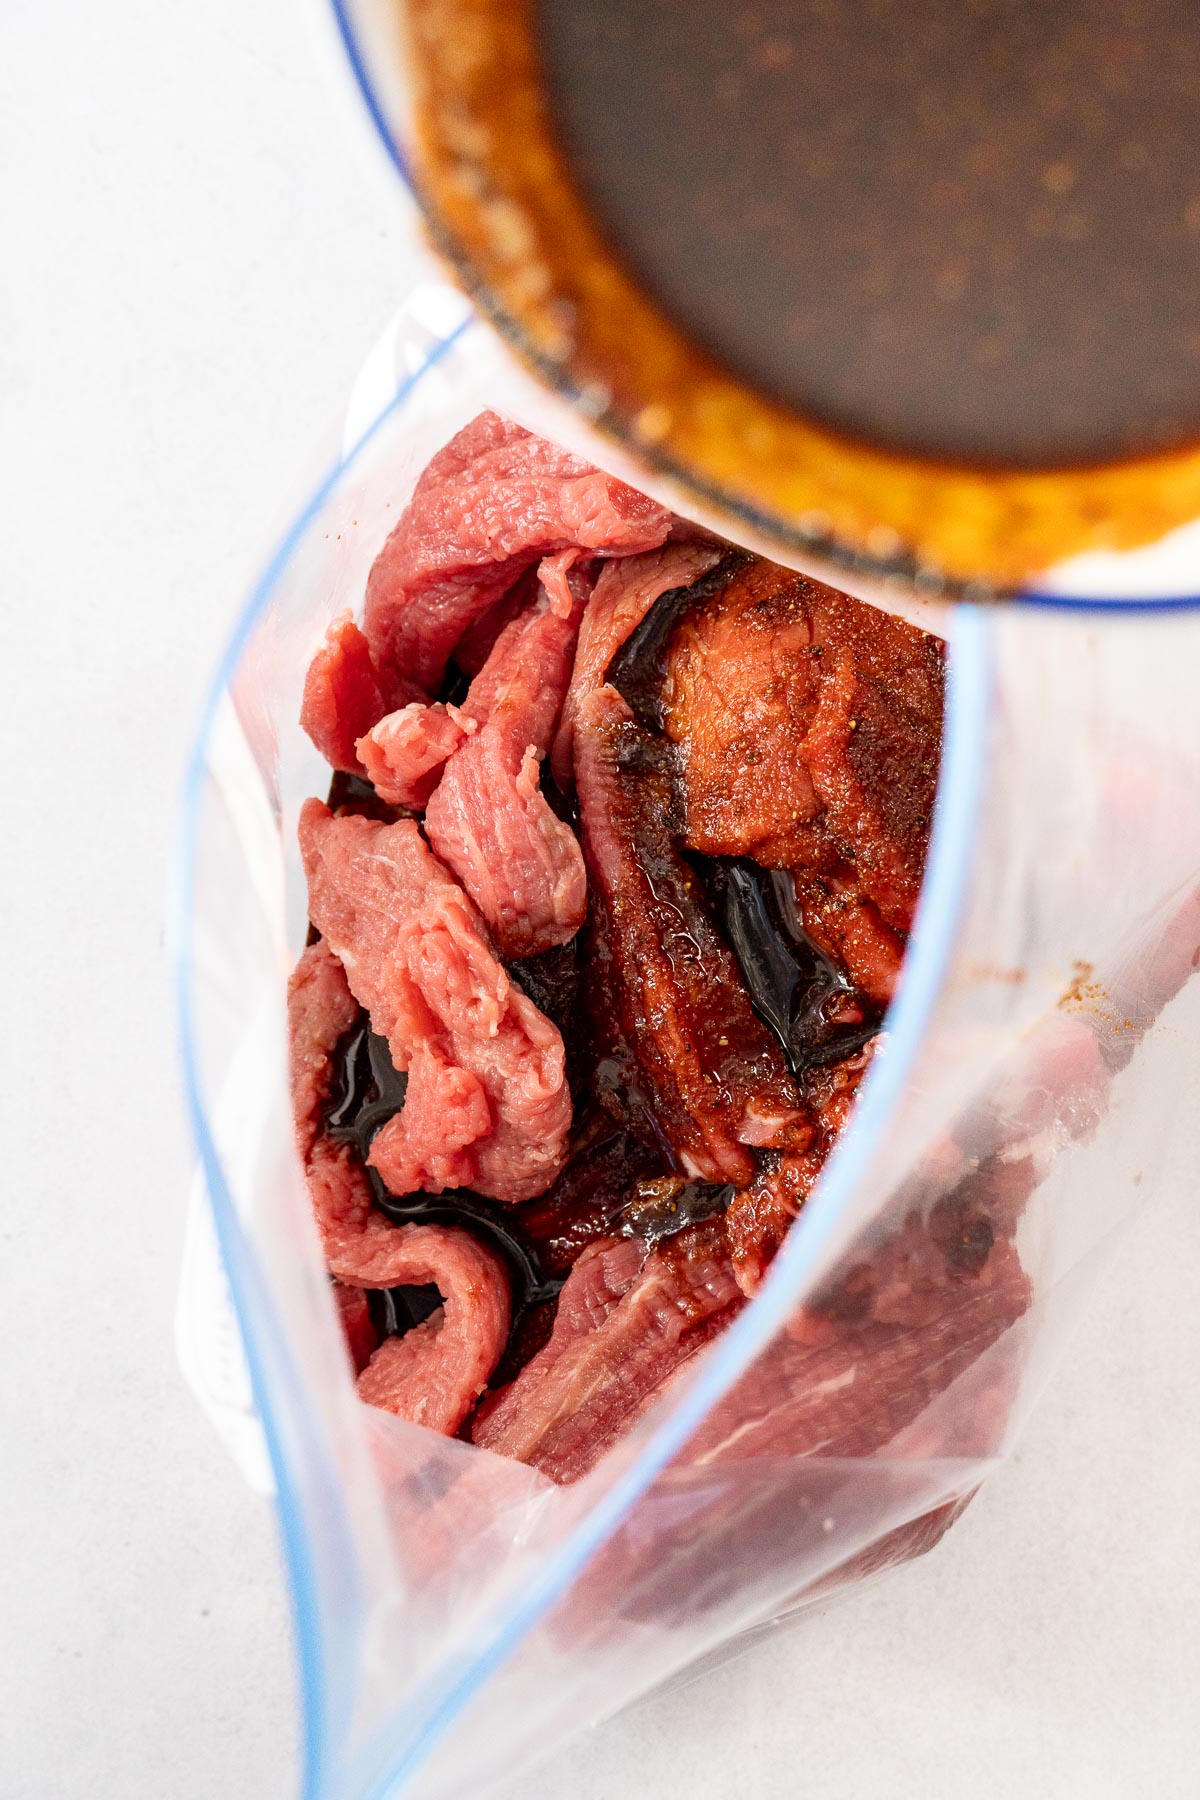
- Place the beef strips in a zip-top bag. Mix remaining ingredients and pour over beef.¼ cup soy sauce, 2 tablespoons worcestershire sauce, 2 tablespoons brown sugar, 2 teaspoons salt, 1 teaspoon garlic powder, 1 teaspoon onion powder, 1 teaspoon smoked paprika, 1 teaspoon black pepper, 1 teaspoon meat tenderizer
- Cover & marinate for 12-36 hours. Shake the bag a few times as it's marinating to make sure the beef is evenly coated.
- Spread the meat in a single layer, shaking off any excess marinade, on the dehydrator trays.
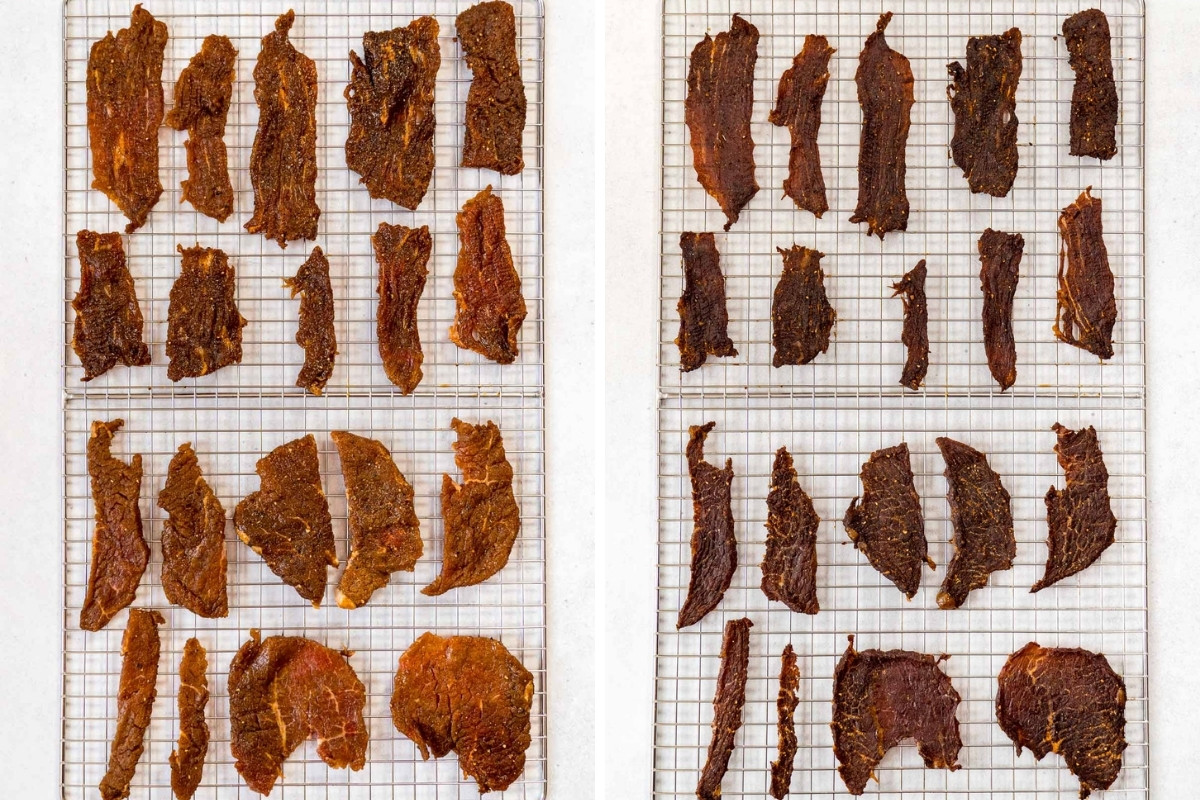
- Dry at 145F/62C for 4-6 hours, occasionally blotting off any fat droplets that appear on the surface. Test using a cooled piece. Properly dried jerky, when bent, should crack but not break.
- Use tongs to transfer the jerky to a baking sheet so that they are not touching or overlapping one another. Heat them in a preheated 275°F oven for 10 minutes.
- Cool, then package jerky in an air-tight container or vacuum seal (*see storage notes below). Store in a cool, dark & dry place.
Notes
Ingredients
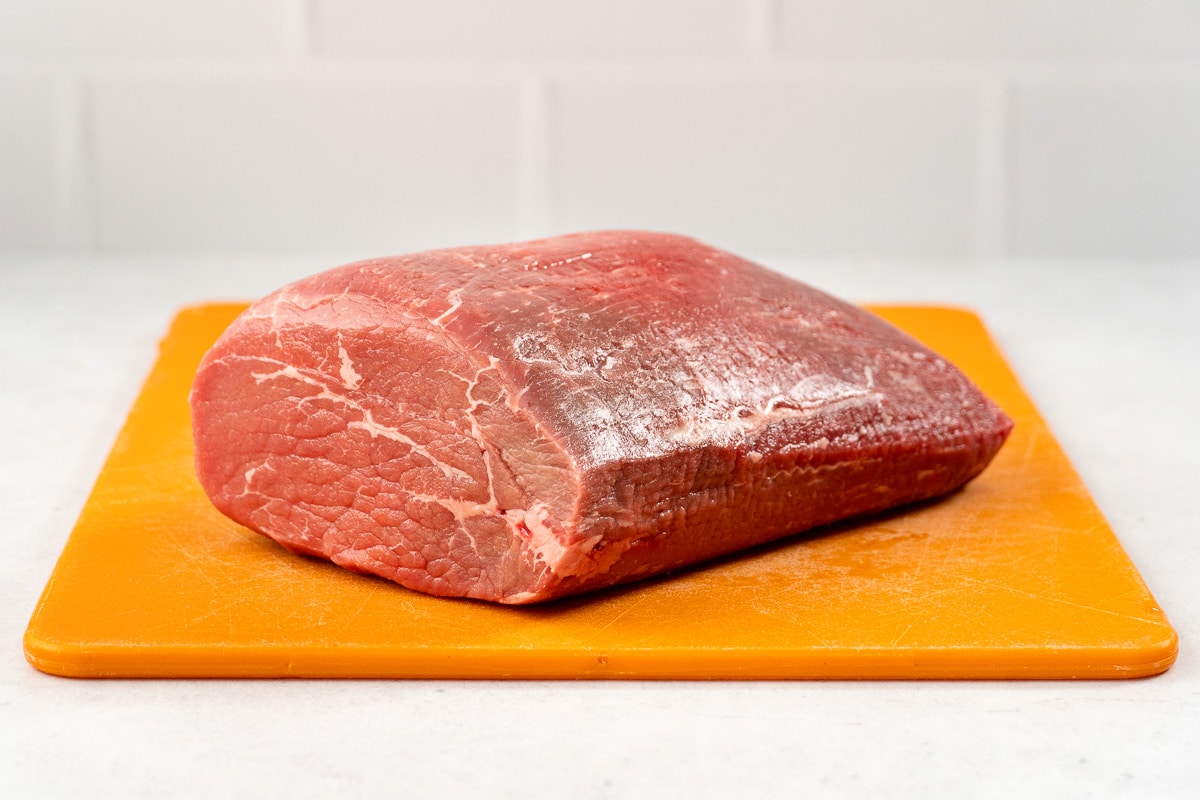
- Beef: One of the great things about beef jerky is that you can use cheaper, leaner cuts of beef. In fact, because fat can’t dehydrate, the leaner the better! Our top choices for this easy beef jerky recipe are top round, eye of round, top sirloin, and London broil. Flank steak is another terrific option, which is more expensive, but has great flavor and can be cut into long, thin strips that are perfect for homemade jerky.
- Soy sauce: A key ingredient in our beef jerky marinade, soy sauce adds salty, “umami” flavor. If you’re watching your salt content, consider a lower-sodium soy sauce or Tamari.
- Worcestershire sauce: This popular sauce brings even more savory “umami” flavor. It’s a little sour, sweet, and a bit spicy.
- Brown sugar: We love the touch of caramelly sweetness from brown sugar. Bonus, the sugar helps to lock in some moisture while helping to preserve your beef jerky.
- Seasonings: Garlic powder, onion powder, smoked paprika, salt, and black pepper are the seasonings we love. But the best part about knowing how to make beef jerky at home is that you can adjust, add, or subtract seasonings to make it your own.
- Meat tenderizer: Meat tenderizer powder is optional, but it really does help break down the meat tissue for the most tender jerky. Meat tenderizing powders are made from plant-based enzymes such as papain, which comes from papayas, or bromelain, which originates from pineapples. You’ll find it in the spice section of most grocery stores.
Equipment Spotlight: Dehydrators
If you’re in the market for a dehydrator, we recommend buying one with an adjustable temperature. This will allow you to dial in the drying temp to give you the best results for individual ingredients. The dehydrator we recommend (and use) most often is the COSORI dehydrator. You can also check out our best dehydrators post for a comparison of all the dehydrators we’ve used and would recommend.
How to Make Beef Jerky — Step by Step
First, prepare the meat. Thinly slice it, cutting with the grain for chewier jerky and against the grain for more tender pieces. Trim off all visible fat. Then, pound the slices with a meat tenderizer mallet until the pieces are all uniform thickness, about the height of two stacked nickels (~⅛ inch or 4mm). Place the beef strips in a zip-top bag.
Next, make your beef jerky marinade. Mix together all of the ingredients in a small bowl, then pour the marinade over the beef and seal the bag. Refrigerate for at least 12 hours and up to 36 hours, shaking and massaging the bag every few hours to make sure the beef stays evenly coated.
Now, it’s time to dehydrate! First, preheat your dehydrator to 145°F. Then grab your dehydrator trays and spread the meat in a single layer, shaking off any excess marinade. Dry for 4-6 hours, checking occasionally for any fat droplets that appear and blotting them off with a clean paper towel.
Check to see if your beef jerky is done by bending a cooled piece. If it’s dry with white fibers and bends without cracking, it’s just right.
Post-drying heat: After the jerky has dried in the dehydrator, do a post-dry heat in the oven to ensure it’s safe, in accordance with the OSU Extension/Pacific Northwest Extension’s guide to making safe jerky. To do this, transfer the jerky to a baking sheet and place it in a pre-heated 275F oven for 10 minutes.
Let it cool completely, then package for storage!
Tips for Making
- For beef that’s easier to slice, partially freeze it beforehand. Put it in the freezer for 1-2 hours, just until it’s semi-frozen (not frozen like a rock, just firm). This way, it will be much easier to cut consistent, thin slices.
- Pick a direction to cut for either tender or chewy jerky. For a more tender beef jerky recipe, cut against the grain of the meat. For a chewier result, cut with the grain.
- If you can, have someone at the butcher counter slice it for you. This will give you even slices and save you a bunch of effort!
- Pound out slices with a mallet. This helps to make each piece the same thickness, plus, pounding each slice with a mallet breaks down the muscle fibers for a more tender texture. Make sure not to over-tenderize, though–the slices still need to retain some structure.
- Preheat your dehydrator, and dehydrate at least 145F.
- Don’t skip the post-drying heat! This will ensure that your jerky is properly dry and shelf-stable. Bake the jerky at 275F for 10 minutes.
- Set a timer! Beef jerky can become over-dehydrated if left in for too long, so you will want to pull it before it gets to that point, which will leave it brittle and crunchy.
Storage Tips
How you store homemade beef jerky will depend on when you intend to eat it. The longer you want to keep it, the more careful you’ll want to be about how you store it.
- Up to a week: Beef jerky will be fine for up to a week in a non-airtight reusable container or plastic baggie. The less exposure to air, the better, and it’s a good idea to keep out of direct light.
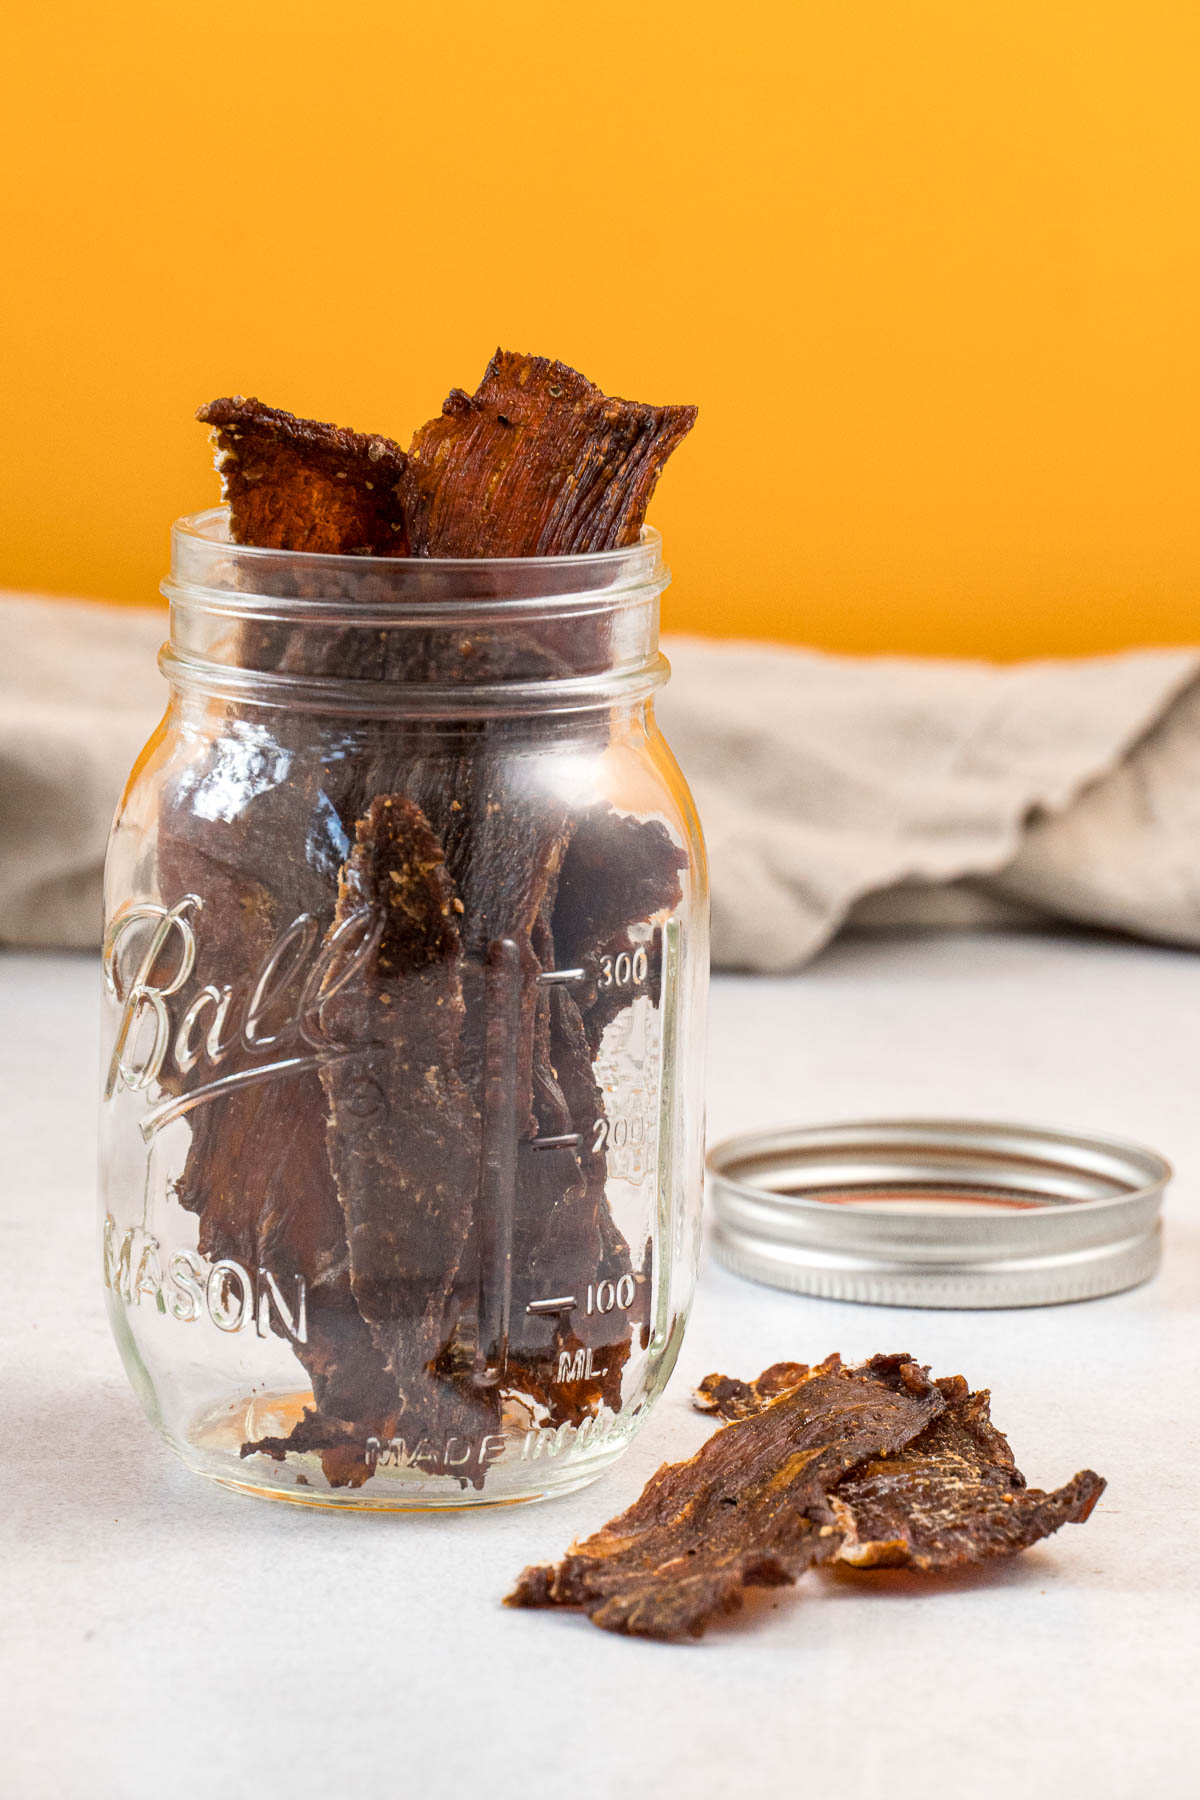
- Up to a month: Use an airtight container like a Mason jar or resealable container with a gasket lid. Your beef jerky can still be stored at room temperature, but it should be kept away from direct light.
- One to six months: For anything over a month, beef jerky should be vacuum-sealed in an airtight container and kept in the refrigerator.
- Six months to a year: To maximize the storage time of your beef jerky, you will want to vacuum-seal it in an airtight container and keep it in the freezer. You might also consider using a moisture-absorbing packet.
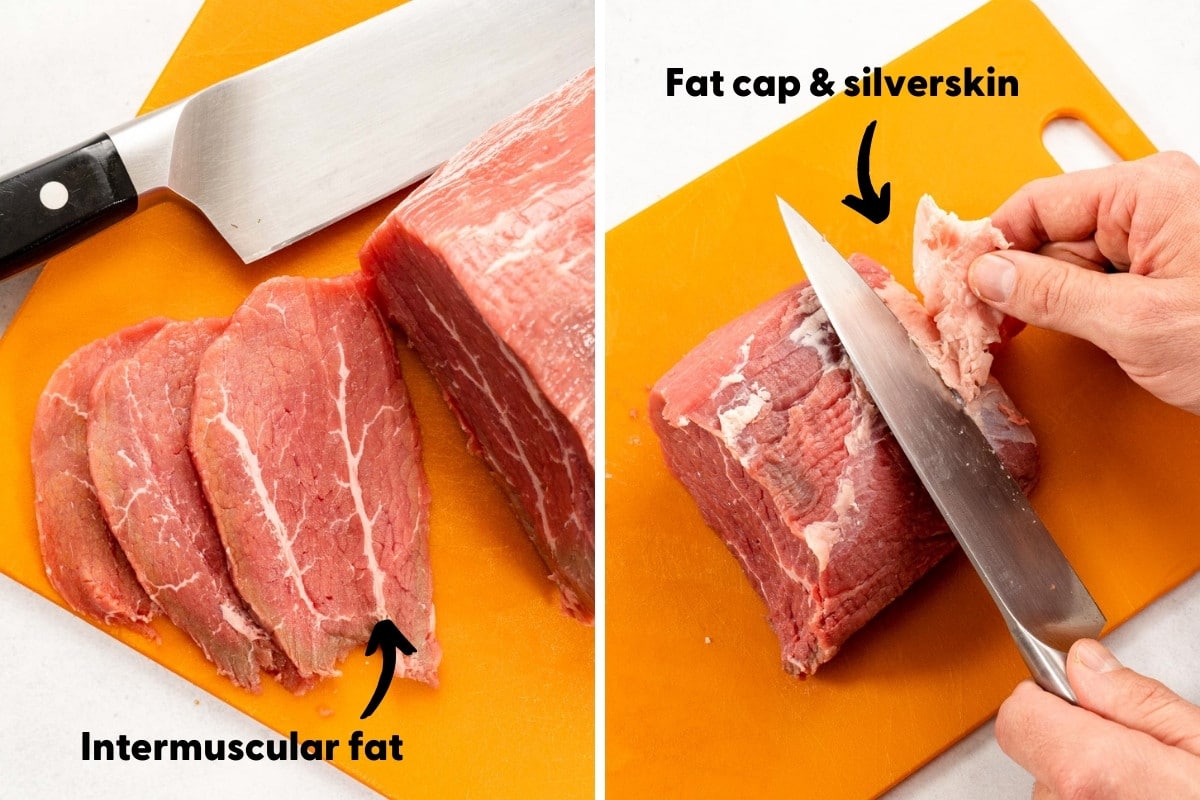
Nearly all cuts of beef have some fat, but not all of it needs to be removed.
You will want to cut away any large caps of fatty gristle. This can be accomplished by running your knife underneath it, lifting up a tab of fat, and shaving away at a shallow angle with your knife.
You may also notice some thin “veins” of intermuscular fat running through the meat. Whether you want to cut these out is entirely up to you.
If you are really trying to maximize storage life, you can go ahead and carefully cut these out. But if you’re planning on eating in your jerky relatively soon, it is fine to leave them. We only ever cut out the really big line of fat and leave the rest.
If you want your jerky to tender, you will want to cut against the grain. (This is what we prefer!)
If you want your jerky to be chewy, then you will want to cut with the grain.
This recipe was originally published 5/2017 and was updated 10/2024. The ingredients remain the same, but the method has been updated to align with the OSU Extension’s safe jerky practices. | Recipe adapted from Allrecipes.com
Dehydrator not required! I get great results with just an oven and some wooden skewers. Soak the skewers in water overnight, string meat onto said skewers, and drape through the bars of an oven grate (I recommend lining the bottom of your oven with foil). “Cook” at around 170F for ~4-5 hours, then let cool for at least 6 hours.
N.B., to assist with air circulation, either set your oven to convection (if that’s an option), or wedge open the oven door a tad with a wooden spoon.
Thanks for the info, Ben! Super helpful for those of us without a dehydrator. Looking forward to trying out your method before our summer road trip.
Yup. I’ve been making jerky for 50 years. Until a few years ago it was all made in the oven. I used toothpicks. Turn it as low as it will go and crack the door open.
My dehydrator does not have a temperature gauge, is that important?
I am sure there is a way around it but it is somewhat important. Different foods require different temperatures and times. I would suggest checking the jerky frequently (a cooled piece should crack and not break when it is done). If your dehydrator doesn’t get warm enough you could finish it off in the oven at a higher temperature.
Thank you for you recipes I looking forward to trying it reguards bob lucas
Use toothpicks soaked in cooking oil. It is easier to remove jerky from toothpicks than water!
My hubby borrowed this round dehydrator yrs ago from a friend that pasted. It’s in the shed. I am disabled n was thinking of making jerky n selling to bars, small stores ect but can I make money on it.n sell for how much. Not sure what kind it is. Thank you for any help.
Thank you so much for posting this recipe. I have a friend who passed several years ago, and he made the best jerky in the world. He never would give up his recipe, but I know it contained
Dr. Pepper. Instead of the jalapenos he used red pepper seeds. My hope is that your recipe is similar. Thanks again for sharing!
On the NESCO 13 1/2 inch round tray, approximately how much raw meat can you put on each tray?
It will depend on the size of your slices, but we usually use 4 trays for 1 pound of meat. You might be able to fit more on each tray, though. We like to give our jerky a lot of breathing room.
Kira and Brendon; A friend, gave me a batch of her first go at your Jerky mix. Rhi didn’t use the MSG or pound the product down to get a consistent thickness – but the product was great! I’ve got my first batch down in the brine. Had to double the brine as the 1.5 kg (2-ish lbs) Roast Beef I used seemed to need the extra juice. Anyway – cross your fingers. Rhi’s batch was a winner for me. Armed with my new Excalibur – should make a great product. Followed by Vac-seal, I should have lots of Jerky for Trekking or simply munching on in the “Man-cave”. I’ll let you know how it turns out. I gave the mix a four star but may upgrade that based on how my batch turns out.