How to Build A Campfire
This post may contain affiliate links.
In this article, we’ll teach you everything you need to know to build a campfire like a pro! We cover the best wood configuration for different situations, how to set up a campfire for cooking, ways to reduce campfire smoke, and more.
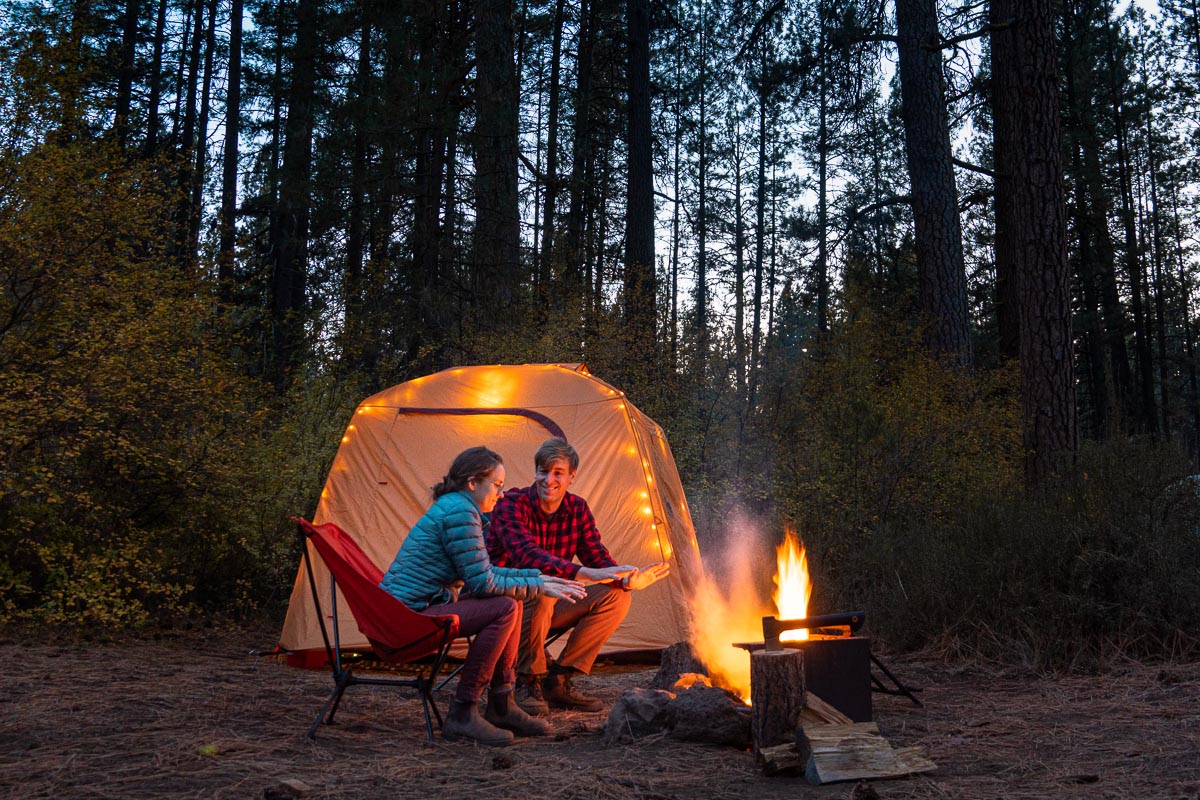
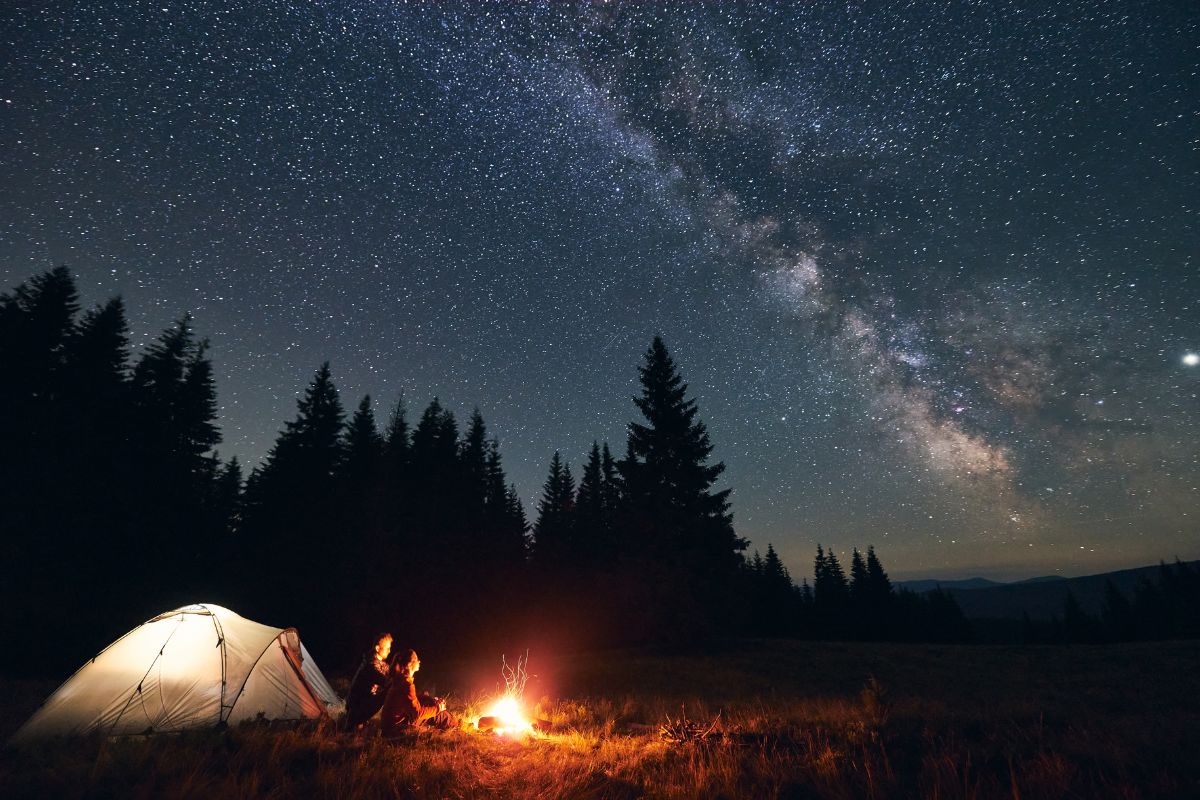
The radiating warmth, the flickering flames, and the cheerful crackle–nothing sets the mood like a cozy campfire. We love how campfires can really draw people together, whether it be for warmth, a hot meal, or just a sense of community.
If you’ve never built a campfire before, or want to improve your technique, we’ve got you covered. We’ll go over all the basics like: where to set up your campfire, what type of wood to use, how to configure it, and the best way to get it lit. We also talk about how to set your campfire up for cooking as well as how to reduce the amount of smoke your campfire emits.
So if you’re ready to take your campfire game to the next level, let’s dive right into it!
Check local restrictions
First things first: check if campfires are permitted in your area. Fire bans have become increasingly common, especially in the western part of the US and can be issued by either the state, county, or town. National parks, National Forests, and BLM land can also issue their own fire bans. If in doubt, call the local ranger station and they will be able tell you if there are any restrictions in place.
For backpackers, there can be even more restrictions about where and when you can have a campfire in the backcountry. For example, campfires can be restricted above certain elevations, near certain water sources, or even in certain geological features like canyons.
If information is not readily available online, find the specific agency that manages the area you will be traveling in (National Park, National Forest, etc) and call them to confirm where campfire are permitted.
Campfire Fire Safety
Countless wildfires are started every year by campers who don’t follow proper campfire safety. By following these simple steps you can drastically reduce the risk of your campfire getting out of control.
Only have campfires when and where permitted. This means only making a campfire when it’s 1) Allowed in the jurisdiction you are camping, and 2) In a proper location like a fire ring.
Always have water readily accessible. It only takes a few seconds for a fire to spread out of control, so you won’t have time to go fill up a bucket at the spigot down the way and come back. Make sure you have some way to extinguish the fire immediately on hand.
Never leave a campfire unattended. This should be obvious, but we’ve walked by plenty of campsites with nobody around and a campfire still blazing away. Somebody needs to be on-site and actively responsible for the fire at all times.
If it’s breezy, keep your campfire low (or skip it). Sparks and popping embers can be carried for miles by the wind under the right conditions. So if it’s breezy out, keep your flames low, or better yet–opt not to have one at all.
Before leaving or going to bed, extinguish your campfire completely. Hot embers buried under a thin layer of ash only need a strong gust of wind to reignite and kick back up. Be sure to drown your campfire with water before leaving it–it should be cool to the touch.
Where Build Your Campfire
Metal Fire Ring: At most established campgrounds, each campsite will come with a metal fire ring. Not only is this the safest and most convenient place to build a campfire, but when it’s available it is also the only place you are allowed to build a fire. There are many different styles, some better than others, but all of them are vastly superior to self-built fire rings.
Use a preexisting self-built fire ring: If you are dispersed camping (either boondocking or backcountry backpacking) and fires are permitted in your area, you should first check to see if there are any preexisting self-built fire rings nearby. The heat from campfires scars the earth, damages the soil, and can prevent future growth, so it is preferable to use an old campfire ring if possible. Even if that means fixing one up a little bit.
Build your own fire ring: If fires are permitted in your area, there is no existing fire ring nearby, and you’re allowed to do so, you can make your own.
1.) Find a good location: Someplace relatively sheltered from the wind, on a hard surface like compacted dirt, gravel, or sand (never on vegetation), and not directly underneath overhanging vegetation like trees or under rock outcroppings where soot will leave a mark.
2.) Clear a space about 5 feet in diameter, removing all dry and flammable materials. Collect rocks from the surrounding area and build a small wall about 6-8 inches tall in a circle around your cleared space. The purpose of the rock wall is to keep the wind out as well as the fire contained within.
Different types of wood for building campfires
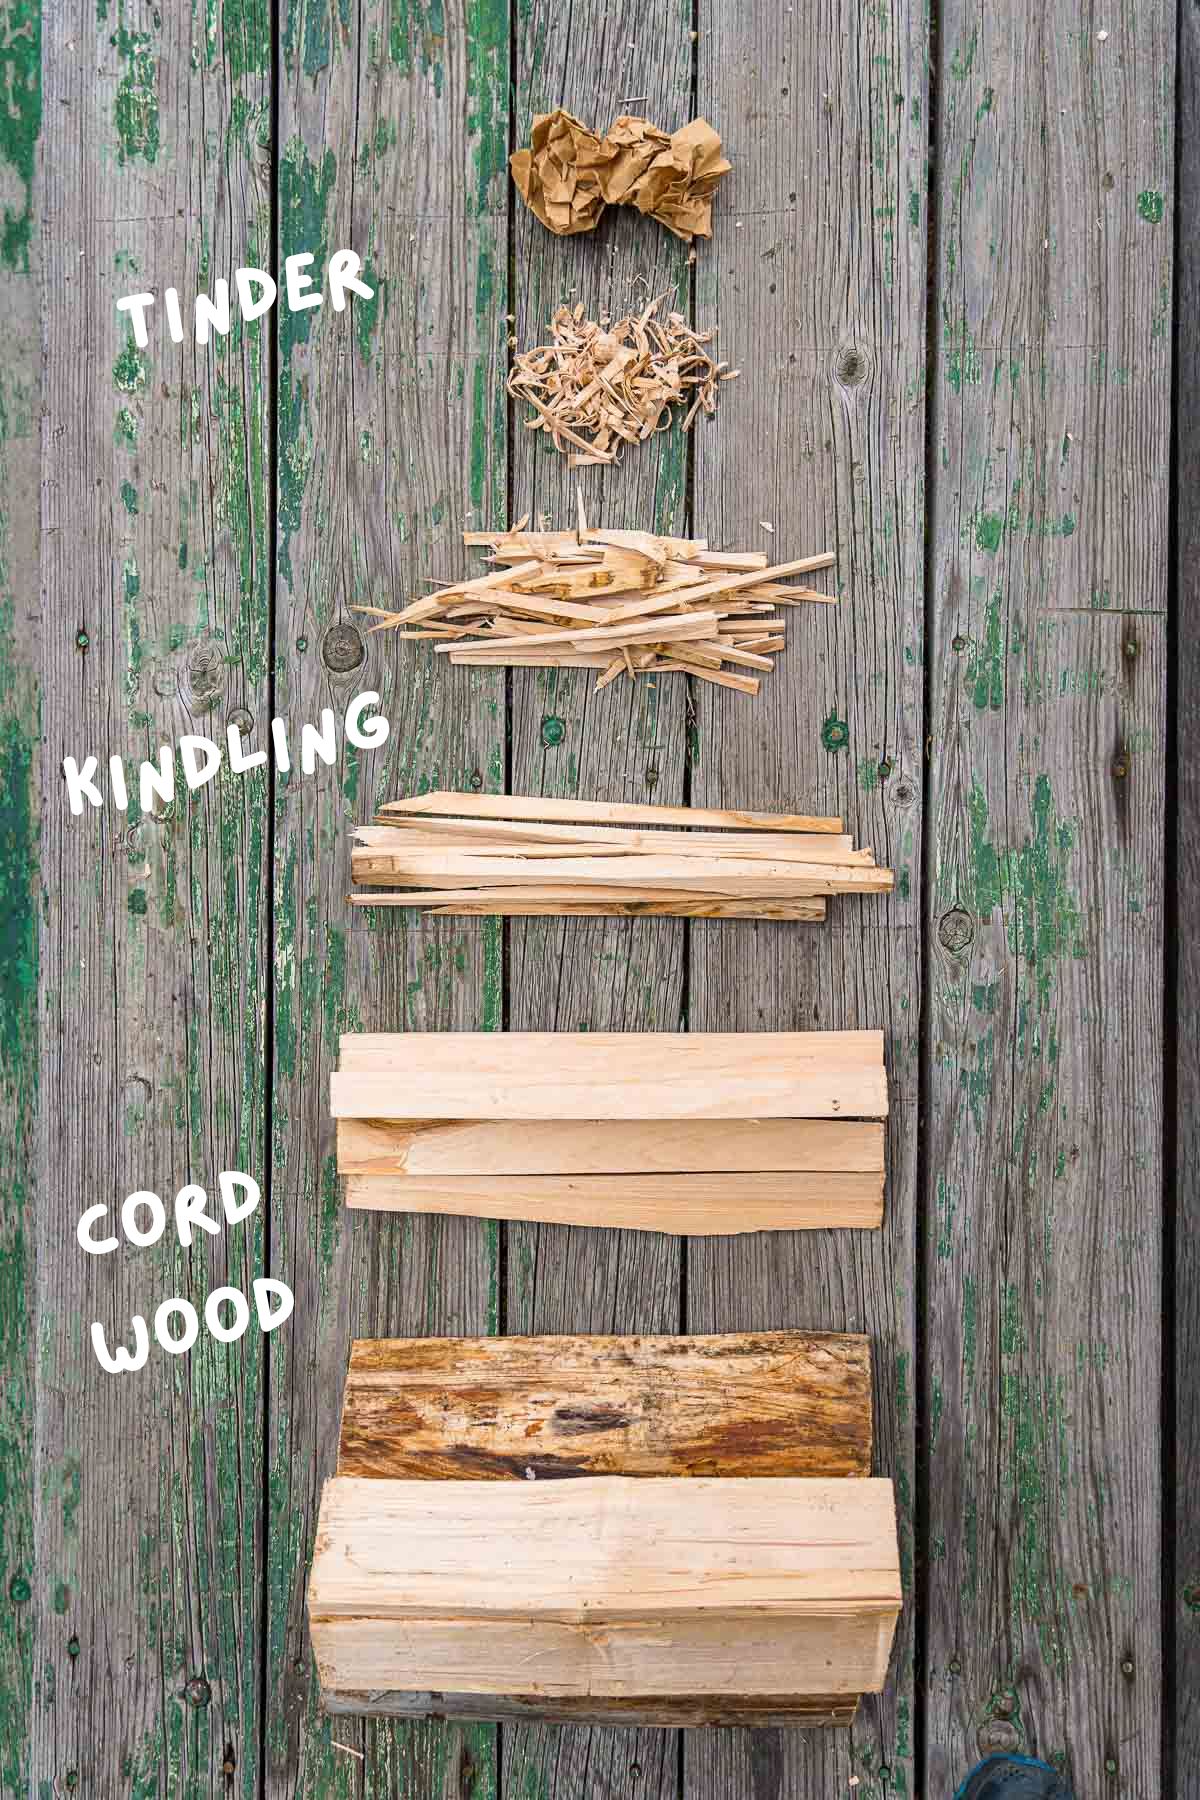
In order to make a campfire you will need three different main types of wood: tinder, kindling, and firewood (aka cord wood). The goal is to allow the fire to progressively build up heat, allowing it to burn increasingly larger pieces of wood.
Tinder
The smallest and most combustable material, tinder is something that should be able to easily catch fire with a single match or spark. Ensure your tinder is extremely dry.
Good examples of different types of tinder:
- Torn up pieces of untreated paper (newspaper, grocery bag, etc)
- Torn strips of untreated cardboard
- Wood chips, shavings, sawdust
- Dryer lint
- Very dry grasses, leaves (aka forest duff)
- Commercial fire starters, sticks, or bricks
Tinder can often be gathered from around your campsite, however if it has recently rained or if the particular campground you are staying at prohibits wood gathering, you may need to bring/make your own.
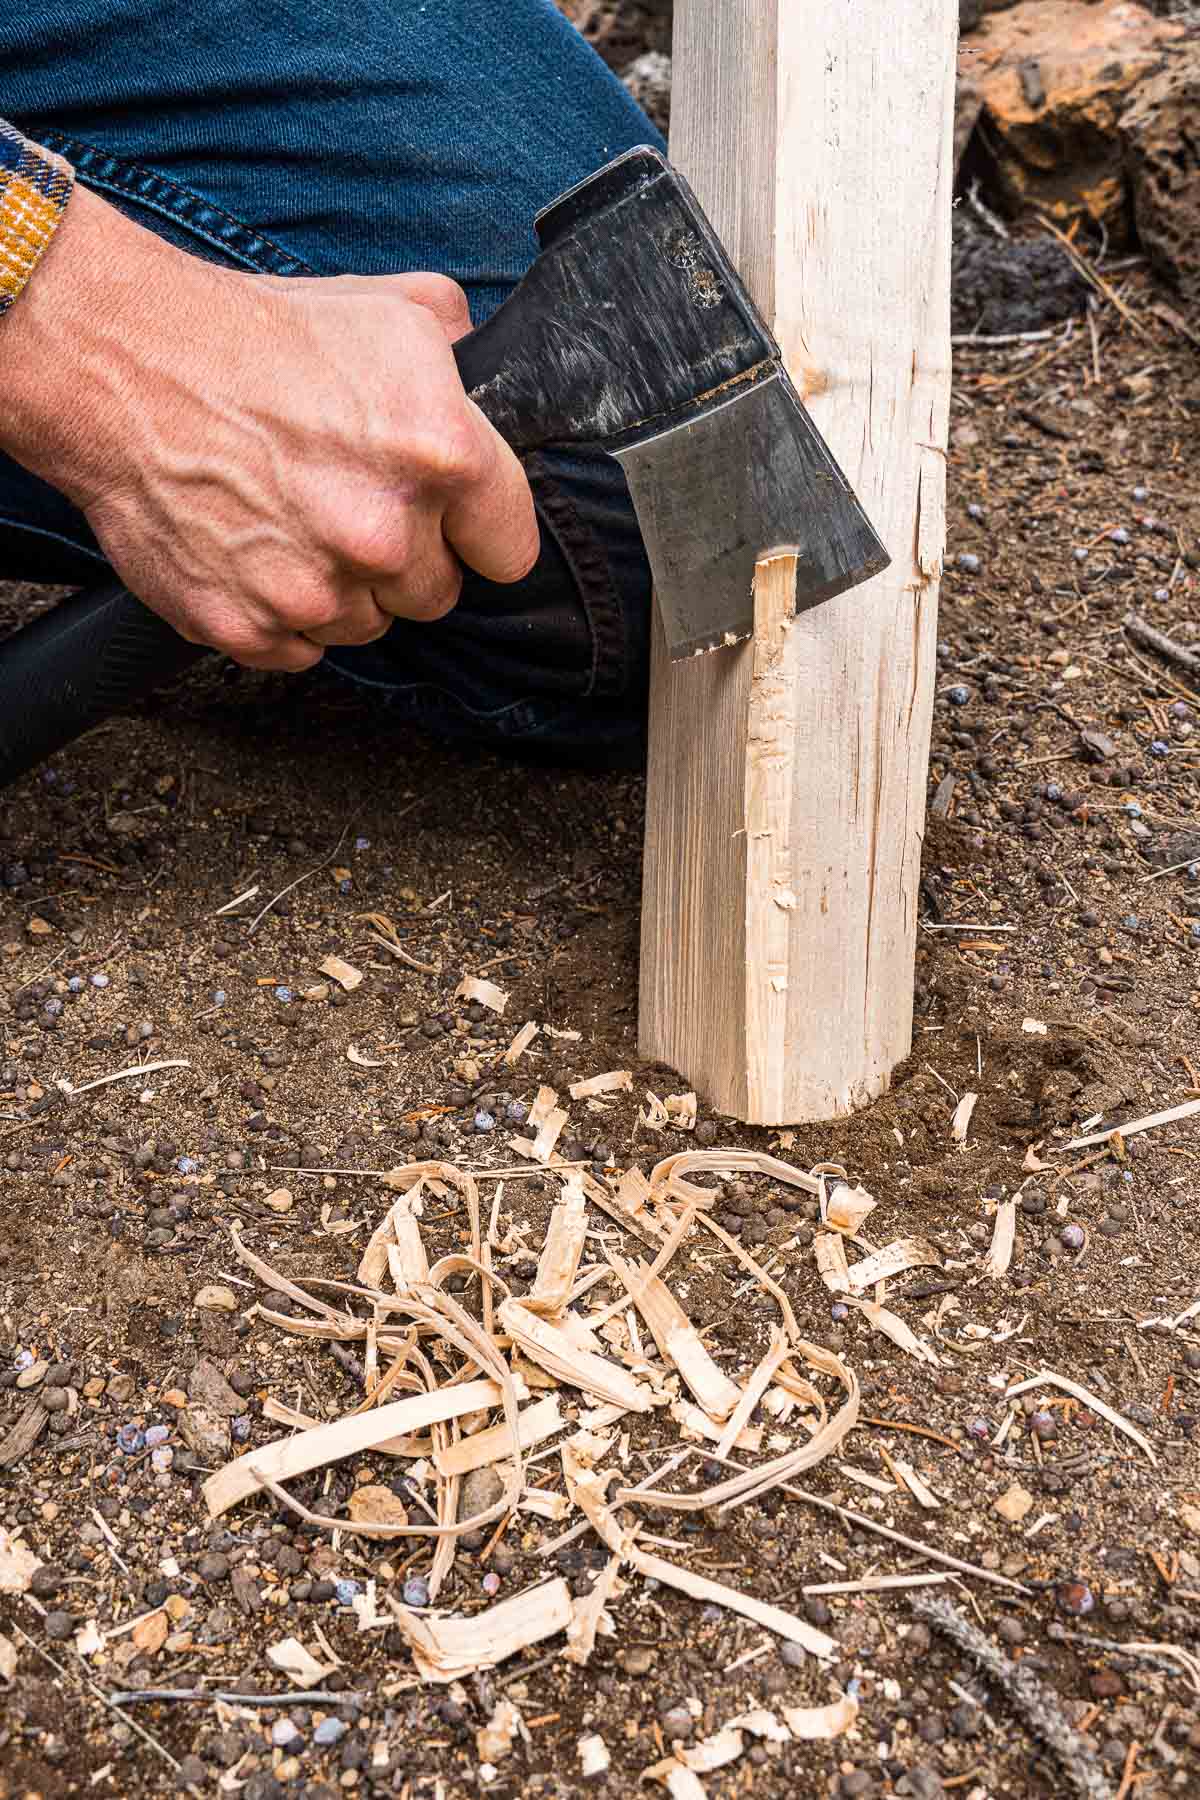
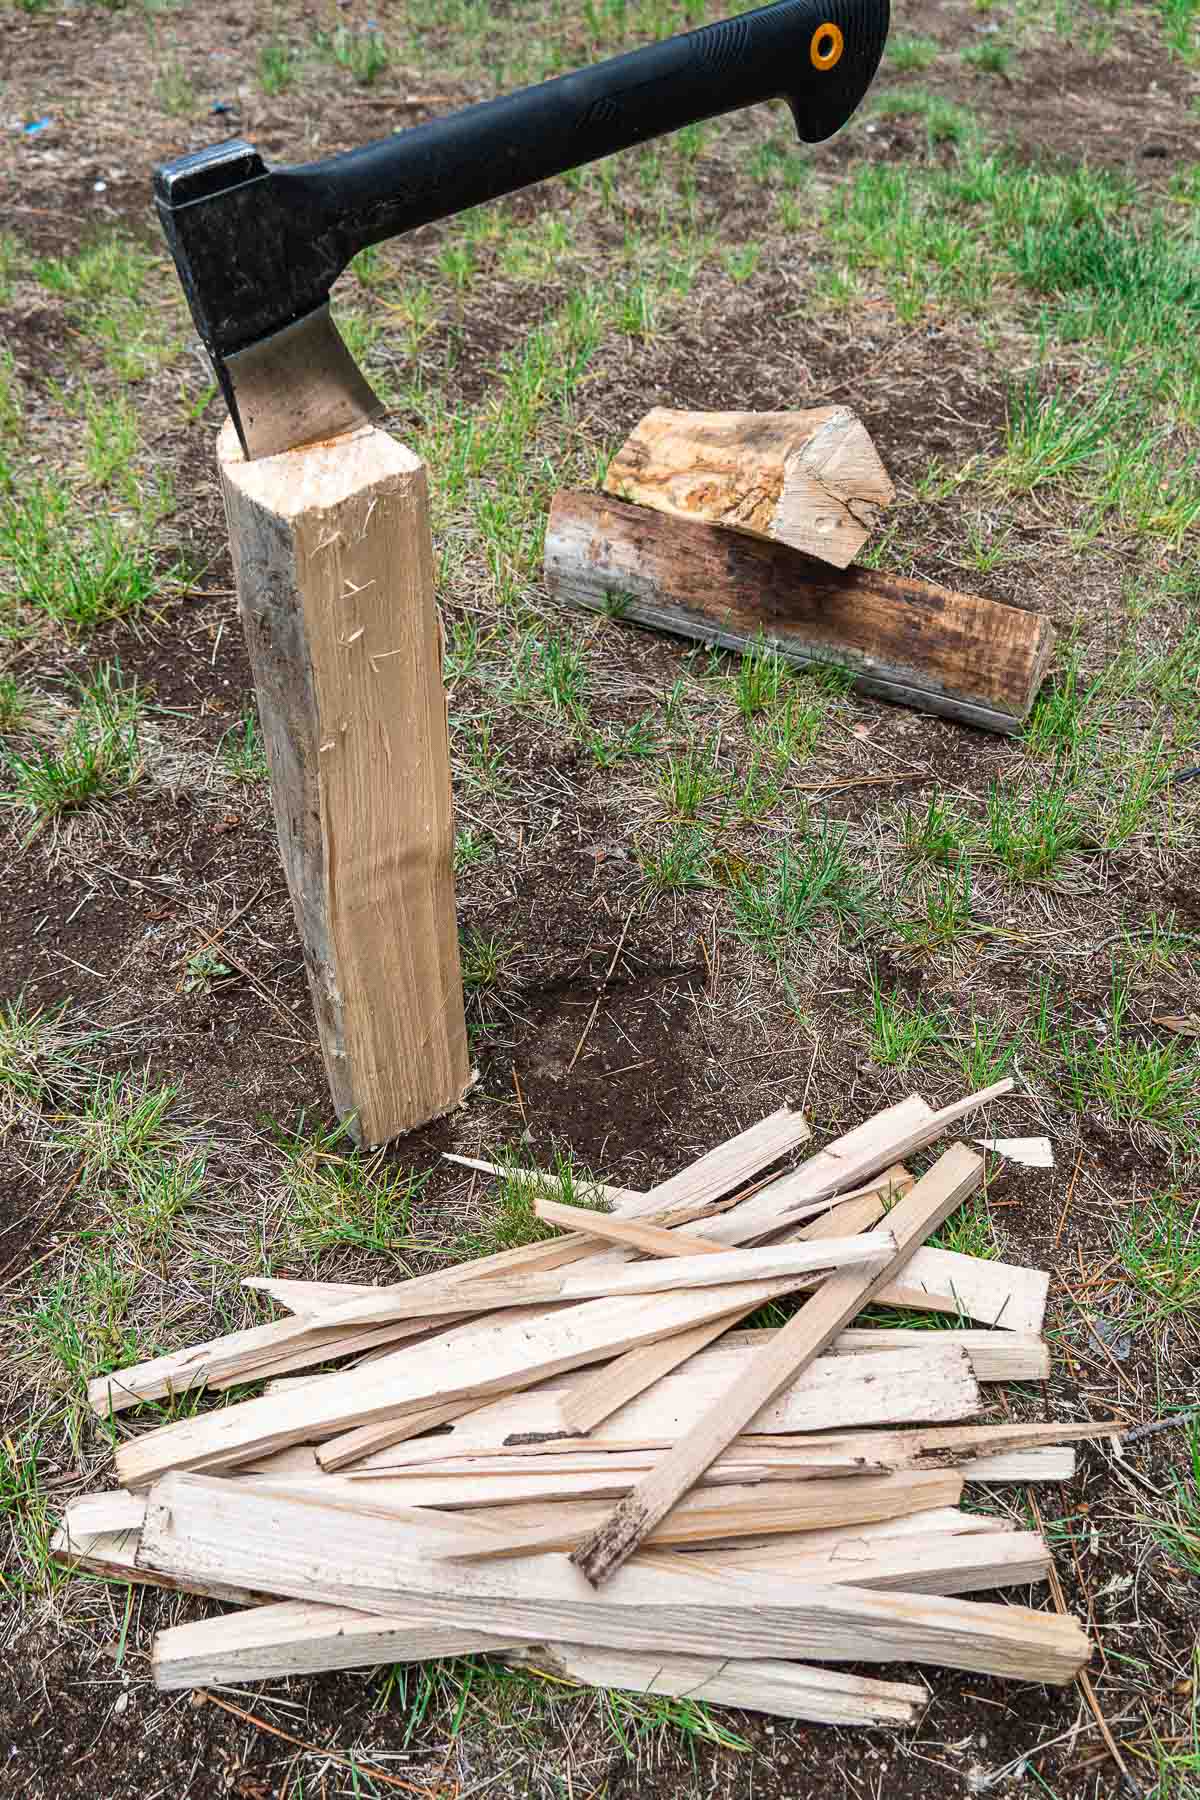
Pro Tip: You can make your own tinder by “shaving” small splinters from the cord wood by making short tapping strikes with a hatchet. Continue this process until you have a small amount of thinly shaved wood slices.
Kindling
Larger than tinder but smaller than firewood, kindling is a broad category that includes things as small as sticks and twigs and as large as thinly split pieces of firewood. You will want to have a good amount of both “small kindling” and “larger kindling” on hand when building your campfire.
You want your fire to be able to easily transition from your tinder to your small kindling, then onwards to your larger kindling. By increasing slowly increasing the size of the wood, you allow the fire to progress quickly and easily.
The most common reasons for a campfire burning out shortly after being started is from not using enough kindling. You need a lot of kindling in order to build up enough heat to start burning full sized firewood.
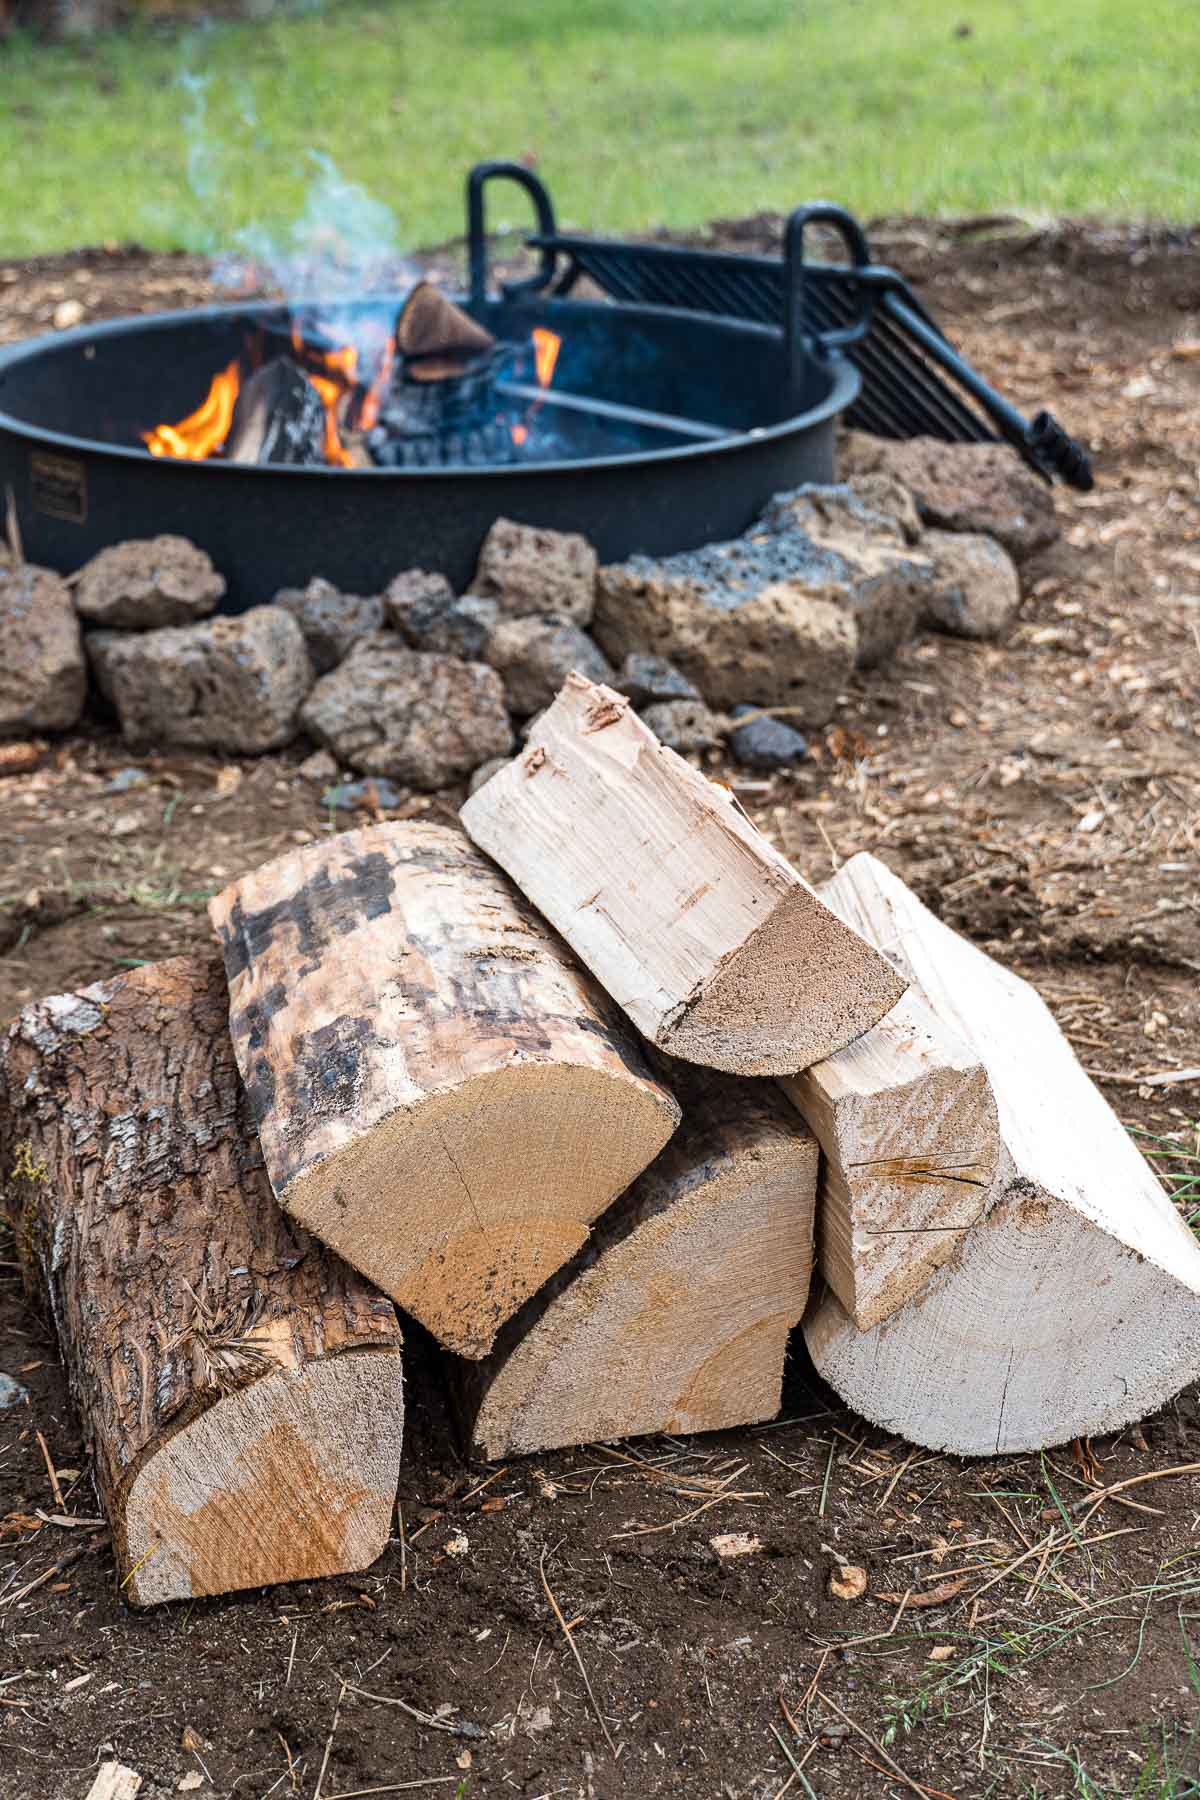
Firewood (or cord wood)
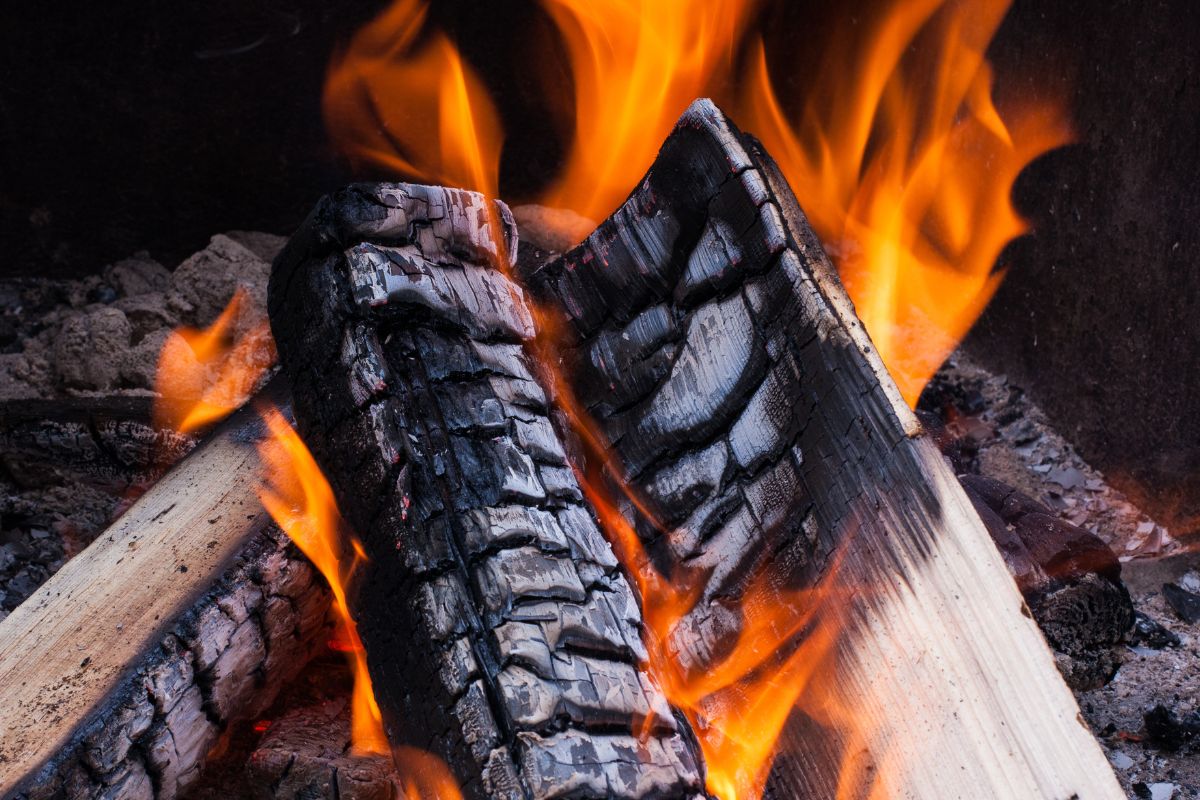
Once your campfire is established, firewood will be the bulk fuel you use to keep it burning. Firewood, also called cord wood, is typically 16” in length and can either be split or whole logs. Smaller pieces of firewood are easier to catch but will burn quickly. Larger wood will be more difficult to catch initially but will burn for longer once they do.
Tree bark has evolved to be fire-resistant (to an extent), with some being more fire resistant than others. Regardless, it’s recommend you split your firewood and place the cut-side towards the fire (bark-side out) to allow it to catch fire more easily.
As with the rest of the fuel, it’s important that your firewood is dry. While you might not have much of a choice about the type of firewood that can be gathered in the area or is available for sale, there are a few different types of wood that are better for fires than others.
Hardwoods are the best kind of wood for a campfire and will burn longer and hotter than softwoods. Some of the best firewood you can burn are oak, maple, beech, alder, poplar, fruit tree wood, etc.
However, the most commonly sold firewood at campgrounds is typically softwood, like pine. So long as it’s are properly dried, soft wood can make a good campfire. It will just burn faster and will give off a little more smoke than hardwood.
Different Ways To Build A Campfire
There are many different ways to build a campfire. While there isn’t a right or wrong way per so, some methods do work better than others. (We certainly have our own personal preference!) Each of the methods described below will work–it’s just a matter of which style works best for you.
Pro Tip: The secret to a “one match campfire” comes down to the prep work. Use enough tinder and enough kindling, have enough size gradation, and arrange the wood properly. Get lazy on the prep work and you’ll be down on your hands and knees blowing to get a smoky smoldering fire to catch. Remember the 5 Ps: Proper Preparation Prevents Poor Performance.
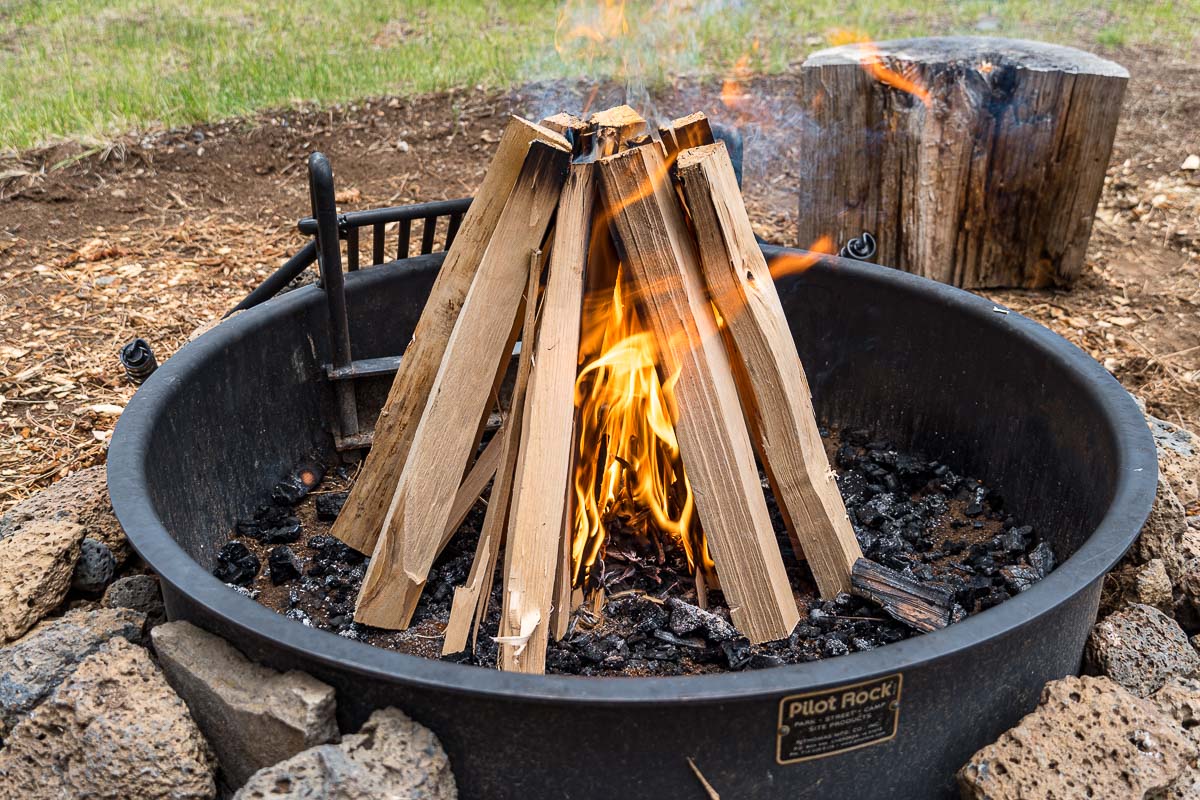
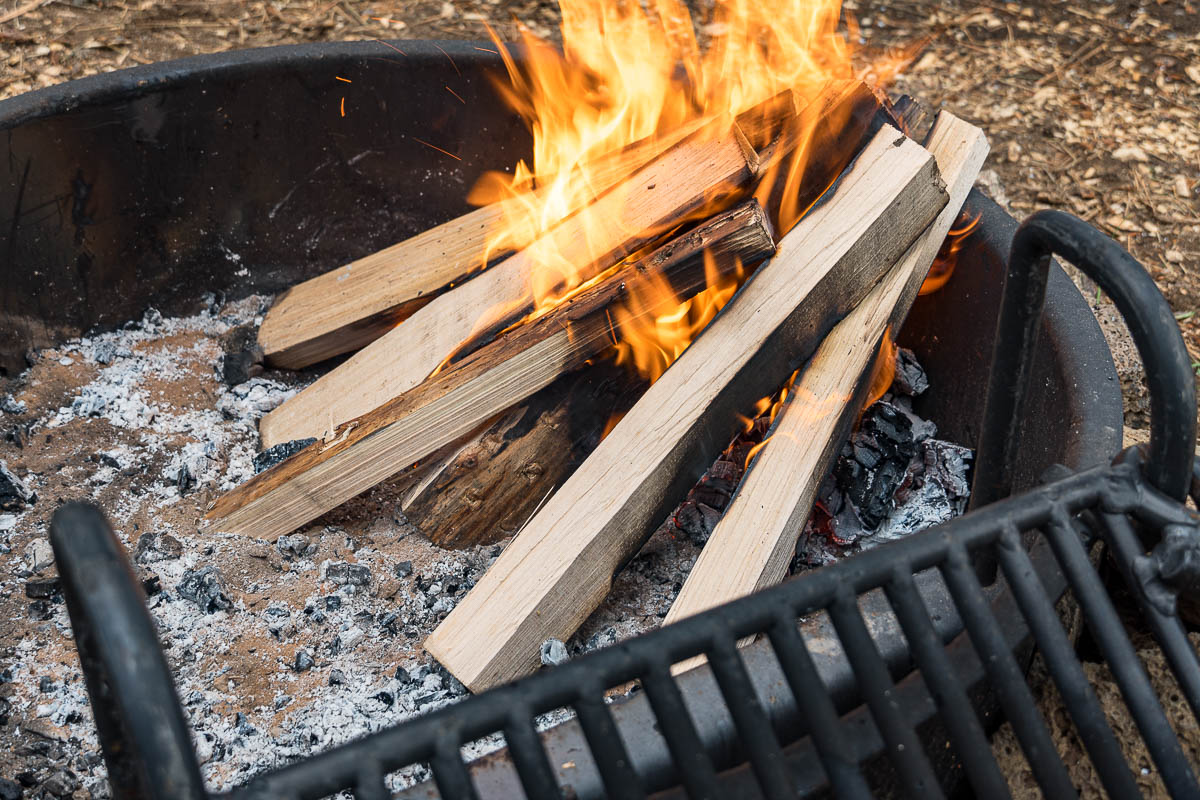
1.) Teepee (our personal favorite)
When we make a campfire, 9 out 10 times we use the Teepee method. It’s very effective, easy to light, and rapidly generates a strong fire. It’s also relatively fool-proof.
Start by making a small mount of tinder in the center of your fire pit. Using the smallest pieces of kindling you have, lean them against each other to make a small teepee over the mound. Make sure to leave an empty space so you can access the tinder with your match or lighter. Then, with larger pieces of kindling, make another teepee around the first teepee, like nesting dolls. Finally, make one last teepee around the other two using small sized pieces of firewood.
Ignite the tinder on the inside. As the fire grows, the innermost teepees will start to collapse into the center, creating a good bed of hot embers to maintain the burn. Eventually the whole teepee will collapse, or you can knock it over once the the fire is well established, to create a broad heat profile.
Pro: Effective use of wood, very easy to light, lots of ground level airflow, naturally protected from the wind, fire grows very rapidly.
Con: Throws up a tall flame initially, so it’s not great on windy days. It will also require a little maintenance, as the teepee will collapse at some point and need to be rearranged.
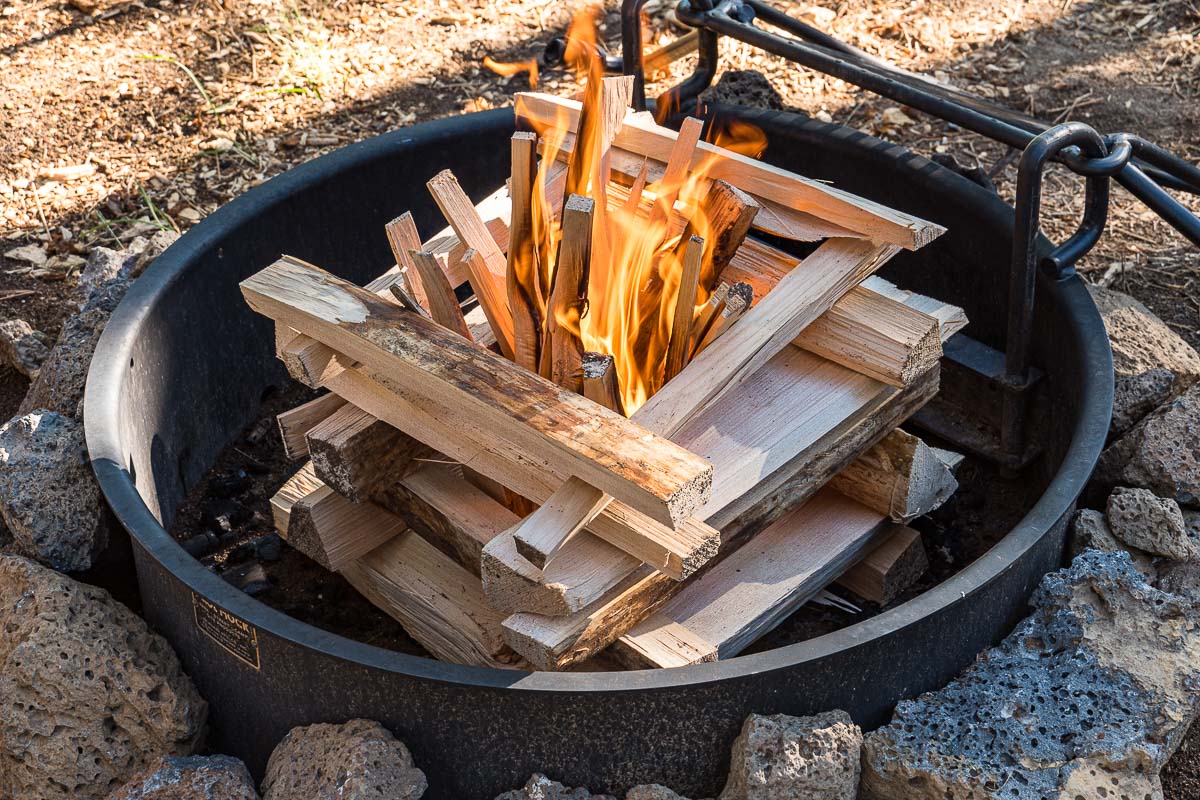
2.) Log Cabin
The Log Cabin campfire method is designed to create a large, low maintenance fire that will generate a broad, even layer of embers over which to cook over.
Place two pieces of wood parallel to each other, then place another pair perpendicular on top. Continue this pattern until you have build a log cabin about 3-4 log layers high. On the inside of the log cabin, place the tinder and a lot of kindling, and ignite.
Pro: Large, broad fire that needs little maintenance once the firewood catches.
Con: Can be awkward to light, the fire sometimes has a hard time making the jump from kindling to the larger firewood walls, requires a lot of wood to be committed all at once.
3.) Platform
Similar to the log cabin method mentioned above, this method uses even more wood to create a broad fire.
Start with by layering a row of medium sized pieces of fire wood on the bottom of the fire ring. Then layer a row of smaller pieces of firewood on top in the opposite direction. Continue this progression of alternating direction and decreasing the size of the wood, until you reach the tinder level (about 4-5 levels high). On the top stack a decent amount of tinder and some very small kindling and light.
As the first burns, ash and embers should drop down, igniting the layers beneath it.
Pro: This method creates a broad, hot fire and the amount of wood used gives this fire some serious staying power, once established it needs little maintenance.
Con: The top is very exposed to any wind and may not remain lit, heat naturally wants to travel up so sometimes the fire doesn’t burn down into the lower layers well, it can be a very slow progressing fire.
4.) Lean-To
This method is also very similar to the Teetee method, except instead of building a free-standing structure, the Lean-To method uses the side of the fire ring for support. This is really just a way to get a fire started, after it is established and lean-to fire should be repositioned to the center of the fire ring.
Pros: The main advantages of using the lean-to method is the increased wind protection it initially offers.
Cons: Only works with high-sided fire rings. Once the fire is well-established it will need to be knocked over and relocated to the center of the fire ring.
5.) Swedish Fire Log
This is sort of a specialty campfire technique that has a few advantages. Popularized by the Swedish army during the Thirty Years War, this type of campfire requires just a single log and can be made even when the ground is wet or covered in snow.
There are a lot of different ways to make a Swedish Fire Log, and we have an entire guide that outlines each method and provides step-by-step instructions. While this type of fire is often made from a single larger log, there is a way to get the same effect by strapping smaller, split logs together.
Pros: Good for when the ground is wet or covered in snow, the concentrated flame and flat cooking surface can be very useful for boiling water.
Cons: Requires some additional equipment and a fair amount of prep work to get ready.
How to start a campfire
There are plenty of different ways to start a campfire, but some methods are definitely MUCH better than others.
Spark
The most rudimentary way to start a fire is with a spark. There are a lot of brands that sell strike sticks, which will allow you to produce a cascade of sparks by striking a piece of metal against a flint rod. While this method might be useful to practice for a survival situation, it requires some skill and can be more hassle than it’s worth when you’re at a campground.
Matches
You can use a book of matches or wooden matchsticks to light a fire, however, they can get ruined if wet and will struggle in breezy conditions. We carry them as a backup, but they are not our go-to. A better alternative would be waterproof, wind-resistant survival matches.
Lighter
The ubiquitous Bic lighter can be a very effective way to light a fire. Due to its lightweight and water resistance, we always take a Bic lighter with us on backpacking trips. But at a campground, a long-necked BBQ butane lighter is even better at getting into hard-to-reach tinder.
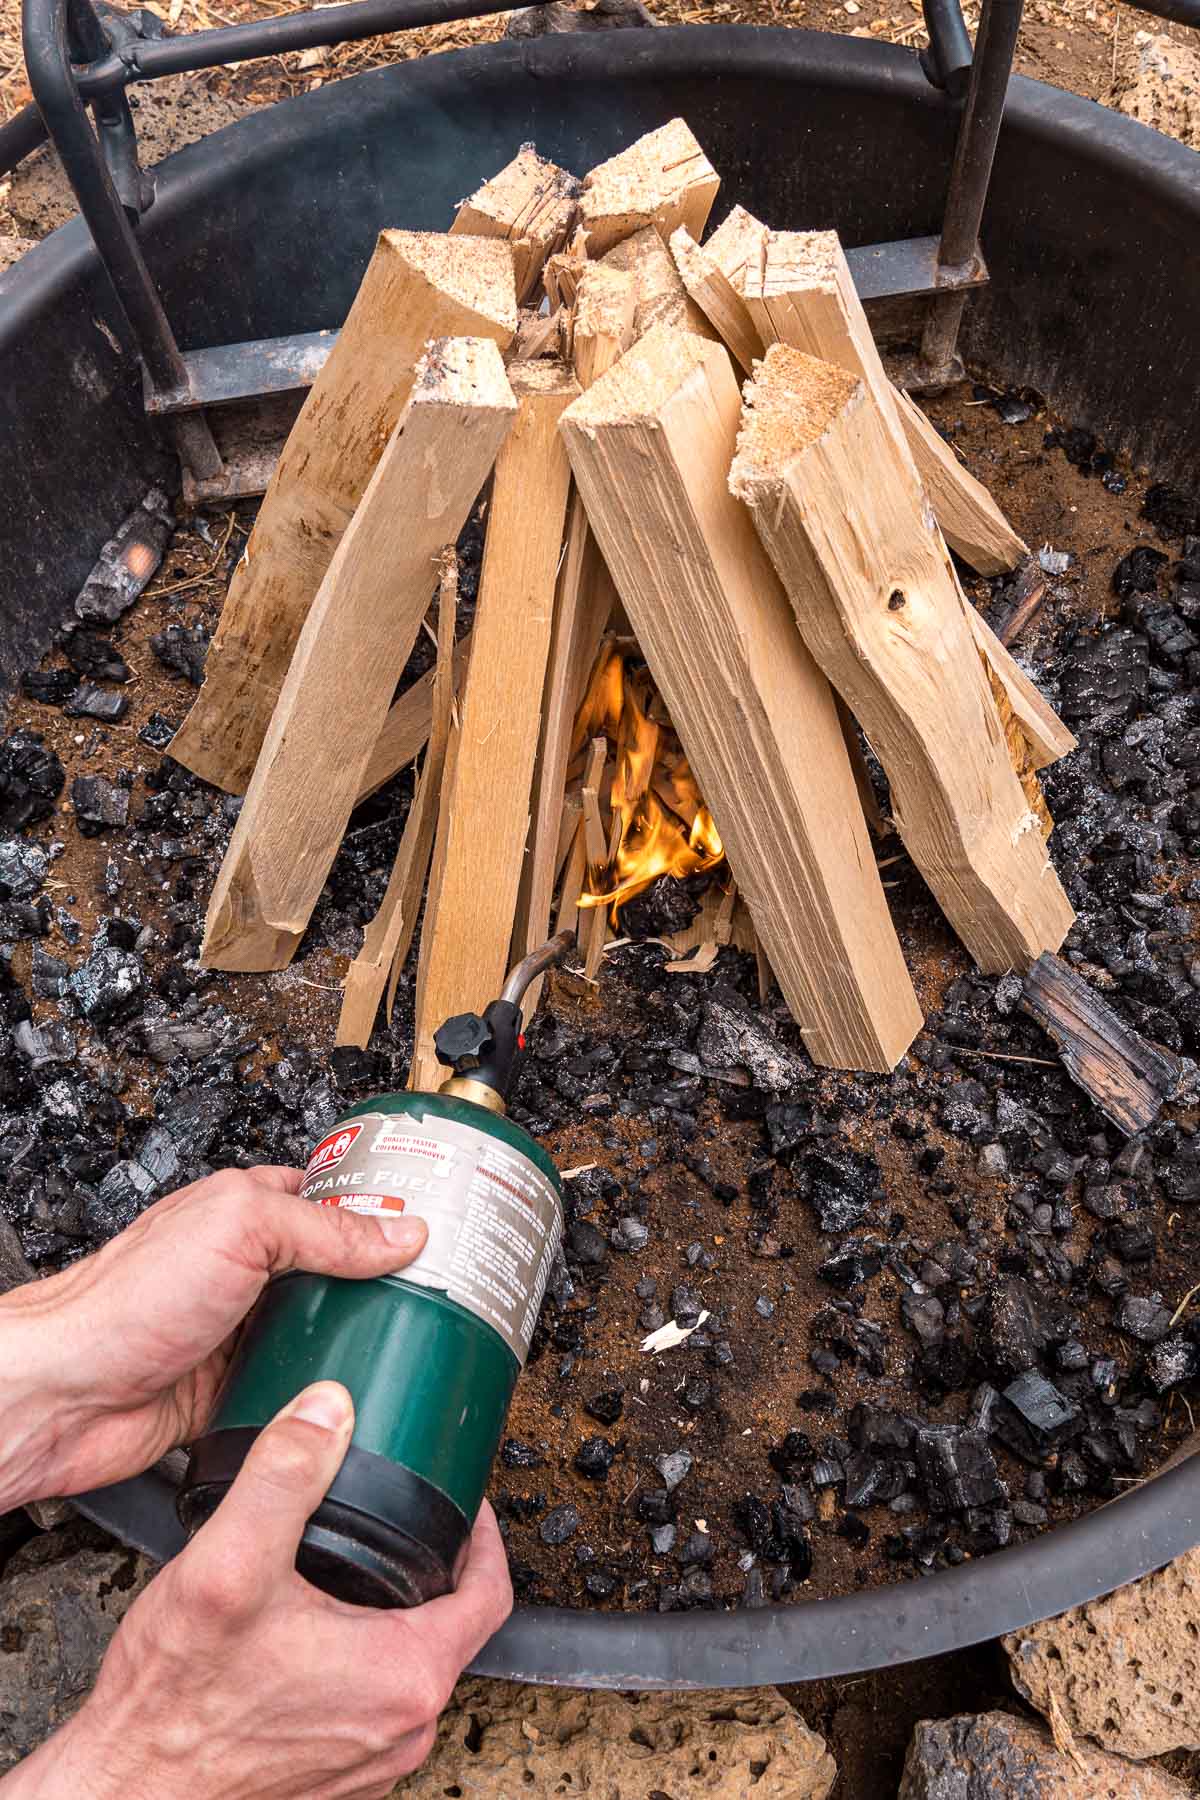
Torch
If you are using a propane camp stove, it might be a good idea to pick up a small torch attachment to screw onto the top of one of the fuel canisters. This is our preferred method of lighting a campfire. Even if the wood is slightly damp or it’s a little breezy, you will be able to power through with the extra heat given off by the torch.
How To Start A Campfire When It’s Wet Outside
When it’s cold and damp out, there’s nothing that sounds as enticing as a warm and cozy campfire! The only trouble is that lighting a fire when the wood and ground is wet is notoriously difficult. We’ve endured plenty of smoky, smoldering fires to know!
Seek out dry tinder/kindling: Look under trees, picnic tables, or even under logs to find dry fire starting material. It is also a good idea to have packed some dry tinder with you.
Split wood and kindling: Even if a piece of firewood is wet on the outside, it is likely dry on the inside. Use a hatchet to split your wood (and keep splitting it) to access the drier parts of the wood. Additionally, smaller pieces of wood burn easier, so you might want to spend some extra time splitting.
Get rid of the bark: Bark is not only fire resistant to begin with, but it holds onto a lot of extra moisture. Peeling, stripping, or shaving away the bark with make the wood easier to catch.
Tall fire configuration: When the ground is wet, the best thing you can do is get the fire up and off it. The Teepee Method is great at allowing the natural updraft of the fire to carrying the flames upwards. The Swedish Fire log is also a good way to get the fire up and off the wet ground.
Pay attention to the wind direction: This is true for any fire, but when things are wet you want every advantage. Light your fire from the windward direction, so that the wind blows the flame onto the rest of the wood.
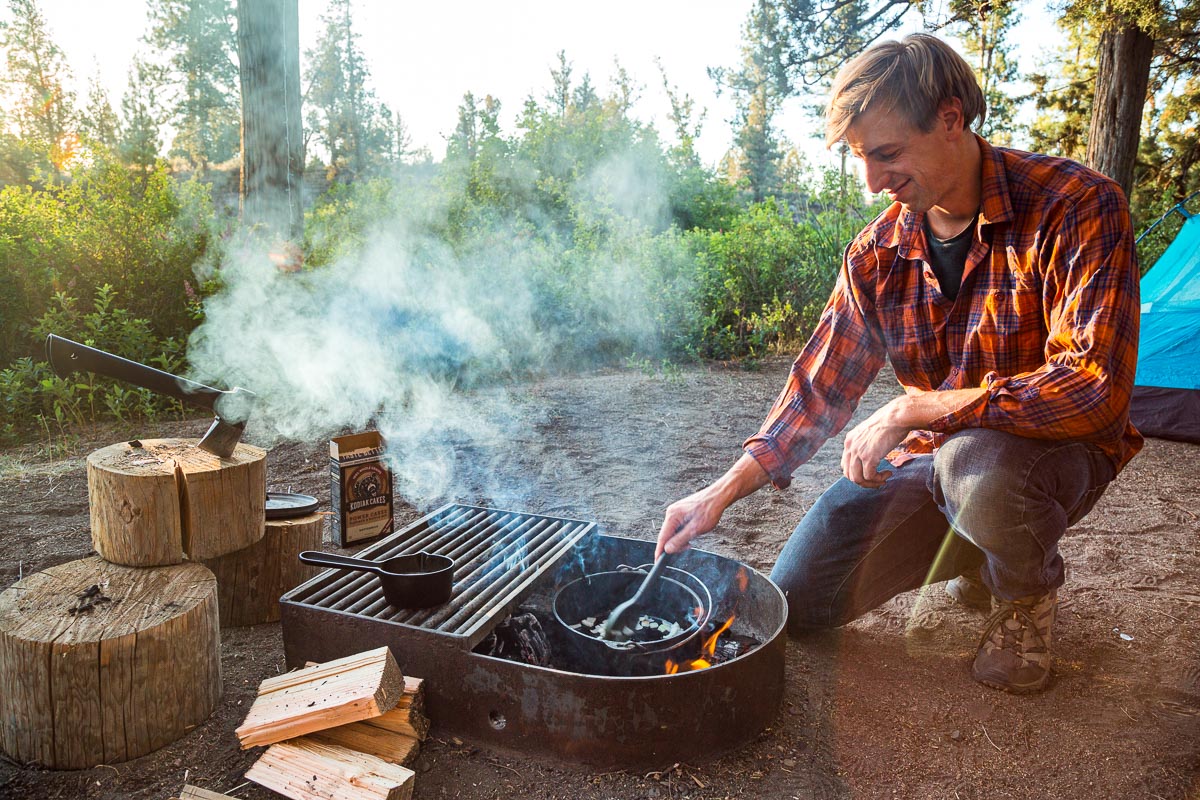
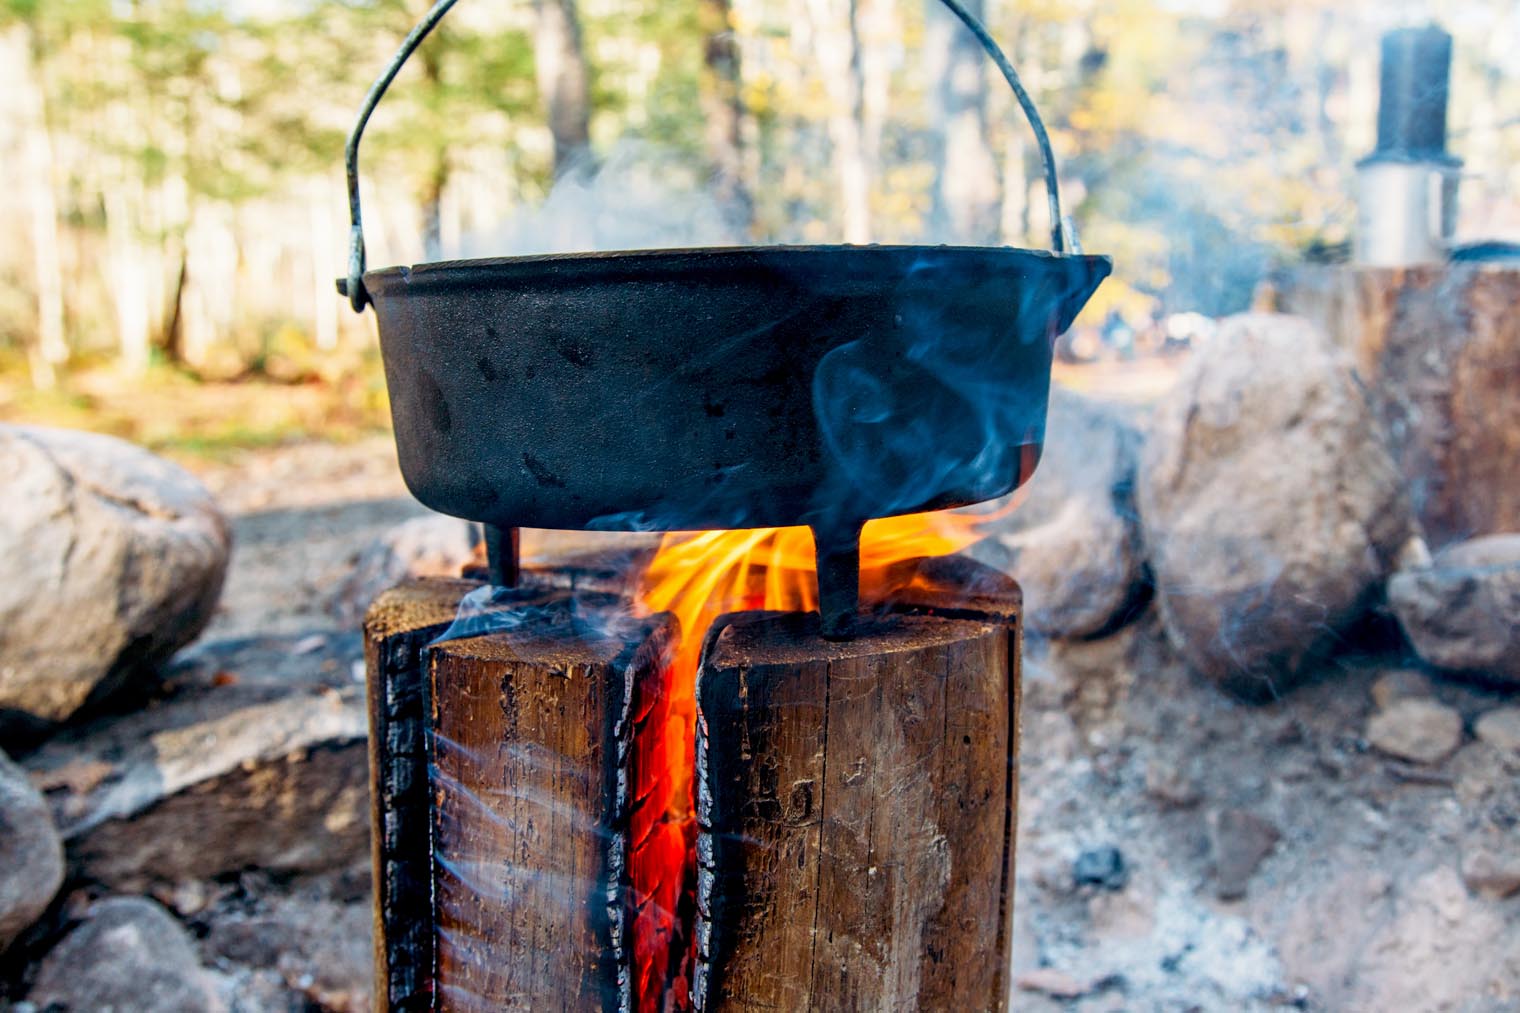
Best campfire for cooking
Cooking over a campfire can be one of the most memorable experiences of any camping trip. But there are a couple of important steps to follow to set your campfire up for cooking vs ambiance.
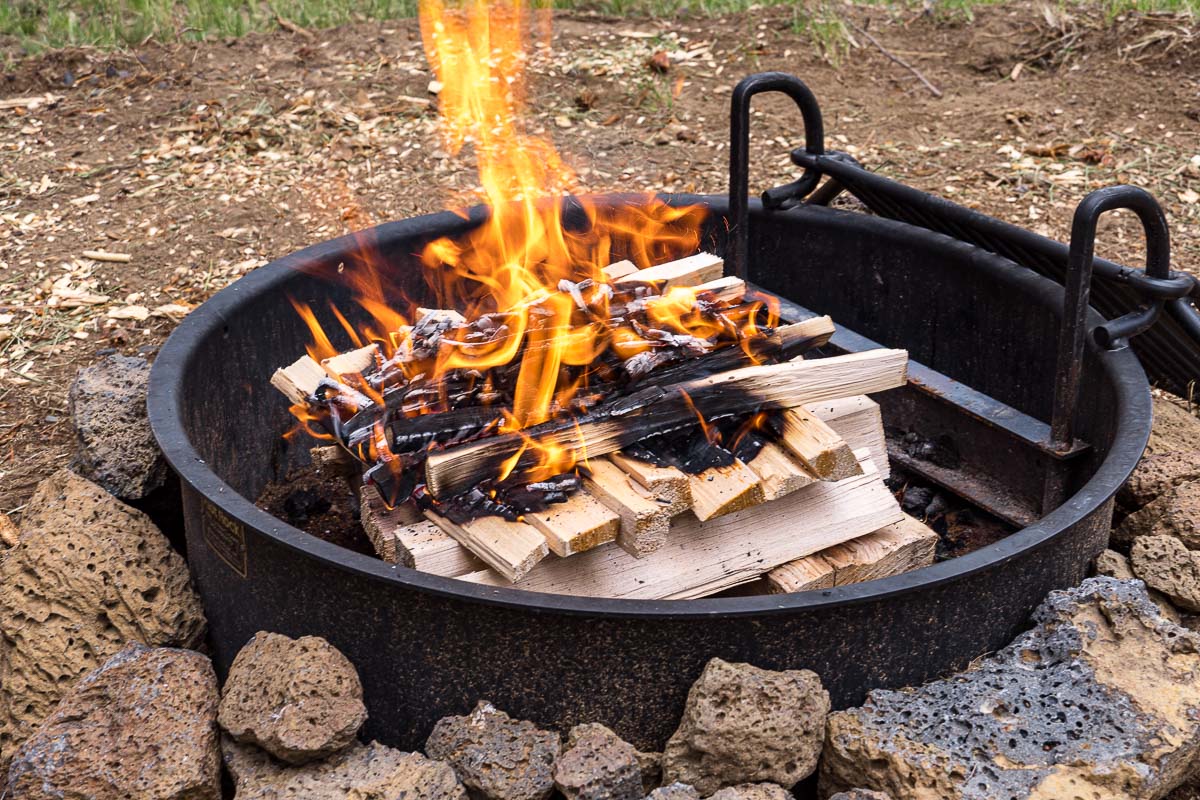
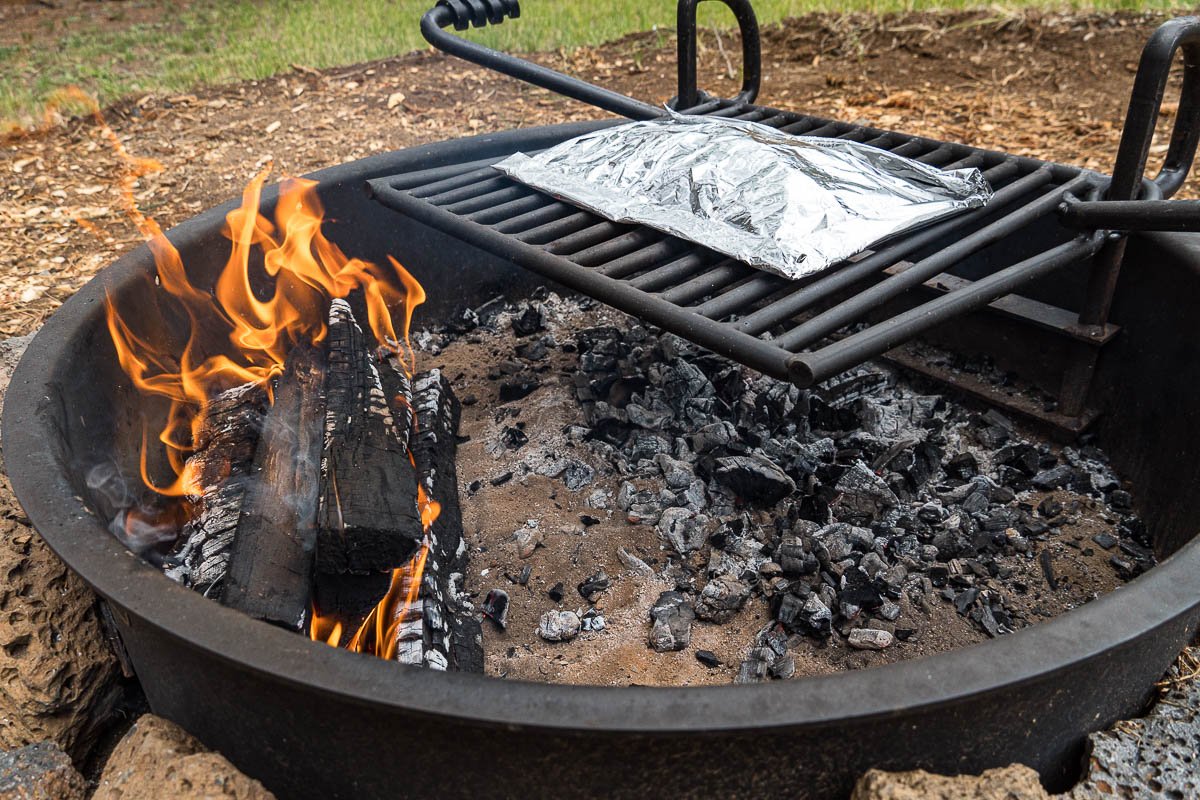
While some cooking methods can theoretically be done over an open flame (like foil packets and pie irons) it is vastly preferable to cook over a bed of hot embers instead.
Open flames create a very inconsistent heat profile, kick up a lot of soot and smoke, and are prone to flare-ups. Hot embers, on the other hand, produce a strong, consistent heat profile with virtually zero smoke, making them perfect for all types of campfire cooking.
In order to build up a bed of hot embers to cook over, you will need a decent amount of wood and about 45-60 minutes just to get the fire ready. So plan ahead!
How to Step Up A Campfire for Cooking – Step by Step
- Get a strong, hot fire going that is capable of burning multiple full size logs. Keep the fire going until the logs start to break apart and turn into embers. This will likely take upwards of an hour.
- Push the burning logs to one side of your fire ring. Using a metal shovel or long stick, rake the hot embers to the other side of the fire ring.
- The side with the hot embers will be your cook side, the side with the burning logs will be your “ember factory”. Hot embers will not last forever, and will need to be replenished regularly.
- Keep those logs on the side burning, adding new appropriately sized wood as needed. As the embers start to cool off, rake new embers over from your ember factory onto the cooking side.
Okay okay, that’s great and all, but sometimes you loose track of time. Or don’t want to waste a ton of money buying firewood from the camp host at $6 a bundle. What then?
The best solution we have found for rapidly developing a bed of embers is to actually add some charcoal to your fire shortly after you have it going. Either hardwood lump charcoal or briquets will work great. Since charcoal is designed to catch easily and burn hot and long without much smoke, it can be a perfect way to quickly simulate a hot bed of embers.
By using store-bough charcoal you’ll be about to start cooking in 20-25 minutes vs 45-60 minutes if you tried using just wood embers. You will also use a lot less wood to maintain your ability to cook.
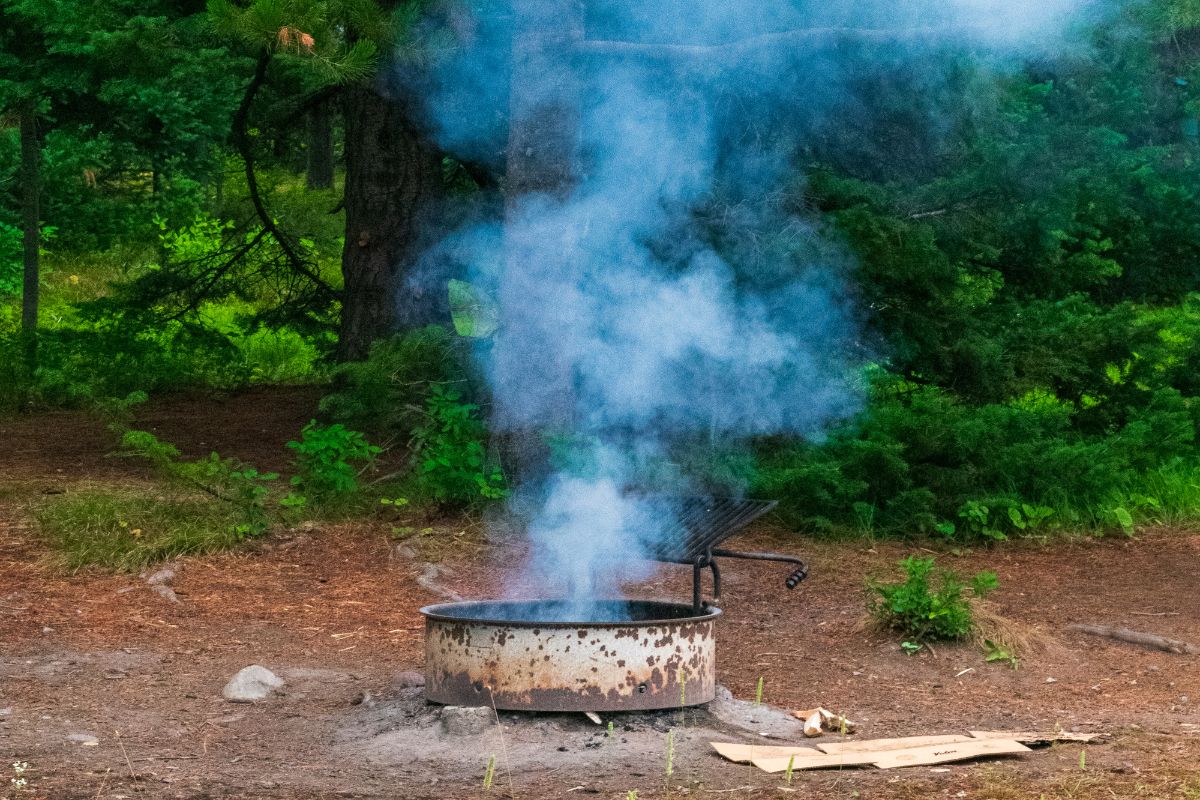
How to reduce campfire smoke
Campfire smoke can be super annoying. It can get in your eyes, cling to your clothes for weeks, and be pretty rough on your lungs. Thankfully there are some ways to help to reduce smoke from your campfire.
Pay attention to wind direction: Make sure you arrange your camp seating upwind of the fire. It’s unlikely you will be able to seat people in a complete circle around the fire unless the wind is dead calm.
Burn dry hardwood: Properly dried hardwood produces the least amount of smoke. Supplementing with charcoal also helps reduce the amount of smoke. Avoid pine cones, bark, leaves, wet or sappy wood, creosote bush, etc.
Keep the heat high: Campfires will start to smoke and smolder when there is insufficient heat to burn the type or size of wood it is being fed. This is why smoking often occurs when the fire transitions from burning kindling to burning full-sized logs. Keep the fire burning strong and hot until you work up a good layer of red-hot embers to sustain the heat.
Consider a smokeless stove: We recently started using a Solo Stove and it has been an absolute game changer. There are a lot of fire rings on the market that claim to be smokeless, but the Solo Stove is the best we have used yet! We absolutely love it and use it both on camping trips and in the backyard.
Best campfire accessories
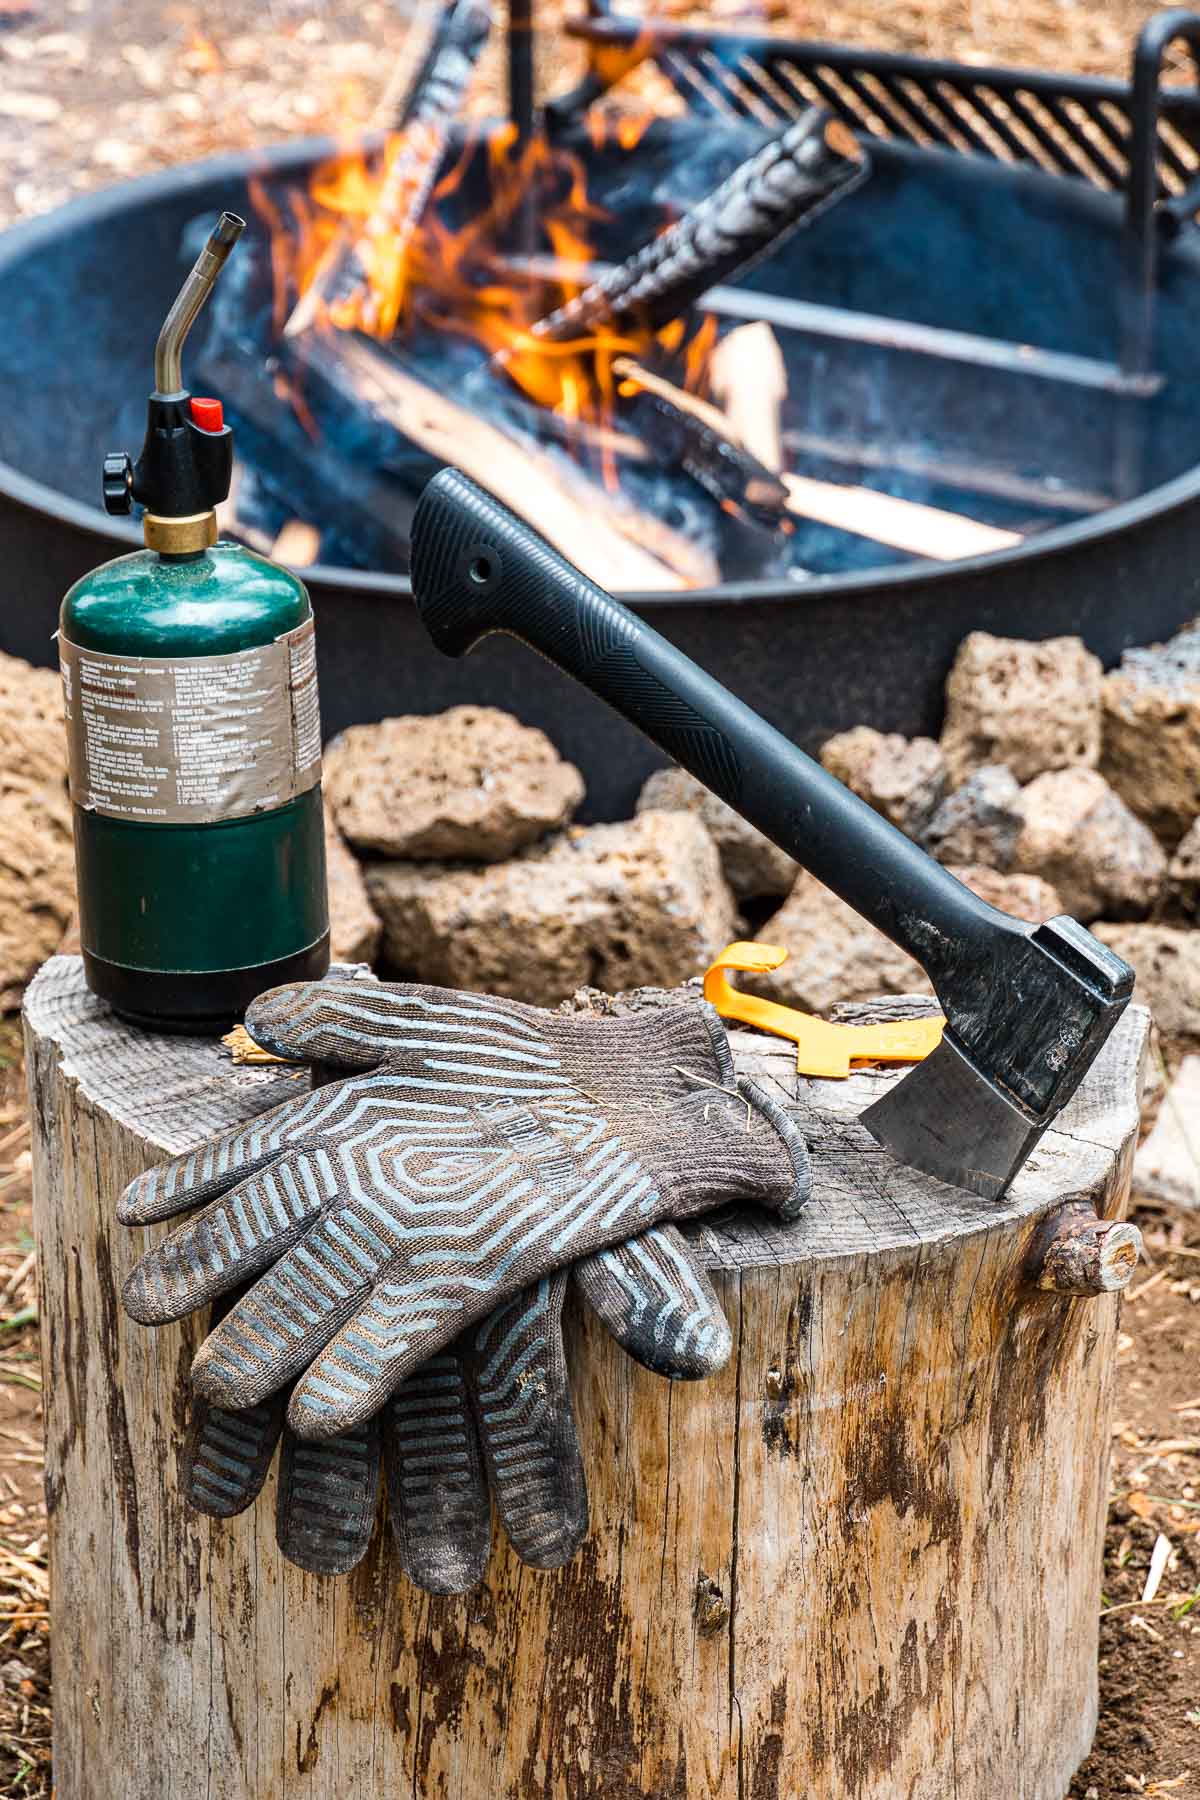
You don’t need much to have a campfire, but here are a few of our favorite campfire accessories that make the experience a little easier.
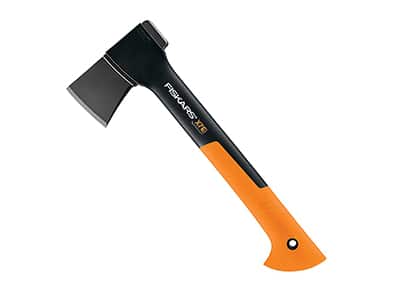
Hatchet: This is an absolute must-have. This is the tool that will allow you to take big pieces of wood and turn them into small pieces of wood. Great for splitting logs and rapidly generating a lot of kindling, you really can’t make a proper campfire without one. We have owned this Fiskars Hatchet with sheath for years and it has been great.
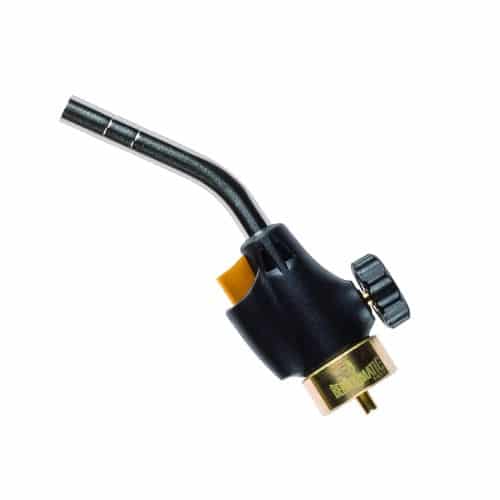
Blow Torch attachment: If you are using a propane camp stove, this is a great thing to bring with you. While being able to light a fire with a single match is a great way to show off your campfire prep skills, a lot of us don’t have time for that type of showmanship. A torch attachment screws right onto the green propane you are using for your camp stove and makes lighting a campfire an absolute cinch.
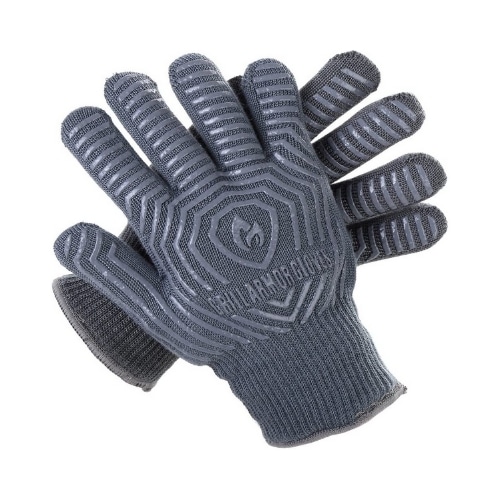
Heat resistant gloves: These heat resistant gloves are great for handling cast iron, moving the grill grate, and even repositioning burning logs in the fire. They are super helpful to have and give you a lot more control around the campfire.
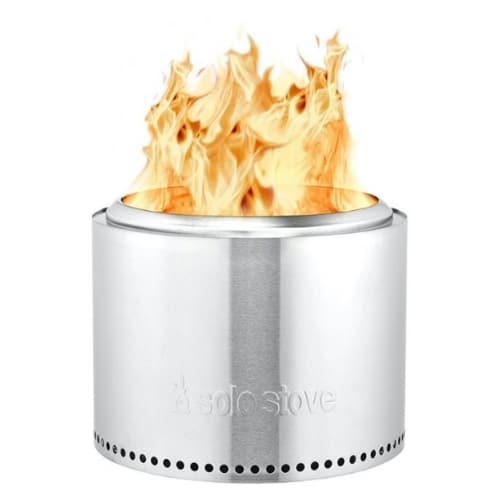
Solo Stove: The Solo Stove Bonfire is an award-winning portable wood fire pit whose unique design provides a smoke-free campfire experience. We didn’t believe it until we experienced it in person, but this fire pit delivers a cozy campfire with an incredibly clean burn. It’s great for camping or at home.
Excellent article on campfires! I teach courses on basic skills to Scouting America Cub Scout Leaders. Your site often is my “go to” source for tips in step-by-step ways to explain sessions on camping techniques that are tried and true. The examples and pictures for delicious meal choices you share have been inspirations for cooking in a group setting as well. Although Cub Scouts only do frontcountry camping, I can provide insight for those older Scouts who will soon be experiencing backcountry treks and camping. Thank you for providing this website – it is such a valuable and used resource!