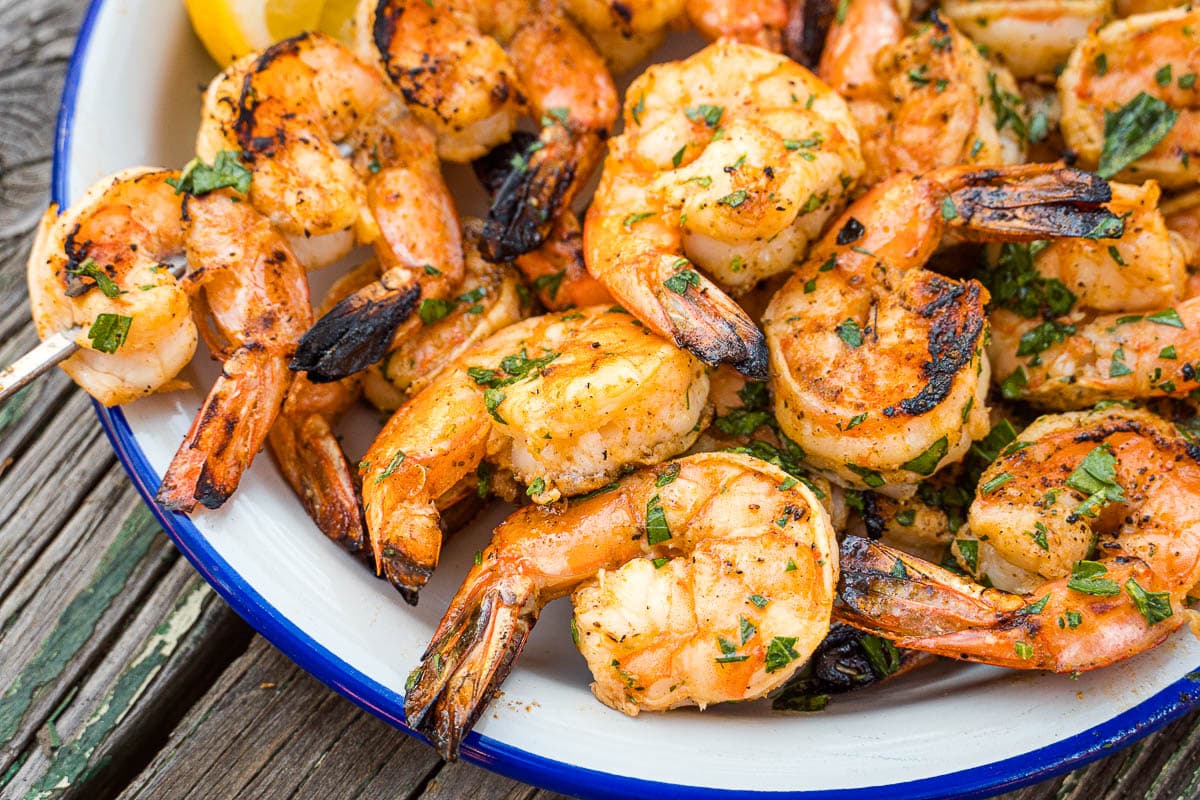
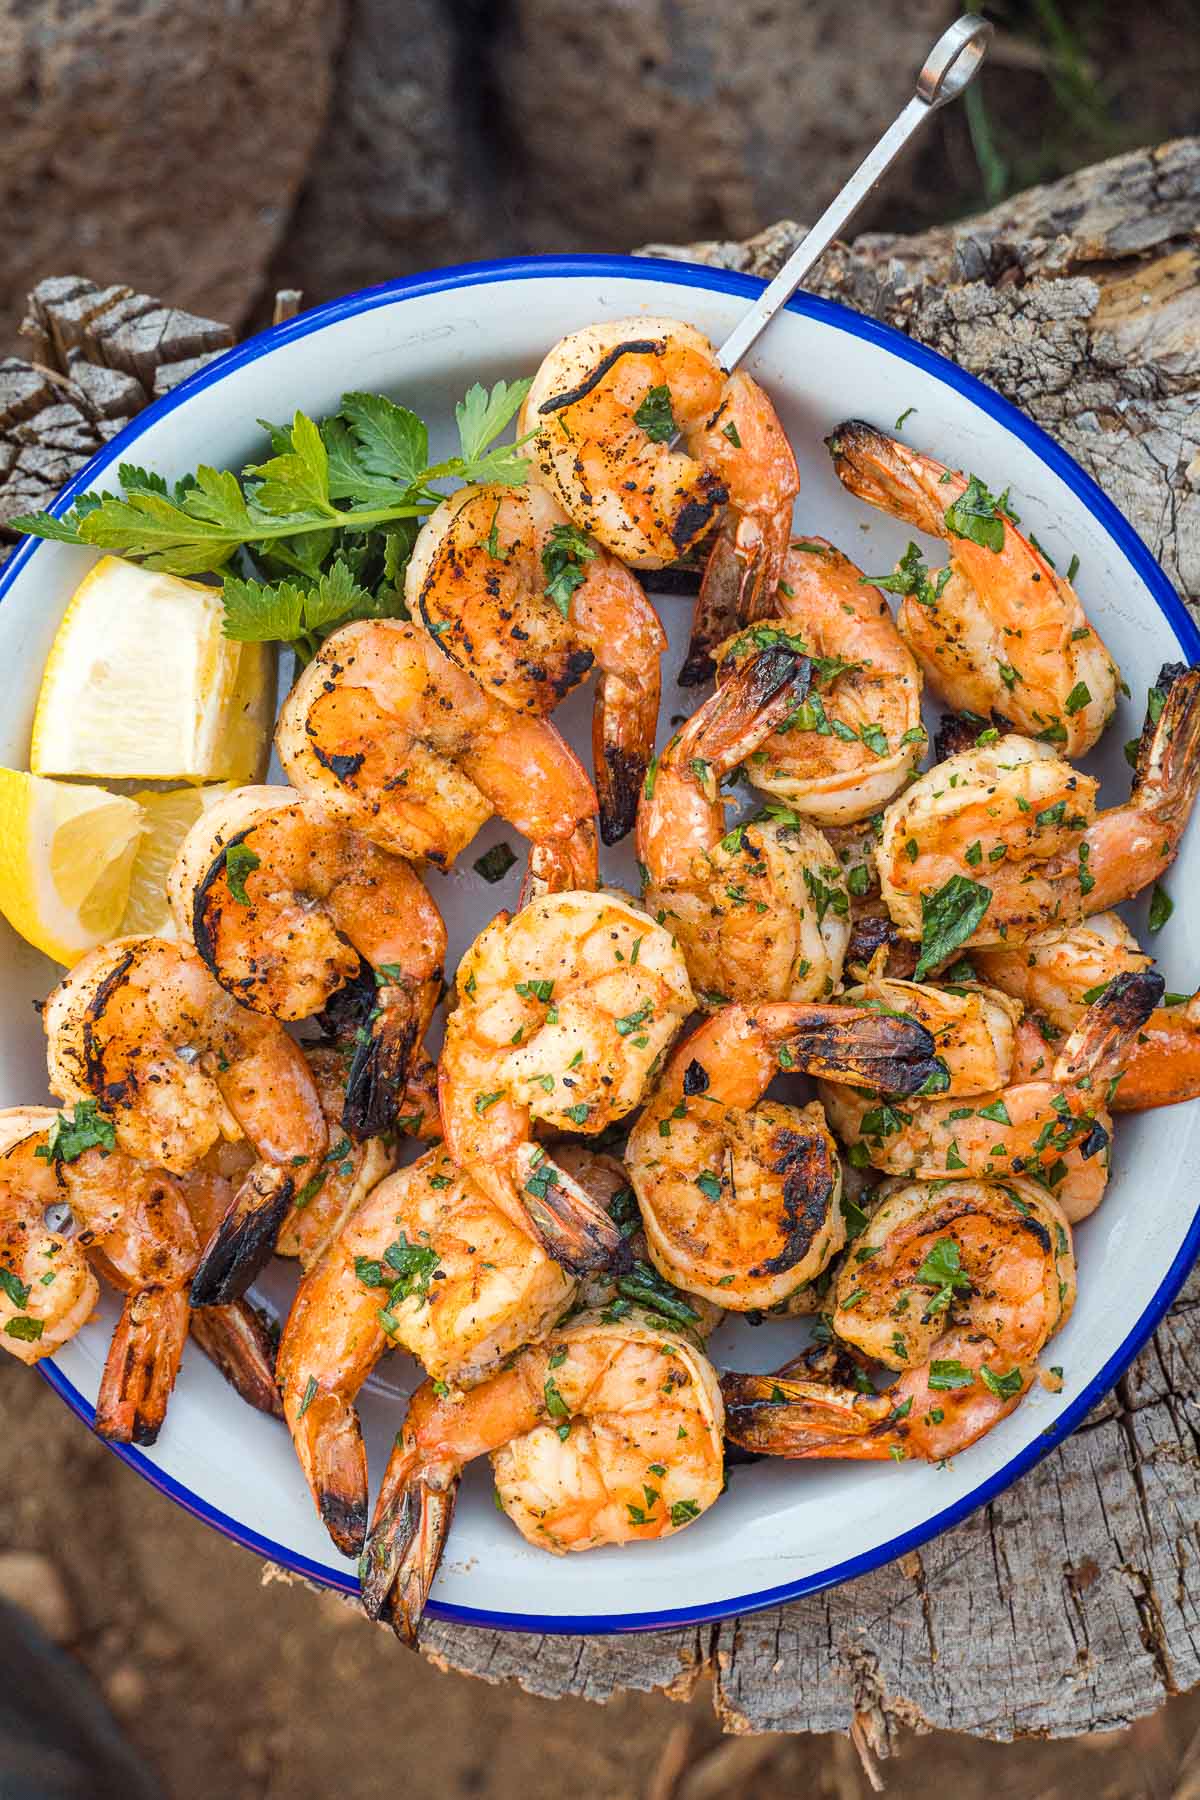
Grilled Shrimp
This post may contain affiliate links.
Bursting with flavor, these grilled shrimp are incredibly easy to prepare and cook in virtually no time at all. They’re perfect for an appetizer or main the next time you’re firing up the grill!
One of the fastest things you can cook over a campfire or grill are shrimp! Once the skewers go on the heat, it only takes a couple of minutes before they’re ready. But getting grilled shrimp that are nicely charred and are popping with flavor, takes a little prep work.
Below we share our simple seafood marinade. This marinade will not only give your grilled shrimp a ton of flavor, but help them develop that exterior browning quicker. We also share our tips on which type of shrimp to get and how to best skewer them. With a little prep work, the grilling step will feel like a breeze.
So let’s jump it and and you’ll have those shrimp on the grill in no time!
Best Shrimp For Grilling
We recommend buying large, frozen shrimp with the shell on.
Frozen or “Fresh”: Nearly all shrimp are flash frozen at sea shortly after being caught and are shipped frozen to the market. The “fresh” shrimp you see at the local fish counter and just frozen shrimp that have been thawed for display. It’s better for you choose the time when to thaw the shrimp—so buy frozen.
Check the bag for freezer burn (big chunks of ice), which can indicate the package was partially thawed or mishandled during packaging.
Size Matters: When grilling shrimp, the bigger the better as they won’t over cook as quickly. Unfortunately, shrimp size is fairly unregulated. Words like Large, Jumbo, and Colossal have no specific definition.
Deveined, shell on, tail on. This is a fairly common shrimp preparation combination, which is sometimes labelled as “EZ Peel”. We find this to be the best compromise for most camping and backyard grilling applications. These shrimp will have very good flavor and texture, while reducing some of the tedious work of deveining. You will still need to remove the shells yourself, but this is worth the effort.

Ingredients
Shrimp: Frozen, large as possible, deveined, shell on, tail on (EZ Peel). Make sure they are fully thawed prior to marinating.
Sugar: We add a little bit of sugar to the marinade to help encourage exterior browning.
Lemon Juice: A little acidity can really make each bite pop with flavor! Just don’t over marinate, because the acid will eventually start to alter the shrimps’ texture (we’re making grilled shrimp here, not ceviche!).
Old Bay: There is no seasoning so intrinsically linked to the flavor of seafood then Old Bay.
Chopped garlic, parsley, and butter: For the final toss, a little chopped parsley and butter will take your shrimp the extra mile!
Step-by-step (simplified)
- Defrost, make the marinade, and soak the shrimp for 1-2 hours
- Chop your garlic and parsley and place it in a large tossing bowl with butter
- Skewer the shrimps
- Grill over high heat, 2 total (flip halfway)
- Toss in the bowl
- Serve!
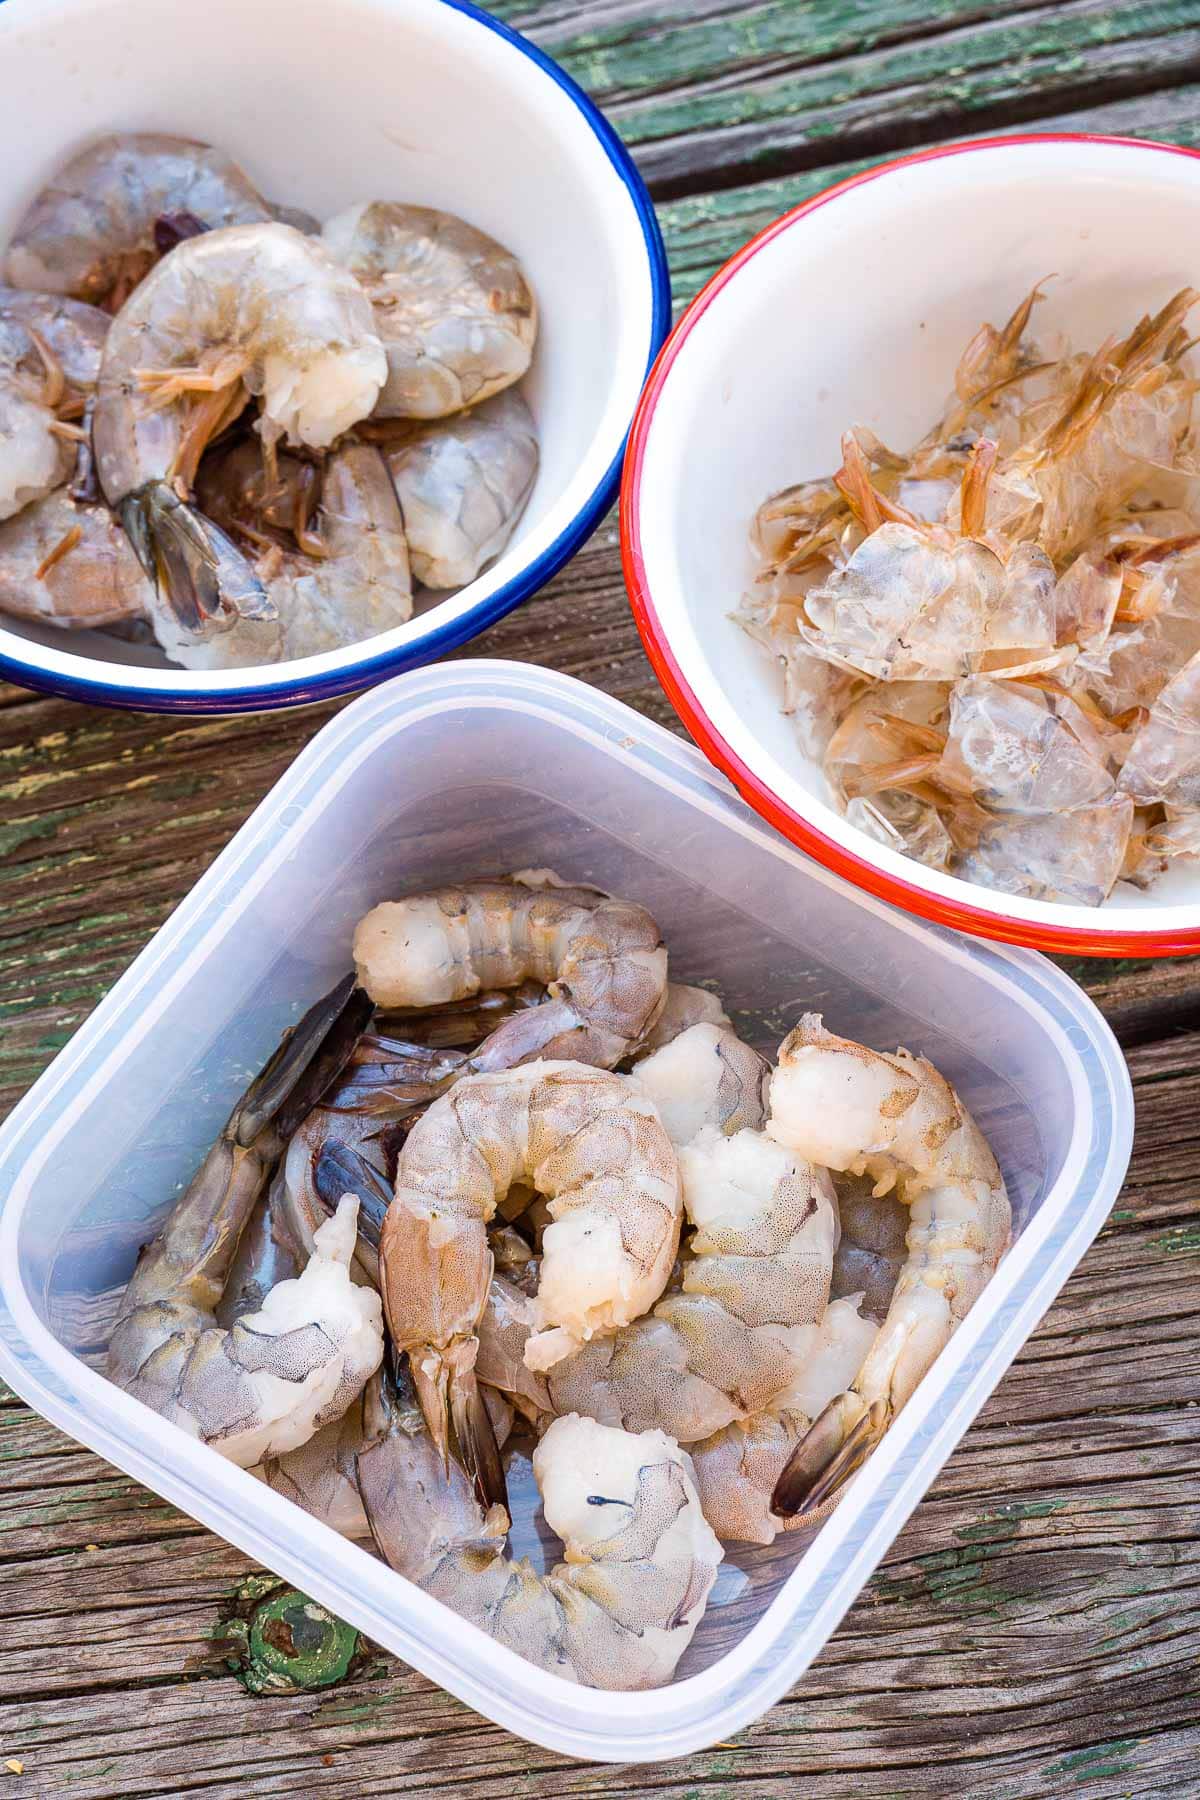
Thaw and Remove Shells
Before marinating, the shrimp need to be completely thawed. If you are transporting them in a cooler, this might happen naturally. If they are still a little frosty, the best way to fully defrost them is to place them in a large bowl of water and let them soak for about 10 minutes.
Once they’re done defrosting, you will then want to remove the shell, but leave the tail on.
While the shell can act like a heat buffer while grilling (which is good), it prevents the marinade from penetrating into the shrimp (which is not so good). It also puts the exterior char on the shell not the meat. That’s why like to remove and discard the shells before we begin the marinade.
Shrimp shells smell a little fishy, so we recommend putting them in a disposable zip top baggie, otherwise your trash can is going to have an aroma.

Build the Marinade
The marinade is super simple so you can easily make it on-site. Just combine olive oil, some lemon juice, sugar, Old Bay seasoning, garlic powder, and pepper.
Old Bay season contains a decent amount of salt. So if you’re using Old Bay, additional salt will not be needed. But if you are not using Old Bay, and substituting it with something like paprika, then you will want to add about 1 teaspoon of salt for 1 pound of shrimp.
Toss the shrimp in the marinade and then return to the cooler to chill for about 1 hour. Don’t marinade for more than 2 hours, or the shrimp will start to deteriorate is texture due to the acidity of the lemon juice.

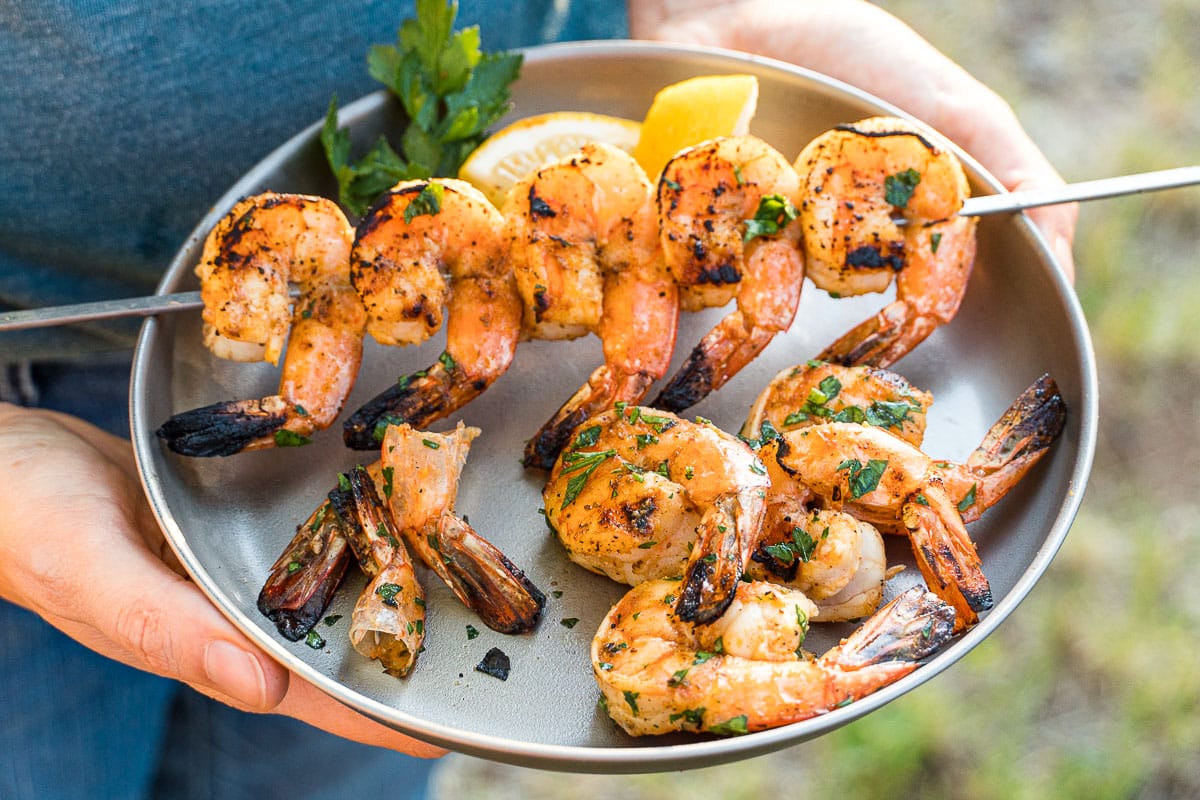
Best Way To Skewer Shrimp
The best way to skewer shrimp is by tightly packing them together on the skewer. Not only does this prevent them from rolling around, but it also reduces exposed surface area and thus slows down the cooking process. Packing the shrimp tightly together on a skewer will help prevent you for over cooking them.
We prefer to use flat metal skewer because they are reusable, won’t catch on fire, and prevent the shrimp from rolling around.
You can also use round bamboo skewers, although it’s advisable to pre-soak them in water for 10 minutes prior to use. With round skewers, we like run two through a single shrimp to prevent them from rolling.

Grill Shrimp with High Direct Heat
You want to hit shrimp hard and fast with high, direct heat. They will cook through in less than 2 minutes, so it’s a race to develop a nice exterior char as quickly as you can.
- For grills (charcoal, propane, etc), you will want to pre-heat with the lid down to get the metal grill grate really hot. Then open the lid and cook the shrimp over high heat with the lid up.
- For campfires, build up a hot bed of embers or coals and drop the grill grate down as a low as it will go.
We like to let the shrimp go a little long on the first side, about 1 and a half minutes, then flip for go for another 30 seconds. If you’re cooking over really high heat this will be plenty of time.
If you can’t develop much char in that time, that’s okay! It’s better to pull the shrimp on time and then it is to leave them on longer in order to chase the char. Plump, tender shrimp without char are much better than overcooked rubbery shrimp with a char.
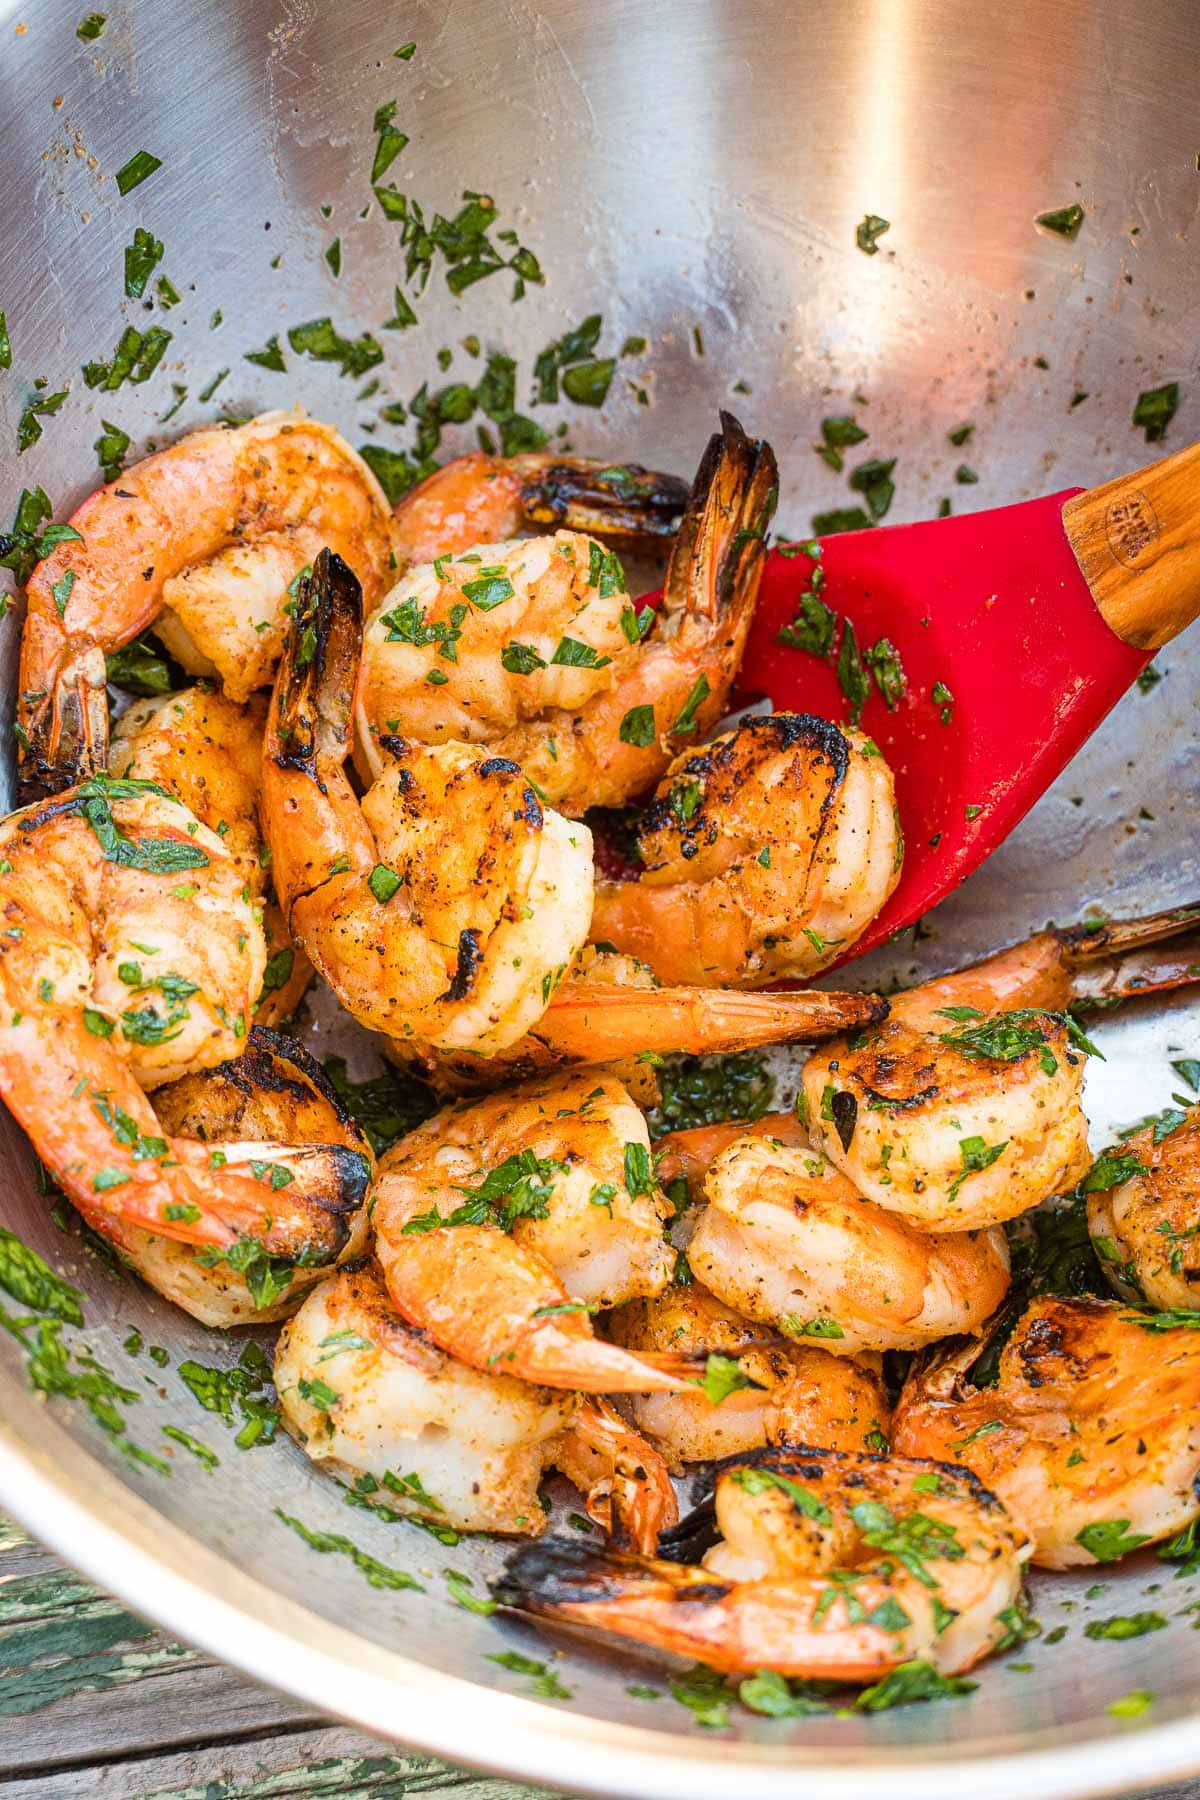
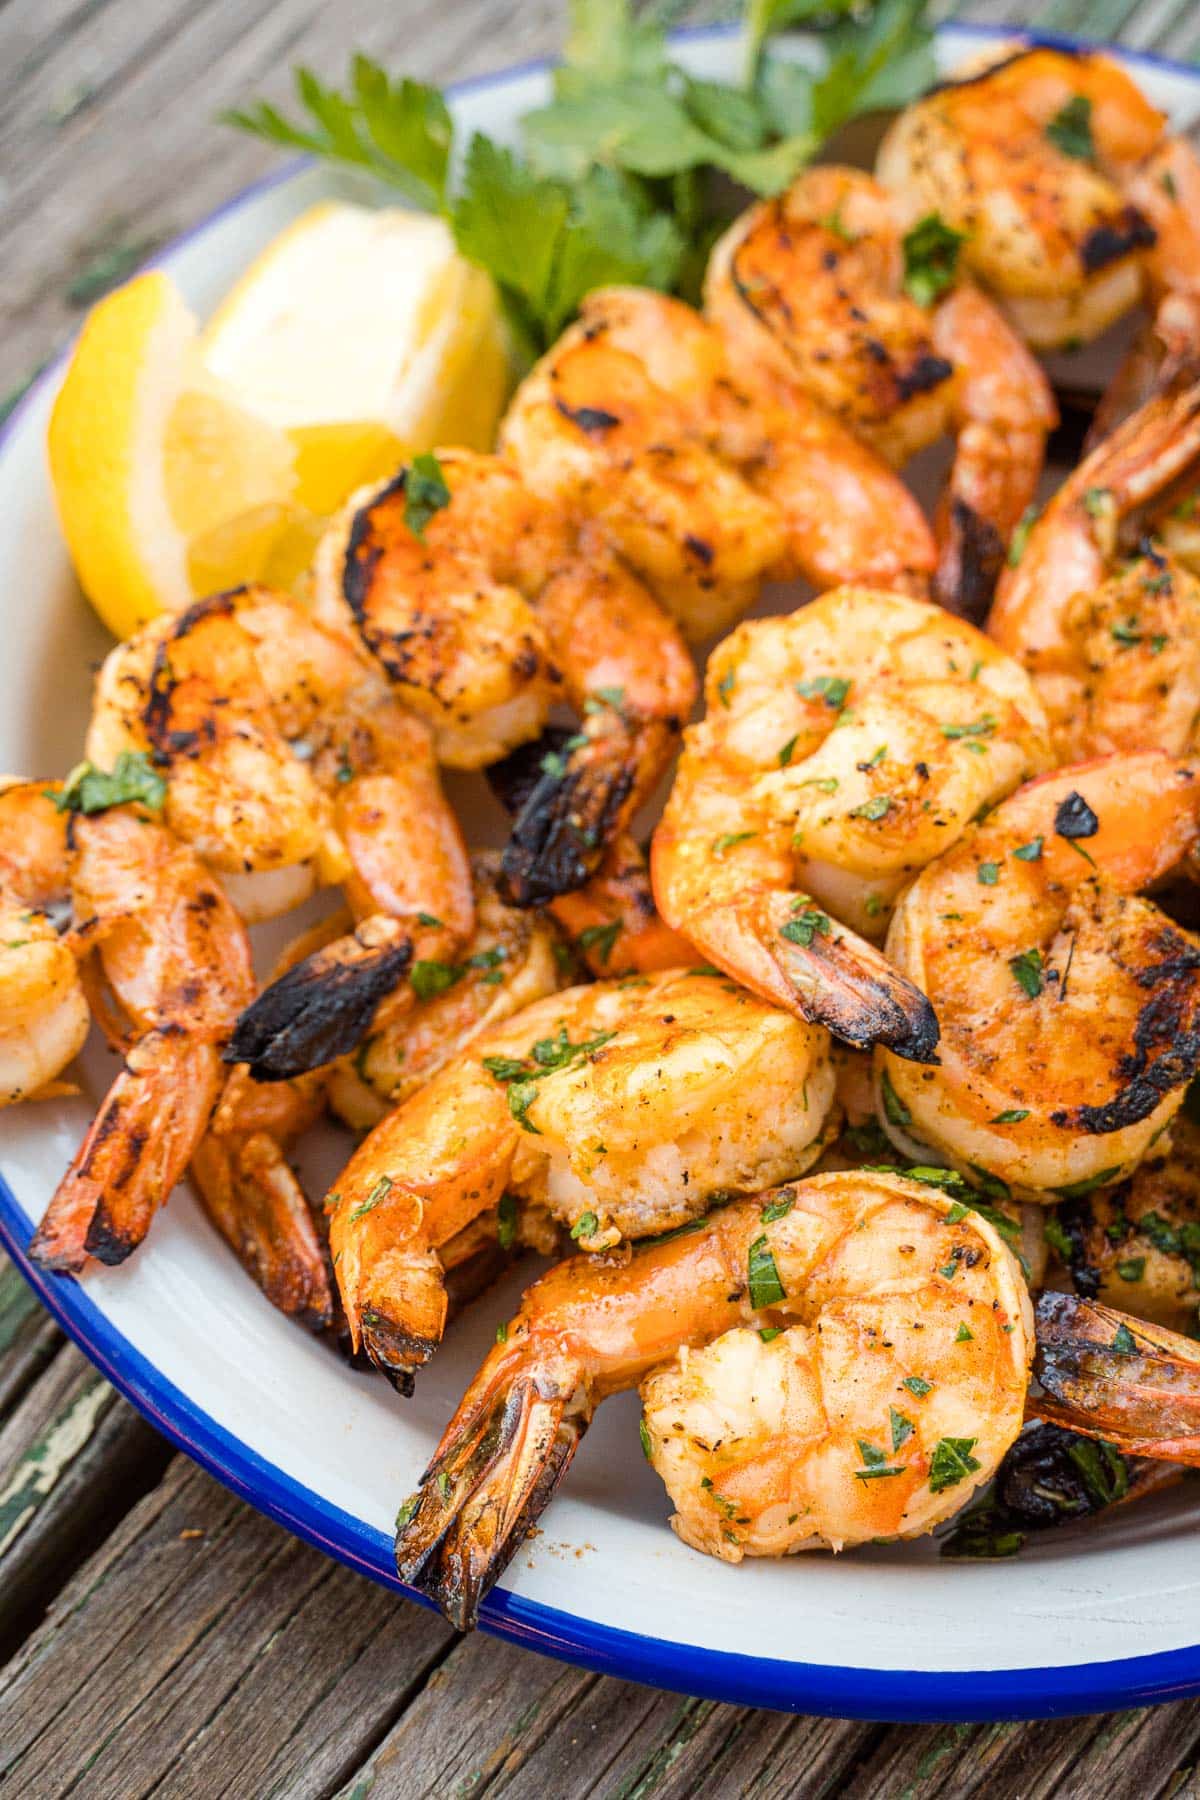
The Final Toss
The difference between good and extraordinary grilled shrimp is giving them a final toss in a large bowl with some fresh herbs and melted butter. The herb-butter coating not only add a ton of flavor and visual appeal to your shrimp, but it also helps prevent the shrimp from drying out.
Try about 2 tablespoons of very soft or melted butter (shrimp straight off the grill will melt the butter). As for fresh herbs, try chopped parsley, cilantro, or basil.
Tips for Making Grilled Shrimp
- You can pre-make the marinade at home in a mason jar, just don’t add it to the shrimp until you’re about 1-2 hours away from meal time.
- Larger shrimp are better for grilling because they will take longer to fully cook through, giving you enough time to develop some browning on the outside.
- Use double skewers or flat metal skewers to make it easier to move shrimp around over the fire.
- Scrunch the shrimp tightly together on the skewers to slow down the internal cooking speed.
- Grill the shrimp fast over high heat. You want to rapidly develop an exterior char before the inside of the shrimp overcooks and becomes tough and rubbery.
Grilled Shrimp
Ingredients
- 1 pound shrimp deveined, tail on
- 2 tablespoons olive oil
- 2 teaspoons lemon juice
- 2 teaspoons Old Bay seasoning
- 1 teaspoon garlic powder
- 1 teaspoon sugar
- 2 tablespoons butter (unsalted) softened or melted
- 2 tablespoons chopped fresh parsley
- 1 or 2 cloves garlic minced
Instructions
- Defrost the shrimp if needed. Make the marinade by adding the olive oil, lemon juice, Old Bay seasoning, garlic powder, and sugar to a sealable container. Once the shrimp are thawed, peel if needed, then add to the marinade for 1-2 hours (keep it in the cooler/fridge during this time).
- While the shrimp is marinating, prepare your campfire or grill for high-heat grilling.
- Chop your garlic and parsley and place it in a large bowl with the butter.
- Thread the shrimp on to the skewers, bunching them together.
- Grill over high heat. Grill for 1½ minutes on one side, then about 30 seconds on the other. Remove from the heat right away.
- Toss the shrimp in the bowl with the butter, parsley, and garlic so that it's well coated.
- Serve with a squeeze of lemon!