Dutch Oven Pizza
This post may contain affiliate links.

Craving amazing pizza? Break out the Dutch oven! Crisp and chewy crust, your favorite toppings, bubbling melted cheese–it’s all in your future when you make this Dutch oven pizza.
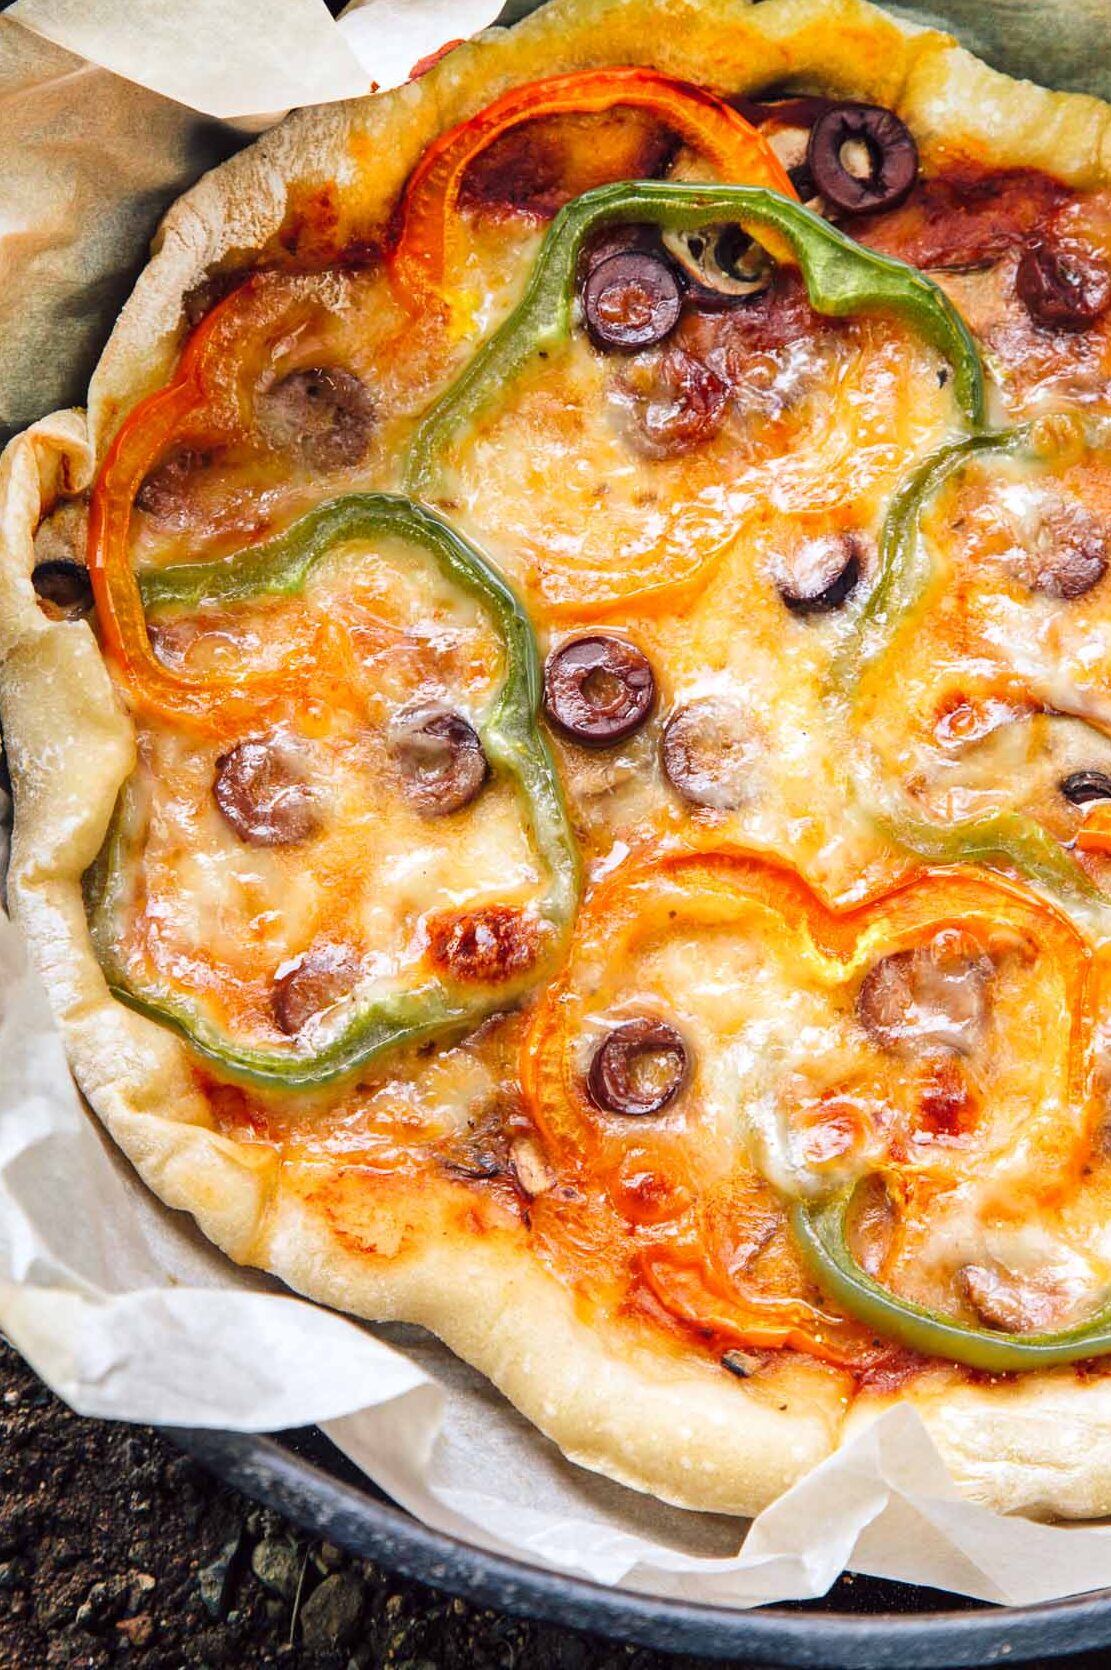
Melty cheese and tangy sauce on a crust that’s crisp on the outside yet soft inside … there’s nothing quite like a perfectly baked pizza.
But sadly, homemade pizza hasn’t been much of an option when camping, considering the whole not-having-an-oven thing. That is, until now! With Dutch oven campfire pizza, great pizza is possible–served up hot and fresh right at your campsite.
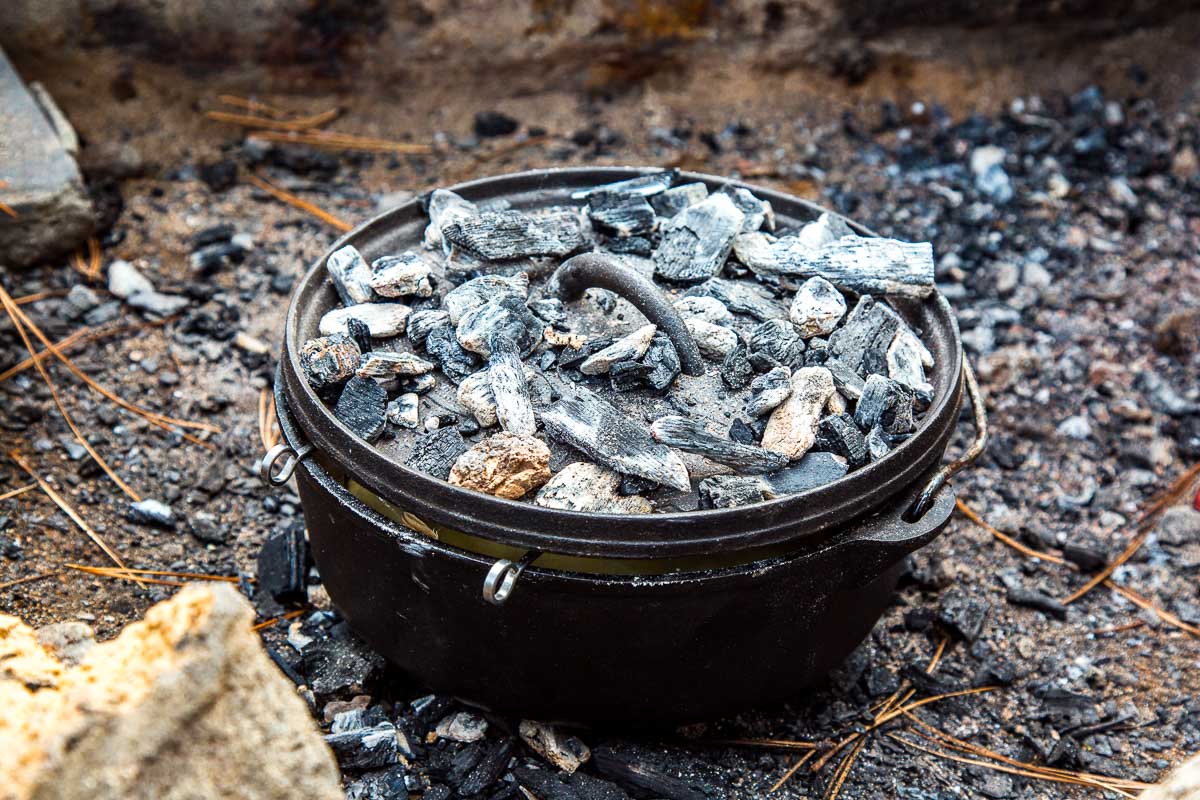
Why make pizza in a Dutch oven? Because the pots are a tremendously versatile cooking vessel–including being perfect for making pizza! When you’re utilizing a campfire, cooking with a Dutch oven allows you to stack coals or embers both underneath and on the lid of the pot, creating high, omnidirectional heat inside. That produces an effect very similar to an oven—exactly the kind of environment that turns out a perfectly cooked pizza.
You can make this pizza at home, too! In fact, once you’ve enjoyed this cooking method out camping, you might just want to replicate it in your own kitchen.
Are you ready to try your hand at one of our all-time favorite Dutch oven camping recipes by making your own Dutch oven pizza? There are a few tricks to getting it just right, so read on for all you need to know.
Ingredients
Pizza dough: Make your own homemade pizza dough (here’s our favorite quick 30-minute pizza dough recipe) or use premade pizza dough such as Pillsbury brand or refrigerated dough from Trader Joe’s. You’ll want around eight ounces of dough for a 10-inch pizza, or 10 ounces for a 12-inch pie.
Flour: Just a bit to help keep your dough from sticking when you’re rolling it out.
Cornmeal: This helps keep your pizza from sticking to the parchment paper and adds a welcome bit of crunch to your crust.
Toppings of choice: This one’s up to you! You can choose typical pizza toppings like mozzarella, pizza sauce, pepperoni … or you can get creative and make a more unique pie. Either way, you’ll want to avoid too much moisture so your pizza cooks up as crisp as possible, so stick with low-moisture mozzarella and omit watery toppings like zucchini.
Here are some of our favorite combinations:
???? Cheese: Mozzarella, parmesan, asiago, and tomato sauce
???? Pepperoni: Mozzarella, pepperoni, and tomato sauce
???? Veggie: Mozzarella, mushrooms, bell peppers, black olives, and tomato sauce
???? Mediterranean: Feta cheese, artichoke hearts, kalamata olives, sun-dried tomatoes, oregano, and olive oil
???? Pesto: Mozzarella, cherry tomatoes, and pesto
???? Blue cheese & bacon: Blue cheese, bacon, chopped dates, arugula, and tomato sauce
???? BBQ chicken: Mozzarella, chicken, red onions, cilantro, and barbecue sauce
???? Spicy chorizo: Manchego, roasted red peppers, chorizo, and tomato sauce
???? Combination: Mozzarella, crumbled sausage, tomato sauce, and sauteed bell peppers, fennel, and onions
???? Goat cheese & grilled peach: Goat cheese, grilled peaches, prosciutto, fresh basil, and olive oil
???? Margherita: Mozzarella, sliced tomatoes, fresh basil, and tomato sauce
???? Spinach ricotta: Ricotta, prosciutto, spinach, and tomato sauce
???? Hawaiian: Mozzarella, pineapple, ham, and tomato sauce
???? Tex-Mex: Monterey Jack, poblanos, roasted corn, onions, cilantro, salsa, or El Pato tomato sauce
Equipment
Dutch oven: You’ll want a camping-style Dutch oven with legs on the bottom (so you can place coals underneath) and a lid with a rim (so you can place coals on top of it).
Chimney starter: While not necessary, a chimney starter helps get charcoal briquettes ready fast. We like this one that packs flat for easy storage.
Parchment paper: Parchment paper gives you “handles” for lifting out your pie with ease. Plus, it makes clean-up a cinch! Cut sheets to size from a standard roll, or you can buy circular parchment paper sheets made specifically for Dutch ovens from Lodge.
Metal skewers: We recommend placing metal skewers between the pot and lid to create a gap for steam to escape. Or you can roll up some foil to create spacers if you don’t have metal skewers.
Metal tongs: For safely moving your coals into position.
Heat-resistant gloves/lid lifter: Your Dutch oven will be extremely hot, including the lid. You can use a special lid lifter to safely remove the lid, but we prefer to use heat resistant gloves because they’re more versatile.
How to Make Dutch Oven Pizza–Step-by-Step
When camping and/or cooking outdoors, begin by preparing your coals or charcoal briquettes in your campfire pit. You’ll start with about 30 coals for a 10-inch Dutch oven, or 33 for a 12-inch.
Once the coals are hot, assemble the coal-pile base for your pot–10 coals for a 10-inch Dutch oven and 11 for a 12-inch pot. Set your Dutch oven on the coals, preheating the pot to 450F (230C).
While the Dutch oven heats, prepare your dough. Dust a large cutting board with flour, place the dough on the board and roll it into a circle an inch or two larger than your pot.
Next, sprinkle the cornmeal evenly onto your parchment paper and transfer your dough to the paper. Use a fork to prick several holes in the dough to prevent bubbles in the crust.
Then add your sauce, toppings, and cheese. See variations (anchor link) for loads of topping ideas.
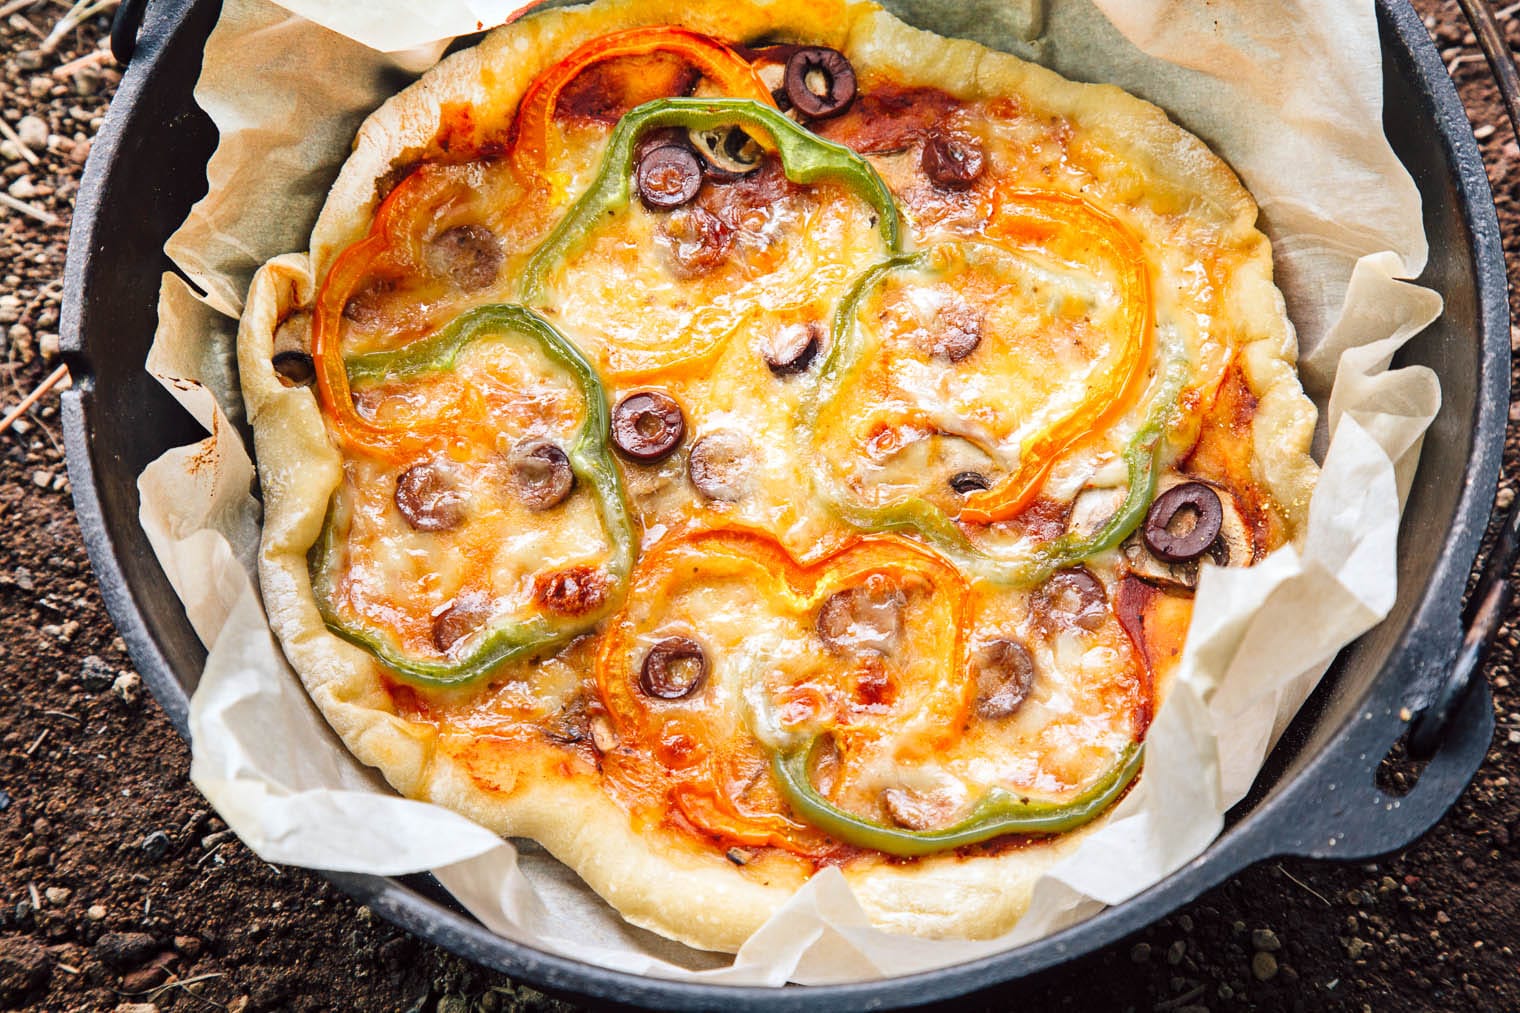
Now it’s time to bake your pizza! Move the preheated Dutch oven away from the coals, remove the lid, and carefully lower the pizza into the pot– parchment paper and all. Lay your spacers–the metal skewers or foil strips–across the top and place the lid over them.
Return your Dutch oven to the bed of coals. Transfer the remaining coals or embers to the top of your pot and bake for 15-20 minutes, until the pizza crust is golden and the cheese is melted and bubbling.
To make Dutch oven pizza at home, preheat your oven to 450F. Prepare your pizza on parchment paper, transfer the pizza to your Dutch oven, place the pot in your kitchen oven, and bake it uncovered for about 15 minutes.
Tips for Making Dutch Oven Pizza
If you like crispy, crunchy pizza, steam is the enemy–so the inside of the Dutch oven should stay as dry as possible. We have two tips to keep moisture at bay for the best, crispiest pizza:
1. Vent the lid: If the lid sits snugly on the pot, the moisture released from the pizza will get trapped inside, resulting in a soggy pie. To avoid this, we recommend you lift the lid with metal skewers, creating a small gap through which the steam can escape. If you’re making this in your home oven, leave the lid off.
2. Use low-moisture toppings: For the mozzarella, forgo fresh mozzarella and choose a low-moisture version instead. More pizza sauce equals more moisture, so a light hand with the sauce is best, too. And avoid watery/higher moisture toppings such as zucchini.

Dutch Oven Pizza
Ingredients
- 8-10 oz pizza dough (8 oz for 10″, 10 oz for 12″)
- 1 tablespoons each flour + cornmeal
- Toppings of choice
Equipment
Instructions
- PREPARE YOUR COALS: Start by preparing your coals or charcoal briquettes. You’ll need about 30 for a 10” Dutch oven, or 33 for a 12” Dutch oven. Once the coals/briquettes are ready, preheat your Dutch oven to 450. For a 10” oven, place 10 coals under the oven and 20 on the lid. For a 12” oven, place 11 coals under the oven and 22 on the lid.
- PREPARE THE DOUGH: In the meantime, roll out your dough. Dust a cutting board with flour and using a water bottle or bottle of wine (who brings a rolling pin camping?), roll the dough into a circle. Dust the cornmeal onto a piece of parchment and transfer the dough to the parchment paper. Dock the dough all over with a fork (this will prevent the dough from bubbling up while baking).
- BAKE THE PIZZA: Carefully remove the Dutch oven from the coals and remove the lid. Place the pizza, parchment paper and all, into the Dutch oven, lay the spacers across the top, cover, and return to the bed of coals. Bake for 15-20 minutes, until the crust is golden.
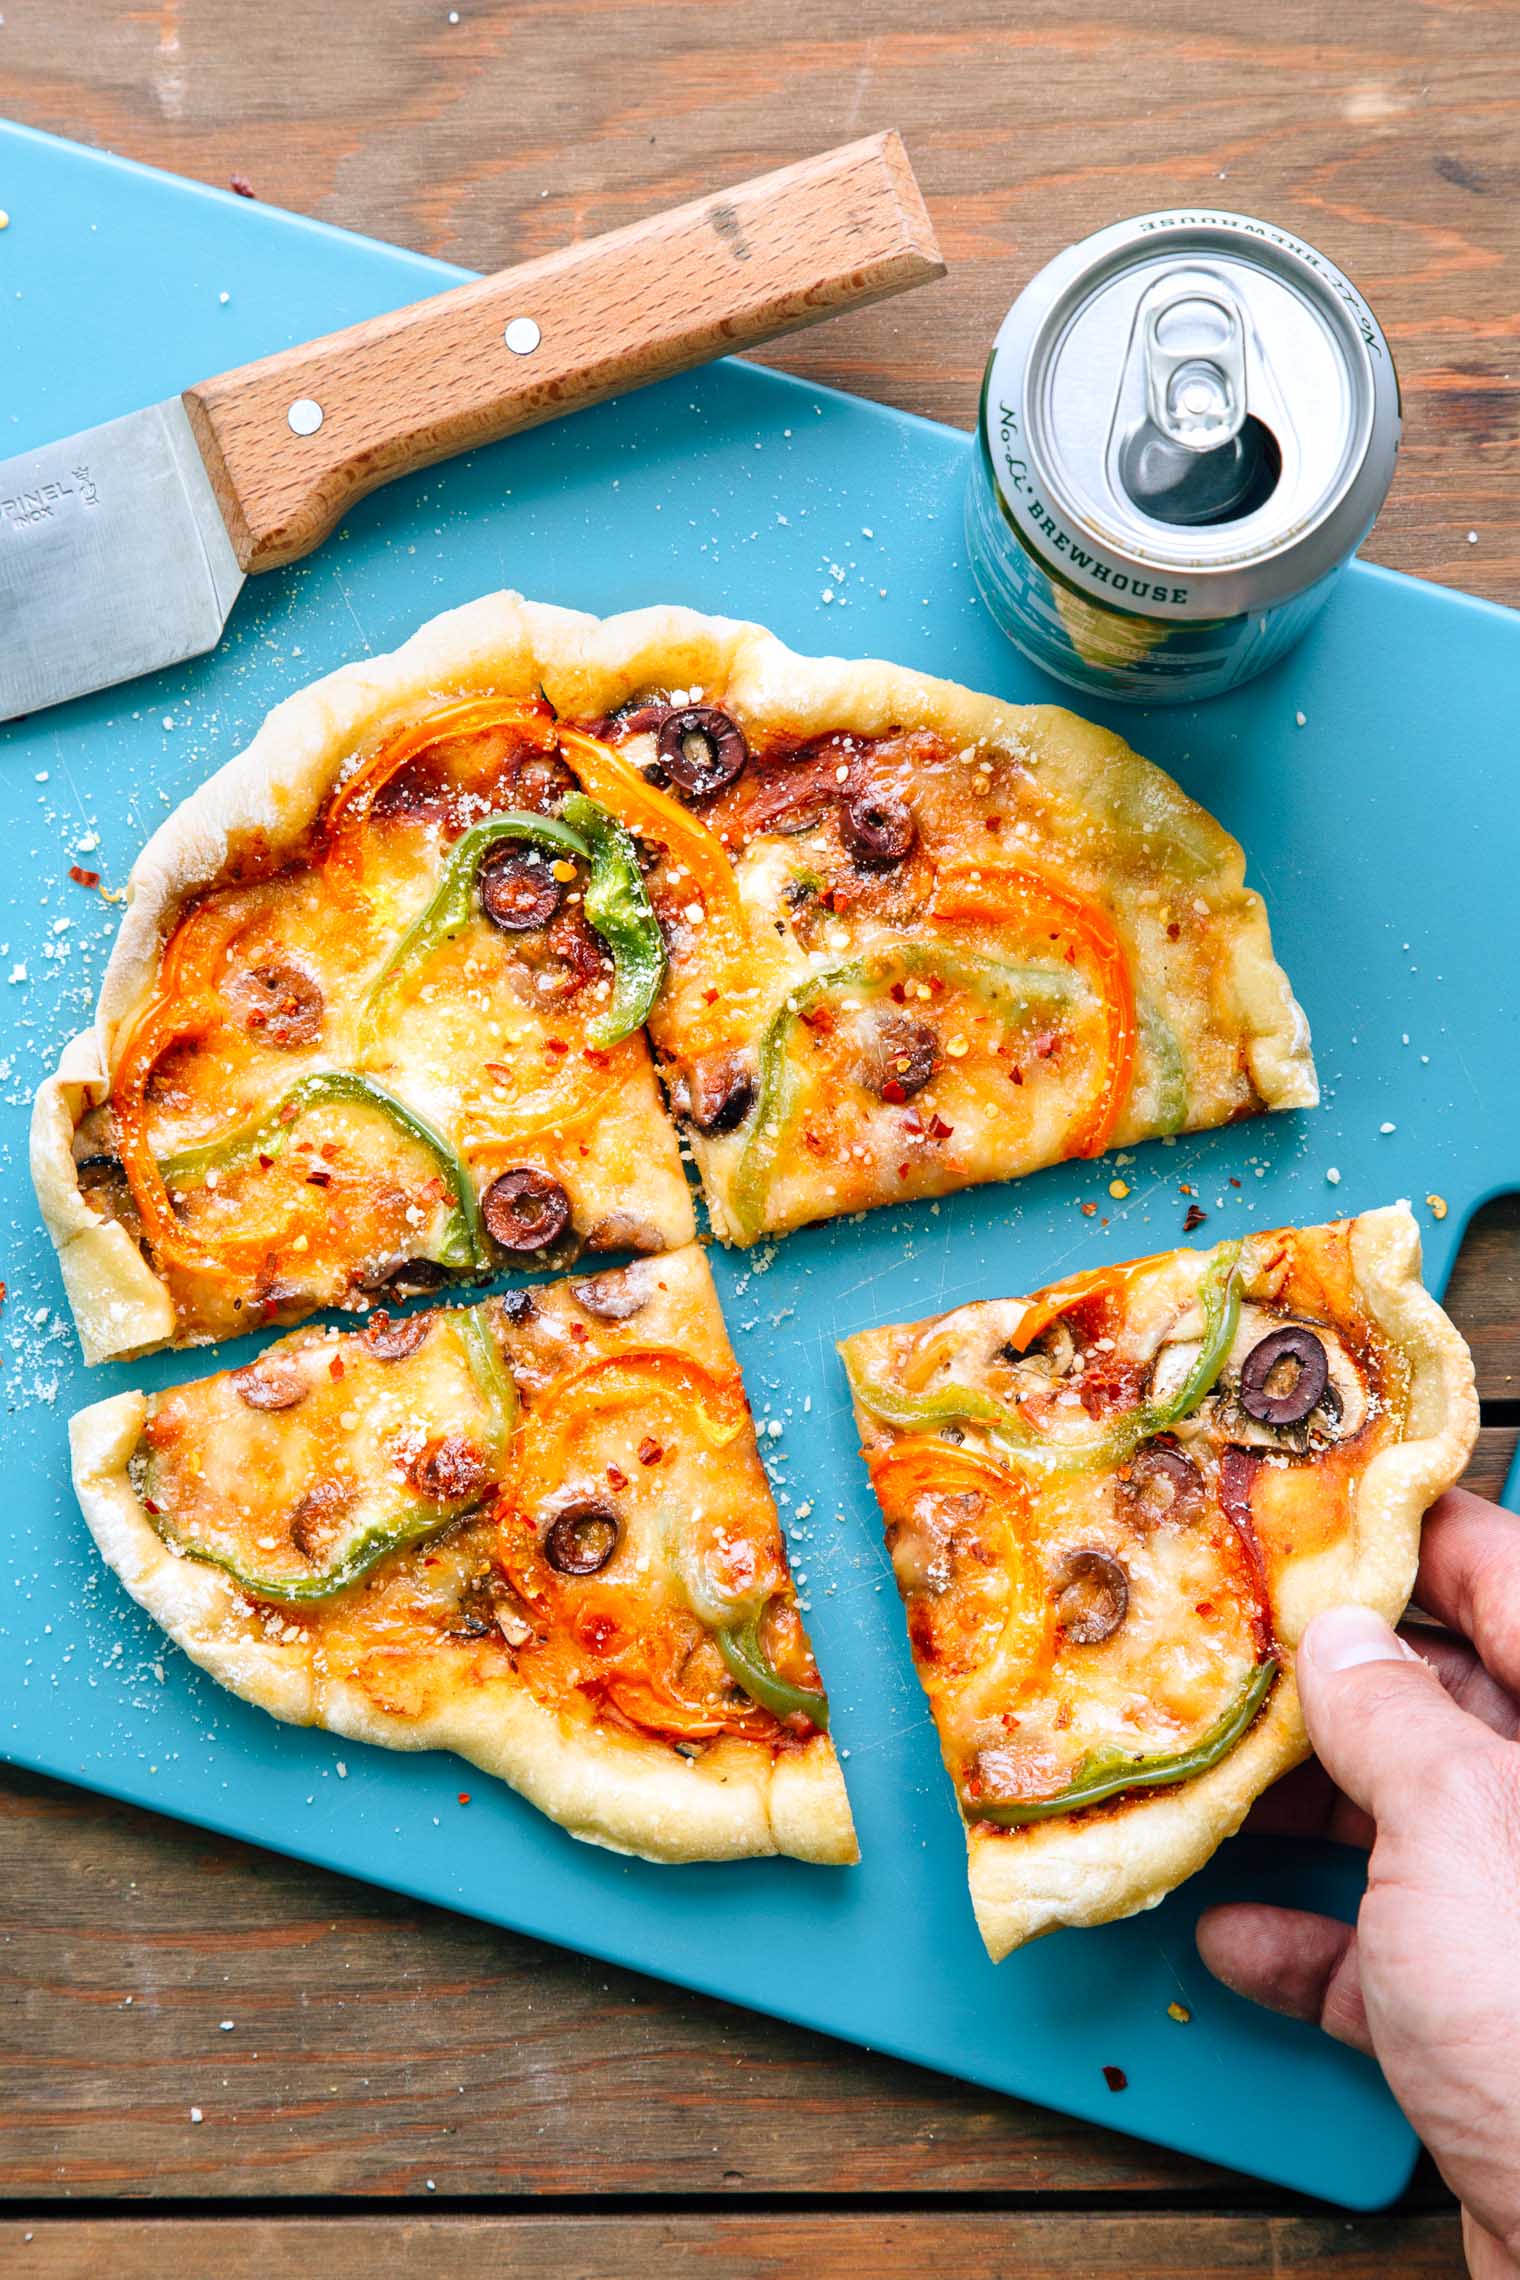
- SERVE & ENJOY!
I’ve been making pizza in my Dutch oven for years. Never thought of metal skewers to release steam. Making pizza tomorrow and I can’t wait to see the results.
I would never ever think of making a pizza in a dutch oven but this looks incredible. And thanks for the topping ideas.
I’m vegan so, obviously, no cheese but with a vegan substitute this is going to be dinner tonight. Just hope mine turns out as good as yours looks!!
Let us know how it turns out! I’m sure it would be great with a cheese substitute or even just with lots of sauce & veggies 🙂
I Want to Learn How To make Pizza.This is very Helpful Article For me.Thanks For Sharing.
it is Very Interesting Article.Pizza is my Favourite Dish.Thanks For This.
this is very great information.I would really loved it.
I wish you guys would drive around the country visiting people like me and helping us pack our cars for our first off the grid car trip! Visit me first!!
But half the thrill and excitement comes from doing it yourself! Ha!
I tried this last weekend and it turned out great. I am doI got this at our church girls camp this week. Our girls are excited to have pizza while camping. Thank you for making this post and easy to understand.