Dehydrated Orange Slices
This post may contain affiliate links.
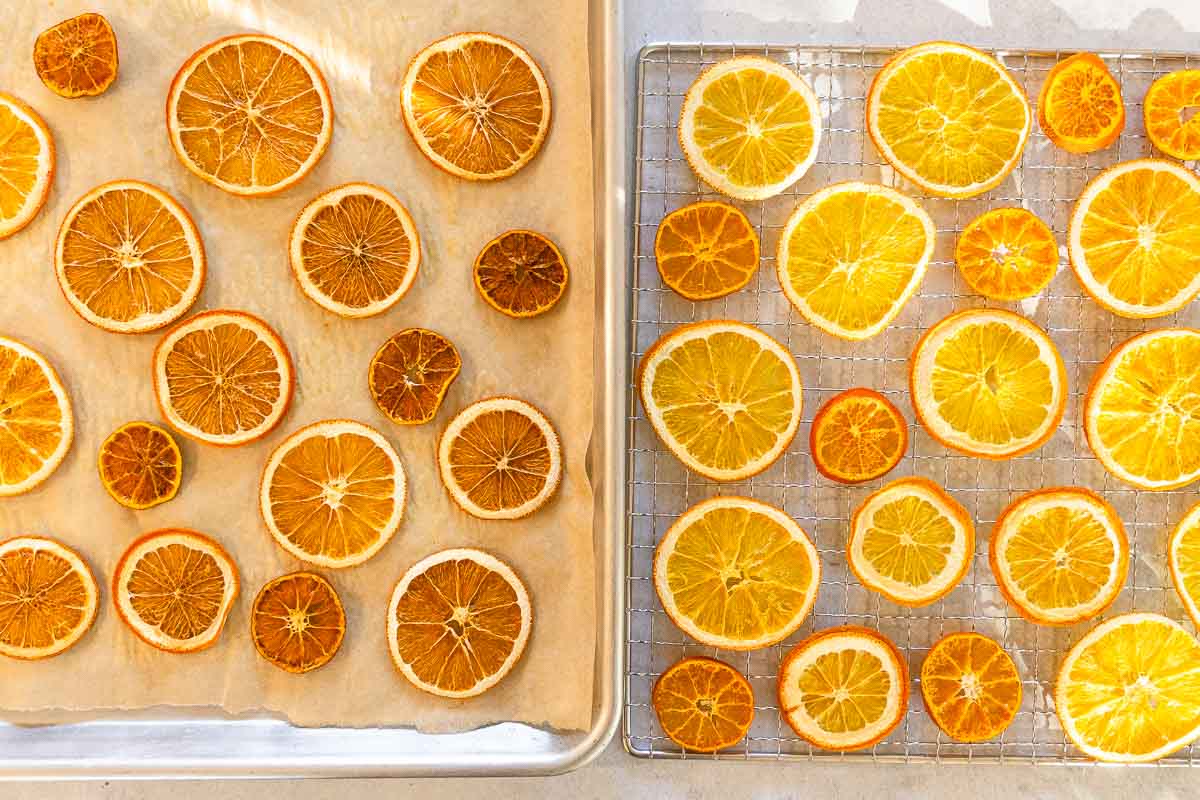
Learn how to make beautiful dried orange slices! Dehydrated oranges add a colorful, citrusy pop to cocktails and drinks, holiday decor, or as a garnish on a cheese plate or charcuterie board.

Dried orange slices are such a fun thing to have on hand. Whether used as an eye-catching garnish for cocktails, a colorful decoration for baked goods, or a unique element on cheese boards, these citrus accents add an easy pop of color.
Their uses don’t stop in the kitchen, either! They add a bright, rustic touch to wreaths, garlands, and ornaments.
Using a dehydrator is an easy way to preserve the bright, sunny hues and the intricate patterns of the orange slices. In this post, we’re sharing everything you need to know to make dried orange slices to keep in your pantry or craft box!

What kind of oranges can you dehydrate?
You can dehydrate any variety of oranges! Smaller oranges like mandarins (think clementines and satsumas) are great for cocktail and drink garnishes. Larger oranges are good for garlands and simmer pots.
Depending on your project, it can be fun to have a variety of colors, too! Cara Cara varieties have a pinkish-red hue, and blood oranges will give you a stunning dark red color.
When choosing oranges to dehydrate, pick ones that aren’t too soft or over-ripe, as they will be messier and harder to slice.

Prepping oranges for dehydrating
Before you start prepping your oranges, make sure your counters, equipment, and hands are clean & sanitized to prevent contamination, which can spoil your batch down the line.
- Clean the oranges: Thoroughly wash the oranges and dry them with a towel.
- Slice the oranges: Using a sharp knife (I find that a serrated bread knife works best), slice the oranges ¼” thick.
Tip: You’re going to have a lot of end bits and maybe some wonky slices that aren’t quite right to dry. Don’t let these go to waste – juice them with a handheld citrus juicer and enjoy a cup of fresh squeezed juice at the end for your effort.

How to dehydrate oranges
Drying orange slices is super easy and a great beginner dehydrating project, or they can be dried in an oven if you don’t own a dehydrator. Once your oranges are prepped, set up your dehydrator and follow these steps:
Dehydrator instructions
- Arrange the orange slices on your dehydrator trays. Leave space between the pieces to allow air to circulate.
- Dehydrate at 125ºF (52ºC) until the oranges are dry. Because of their high sugar content, this can take quite some time. If you have the time, try drying them at an even lower temperature to better preserve their color.
- Depending on your machine, you may need to rotate the trays every so often to promote even drying.
Oven instructions
- Arrange slices lined baking sheets.
- Dry at 200ºF (93ºC) or lower. If you can, keep the door propped open with a wooden spoon to allow moisture to escape (keep an eye on curious children or pets!).
- Oven-dried oranges will be done after a few hours. I like to start testing them around the 3 hour mark.
- They are done when they snap when bent after being cooled and have no juice left (tear one in half and squeeze to test).
Equipment Spotlight: Dehydrators
If you’re in the market for a dehydrator, we recommend buying one with an adjustable temperature. This will allow you to dial in the drying temp to give you the best results for individual ingredients. The dehydrator we recommend (and use) most often is the COSORI dehydrator. You can also check out our best dehydrators post for a comparison of all the dehydrators we’ve used and would recommend.

How to tell when dried oranges are done
Dried orange slices will snap when bent once they are completely dried and cooled, and will have no juice left (tear one in half and squeeze—if moisture appears, dry them longer). Take a few pieces out of the dehydrator and let them cool before testing.
How to store
When properly dried and stored, dehydrated oranges can last upwards of a year. Here are our tips for storage:
- Let the orange slices cool completely before transferring them.
- Condition: Loosely pack the oranges in a transparent airtight container. Check it daily for a week for signs of moisture or condensation, and shake it to help prevent the slices from sticking together. If signs of moisture appear, stick them back into the dehydrator (as long as there’s no mold—in that case, toss the batch). After a week, if there are no signs of moisture or mold, you can package them for long-term storage.
- Store in a clean, airtight container. For longer shelf life, vacuum seal.
- Use a moisture-absorbing desiccant packet if you anticipate opening the container often or if you live in an area with high humidity.
- Label the container with the date and any other important details
- Place the container in a cool, dark, and dry place—inside a pantry cabinet works well.
Vacuum Sealing Tips
We like to store our dehydrated food in mason jars that have been vacuum-sealed using this handheld FoodSaver vacuum sealer along with these jar sealing attachments. This gives us the benefit of vacuum sealing without the waste (and expense) of plastic vacuum sealing bags. Since the jars are clear we make sure we store them in a dark spot in our pantry to keep them out of direct light.

How to use
Here are a few ideas on how to use dried orange slices:
- Mulled cider
- Simmer pot
- Cocktail garnish
- Cocktail infuser kits
- Flavored water
- Potpourri
- Garlands
- Wreaths
- Ornaments
- Napkin rings
- Gift wrapping
- Dipped in chocolate and sprinkled with flaky sea salt
- Garnishes for charcuterie boards or cheese plates
- Decorate cakes and cupcakes

Ingredients
- Oranges
Equipment
Instructions
- Arrange the orange slices in a single layer on your dehydrator trays.
- Dehydrate at 125ºF (52ºC) until the oranges are dry (see note 1). Depending on your machine, you may need to rotate the trays every so often to promote even drying.
- Orange slices will snap when bent once they are completely dried and cooled, and will have no juice left (tear one in half and squeeze—if moisture appears, dry them longer). Take a few pieces out of the dehydrator and let them cool before testing.
Storage Tips
- Let the orange slices cool completely before transferring them to an airtight contaier for storage (see note 2).