Everything You Need to Know About Bear Canisters for Backpacking
This post may contain affiliate links.
Storing your food in a bear canister is one of the most effective ways to safely protect your food when backpacking. In this article, we cover how to properly use a bear canister, where you need to carry one, and explore the best bear canisters on the market.
If you’re backpacking overnight in an area where bears are known to inhabit, you definitely should consider using a bear canister to store your food. Using a bear container is the simplest and most effective way to prevent bears from accessing your food. In doing so, you not only keep your backpacking food safe, but you also help keep bears safe as well.
Bears are incredibly adaptable and opportunistic creatures. A bear only needs to succeed once in accessing human food for it to habitually seek out humans as a potential food source.
The phrase “a fed bear is a dead bear” is used among park rangers because once a bear gets a taste for human food, it often becomes overly assertive, forcing rangers to euthanize the animal before it becomes a public hazard. Tragically, dozens of “problem” bears are shot and killed every year (in 2017, Colorado alone had to euthanize 178 bears).
But by properly using a bear canister, much of this can be avoided. Using a bear canister is easy and effective. It protects you, your food, other hikers, and the bear population at large. We know they can be heavy and bulky to carry, but it is an essential piece of backpacking gear, not to mention legally required in many areas. As a consolation prize, they also make a great camp chair! 😉
Below, we cover some of the most important aspects of using a bear canister, where they are required, and an overview of the different models available.
Top recommended bear canisters
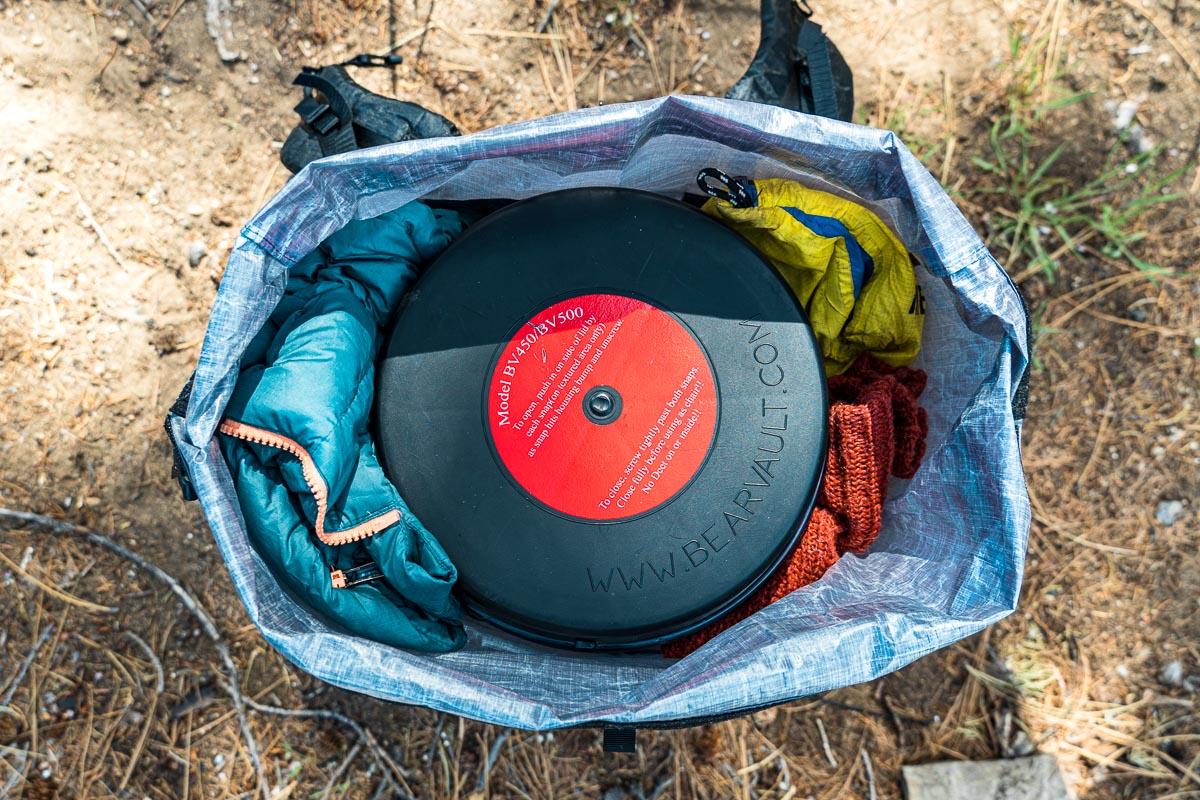
Overall Best Buy: BearVault BV500
Solo Weekend Warriors: BearVault BV450 (7 oz heavier but cheaper and larger) or Bare Boxer Contender (lighter but with 37% less volume)
Ultralight Bear Canister: Bearikade Weekender
Best Bear Canister Alternative: Ursack AllMitey
What is a bear canister and how they work
A bear canister is a bear-proof container designed to safely store food, scented consumables, and trash when camping overnight in the backcountry.
These canisters are designed to prevent bears from accessing your food—at most, a bear will interact with the canister and then get bored when it realizes that it can’t open it. Over time, the idea is that bears will learn that canisters don’t provide an easy meal and won’t bother approaching them at all.
When used properly, bear canisters are an extremely effective way to prevent bears from accessing your food. They dramatically reduce the (already low) likelihood of an adverse human/bear interaction and prevent bears from correlating humans with food.
Can bears smell food in a bear canister?
Yes, bears can smell the food in your bear canister. Bears are thought to have the strongest sense of smell of any animal, making it nearly impossible to completely contain the scent of food, though some canisters are “smell resistant.” This is why it’s important to cook and store your bear canister away (and downwind) from your tent—so you don’t give bears a reason to poke around your camp! If you’re in an area where bears might be a particular concern, you could put your food in a Smelly Proof bag which is nearly odor-proof, in addition to your bear canister.
Where bear canisters are required
Protecting your food from bears is recommended in any area that is inhabited by bears, and using a bear canister is required in many state and national parks, national forests and wilderness areas, and a number of other public lands.
This can be a frustrating topic to navigate, though, because not all areas within bear habitats have requirements, and even among places that do have requirements there are differences in which storage methods are and aren’t allowed.

Data sources: Black bear habitat / Grizzly bear habitat
If you’re backpacking in bear country, your best bet is to call the ranger office in the area you’re going to be traveling through for up-to-date requirements, or Google “[area] food storage requirements”.
Here are some notable areas that require bear canisters (note: this is not inclusive of ALL areas with requirements):
- Appalachian Trail: strongly recommended by the Appalachian Trail Conservancy
- Big Bend National Park: all backcountry areas
- Canyonlands: Salt Creek campsites, Salt/Horse Zone in The Needles, and Peekaboo campsites from March 15 through November 30
- Eastern High Peaks Wilderness Area: required between April 1 and November 30
- Denali: within Units 1-21 and 23-43
- Desolation Wilderness: required for overnight trips
- Gates of the Arctic: most areas
- Glacier Bay: most areas
- Glacier National Park: required in the Nyack / Coal Creek Camping Zone
- Grand Teton: all areas unless food lockers are available
- Inyo National Forest: required in some areas
- Sequoia-Kings: required in the Dusy Basin, Palisade Basin, Rae Lakes Loop, North Dome, Rock Creek, and Pear and Emerald Lakes areas from May 1 through October 31
- Sierra Nevada: required in some areas
- Lassen-Volcanic National Park: all backcountry areas from April 16 through November 30
- Maroon Bells–Snowmass Wilderness: all areas
- North Cascades: some areas from June 1 through November 15
- Olympic National Park: required in most backcountry areas
- Rocky Mountain National Park: required in areas below the treeline between April 1 and October 31
- Yosemite National Park: all backcountry areas
Who certifies bear canisters?
As you read through various regulations and requirements, you’ll start seeing two acronyms pop up: IGBC and SIBBG. These mean “International Grizzly Bear Committee” and “Sierra Interagency Black Bear Group.”
The SIBBG has disbanded but you’ll still see their name pop up since that’s what Yosemite uses for their accepted canister requirements (and many other national parks end up taking Yosemite’s lead in creating their guidelines).
The IGBC is still active in certifying new canisters. You can read more about their certification process and see a list of all their approved products here.
What size bear canister do you need?
Generally, 100 cubic inches (1.6L) per day for food—plus your toiletries and other smellables.
We’ve personally found this metric to be fairly accurate so long as you know how to pack your canister efficiently (keep reading below), your food is fairly calorie dense, and you’re not over-packing toiletries (ie, use travel sizes instead of full sized).
Keep in mind that you don’t need to put your first day of food in the canister as long as you keep it on you at all times.
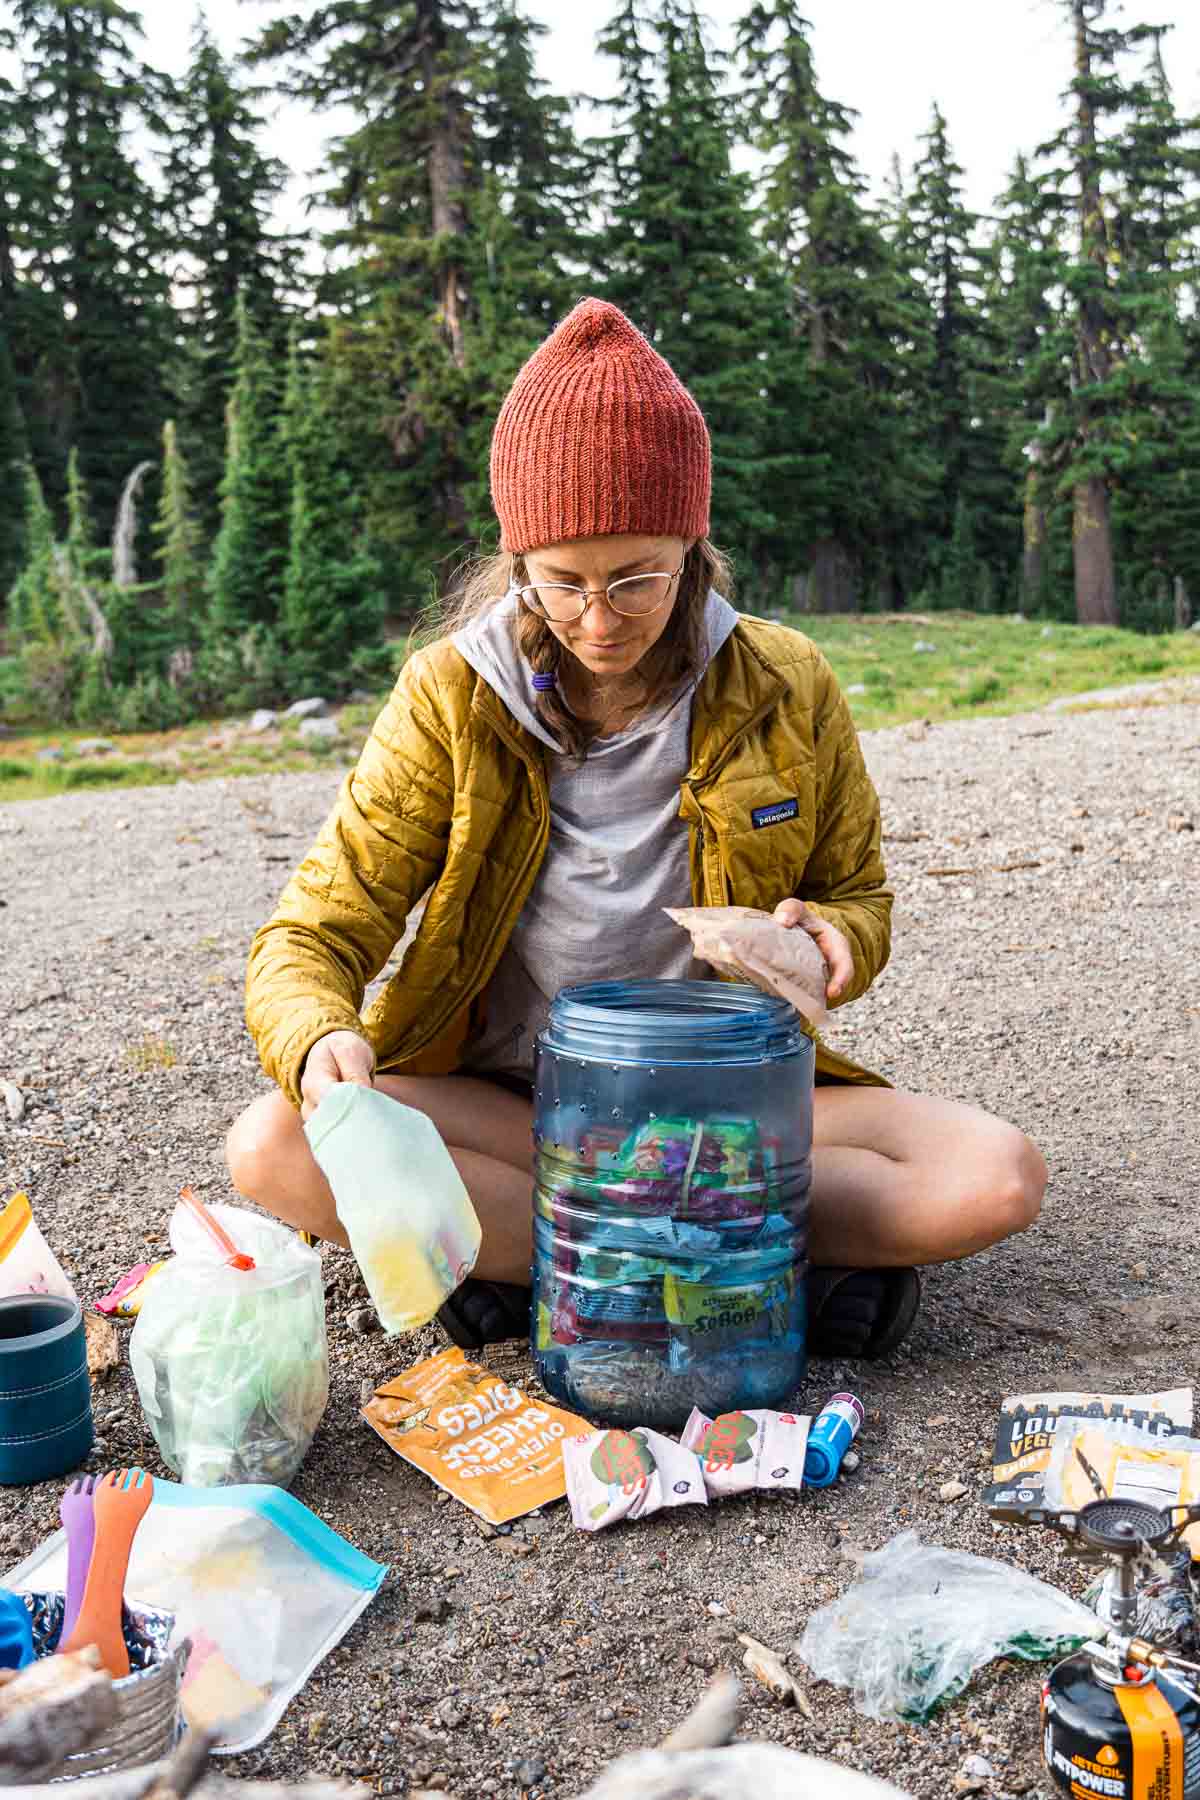
What goes into a bear canister & packing tips
The rule is fairly straightforward: All food, items with any scent, and all trash belong in your bear canister.
According to the Yosemite website: “This includes but is not limited to all sealed or packaged food, sunscreen, soap, mosquito repellent, lip balm, deodorant, medications, and feminine products. As a general rule, if you put it in your mouth or on your skin, it should probably be stored in a bear-resistant container.”
All these items can take up a lot of space, especially on longer hikes, so here are a few ideas to help you pack your bear canister efficiently:
- Remove excess packaging
- Remove as much air as possible from packaged food. Tactics include using a pin to make a hole at the top of freeze-dried meal bags to squeeze out the air, or crushing food items like pasta or dehydrated items so that there isn’t as much air space between ingredients.
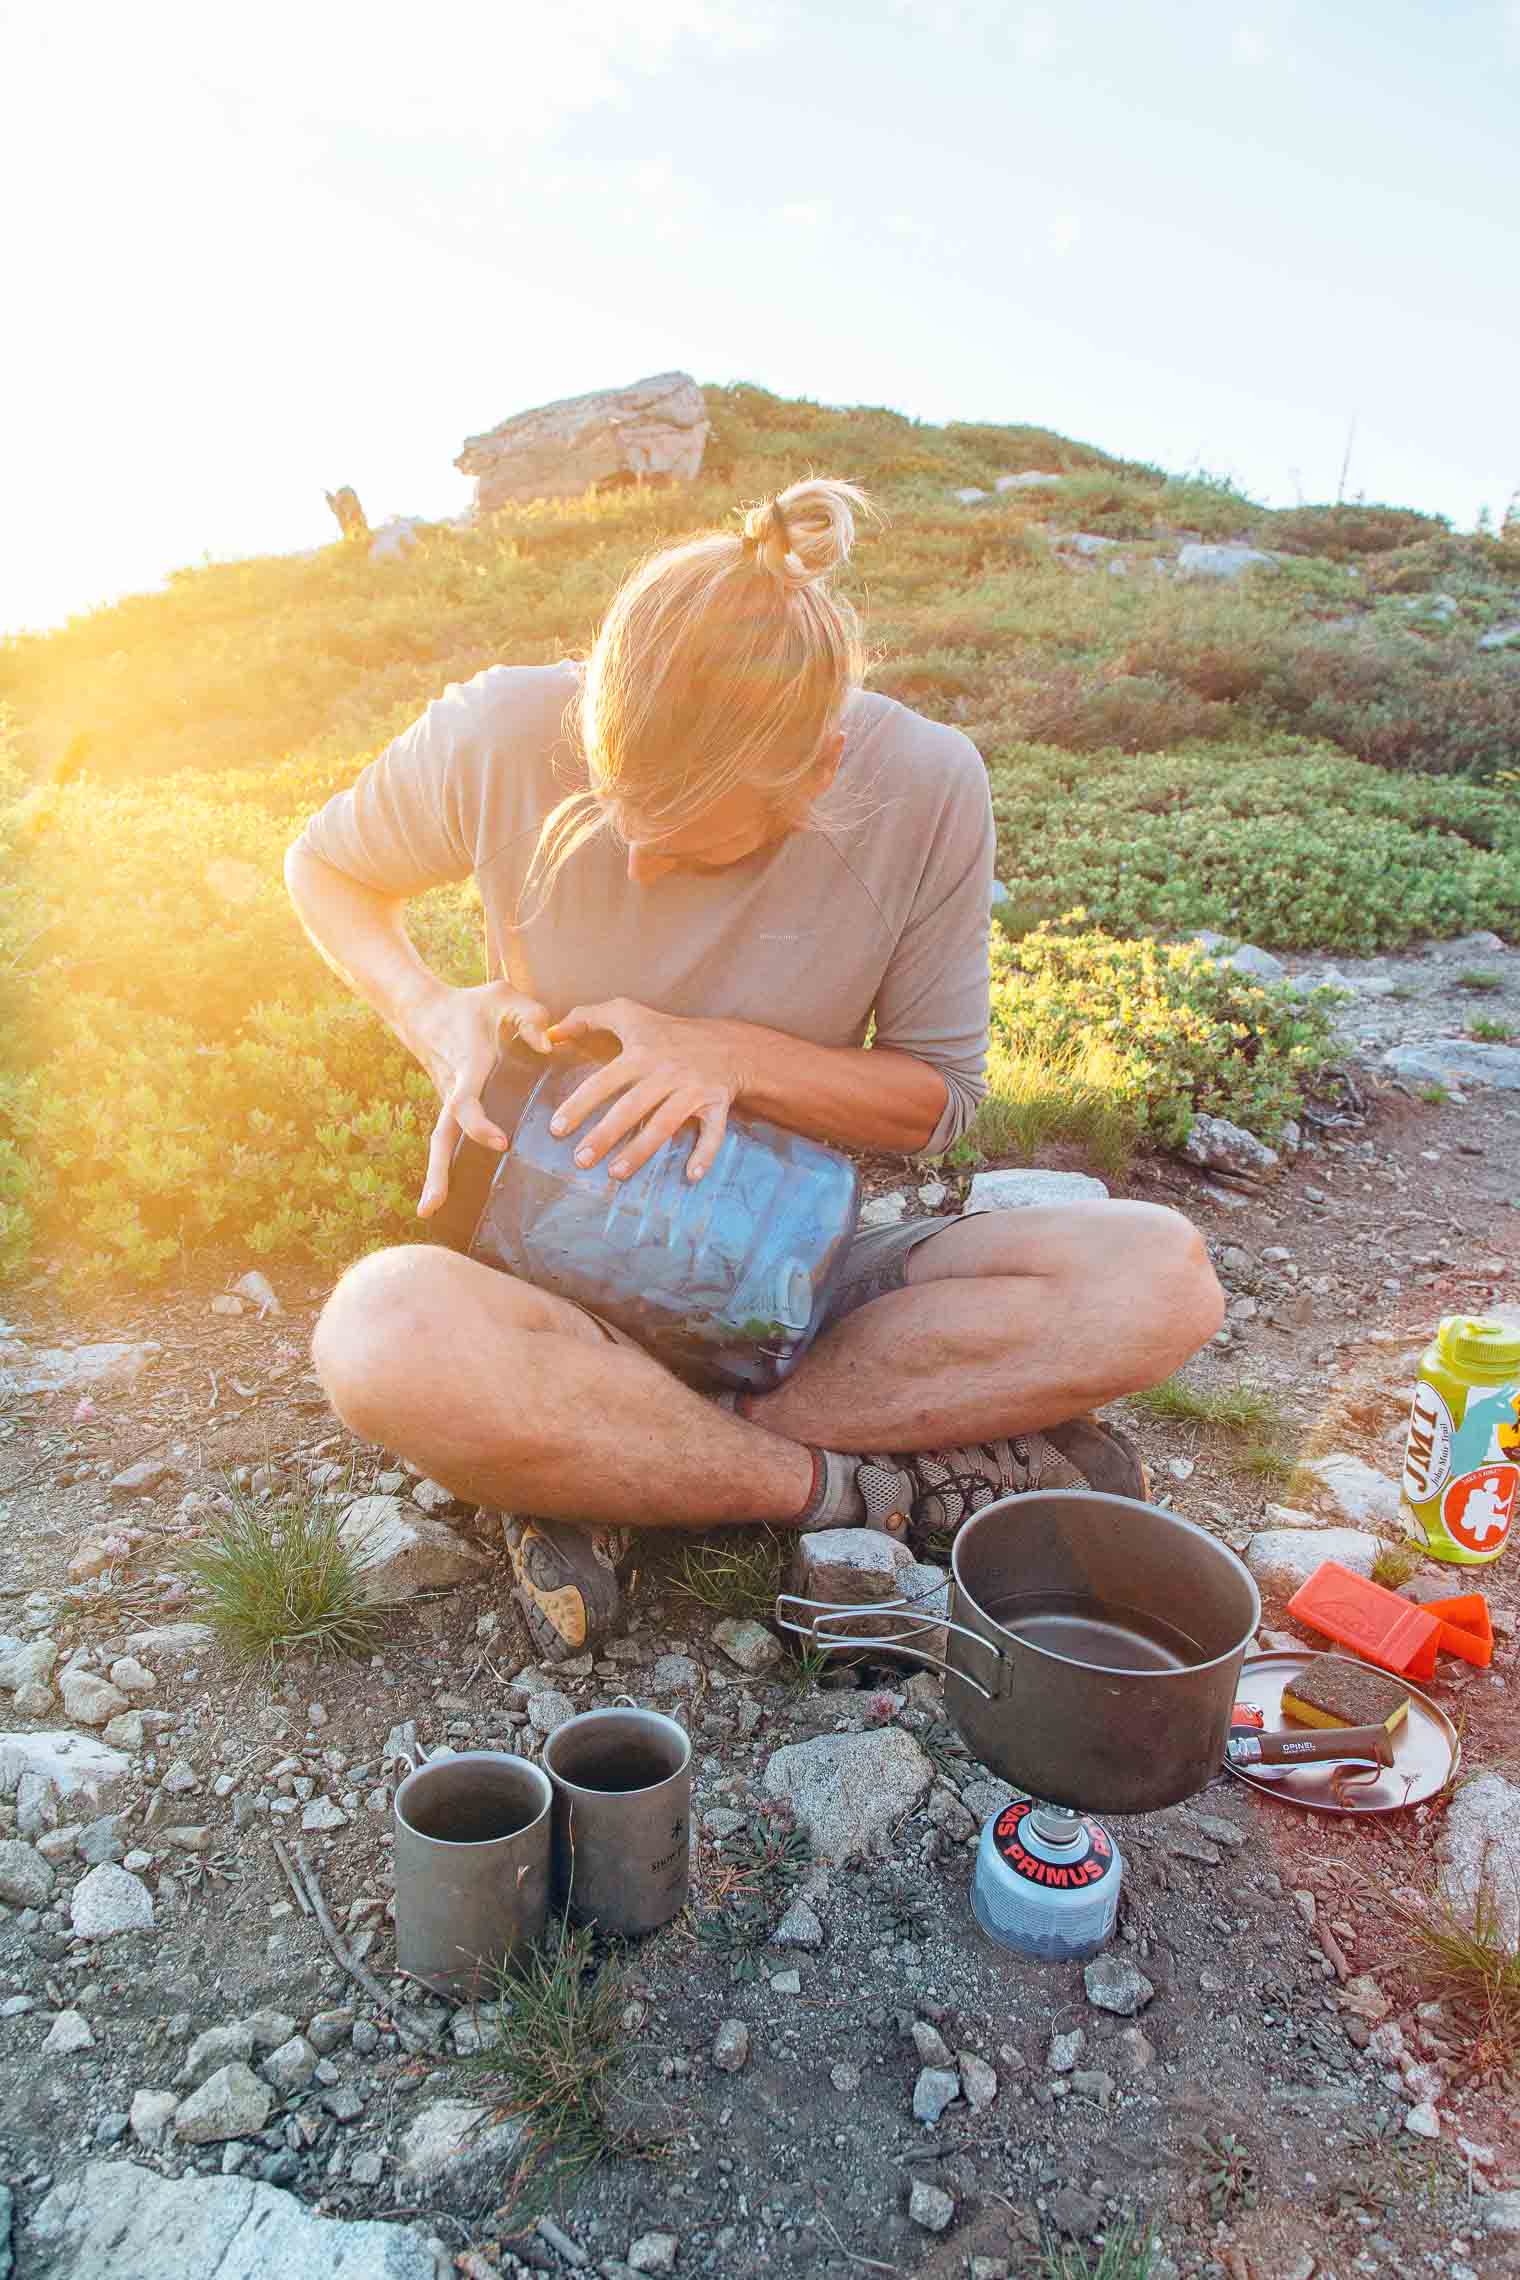
- Organize your food by day so you don’t have to unpack your whole canister to find your next meal. Start with the food for your last day at the very bottom, then layer each subsequent day’s food as you work your way to the top of the canister. Toiletries can go at the top so they are accessible each day.
- Many bars like Cliff and Larabars are very flexible—you can bend them around the rounded sides of the canister or shove them into gaps between larger meal packages.
- Check that all your food and toiletries will fit into your canister before your trip. We recommend packing your bear canister at home, not at the trailhead (or worse, once you hike into camp the first night!). If you’re sending food ahead for a longer hike, consider doing a dry-fit in your canister before shipping your resupply box. We made the mistake of not doing this when sending our resupply to Muir Trail Ranch on the JMT and had to leave lots of tasty calories behind in the hiker bins because they wouldn’t fit.
- Remember that you can carry your first day’s worth of food outside of your bear canister, so long as you don’t leave it unattended in your pack.
How do you carry a bear canister when backpacking?
When you’re packing your backpack, you want to keep your heaviest items in the middle of your pack close to your body—and we’re willing to bet that when it’s full of food, your bear canister will be the heaviest thing in your pack!
You can orient your canister horizontally if your pack allows, or vertically—just make sure that the canister remains in the center of your back to maintain even weight distribution. We like to stuff extra clothes or other soft items around the sides of a vertical canister to keep it in the center.
If you’re carrying a lower volume backpack, you may want to carry your bear canister on the outside of your pack. In that case, your options are: under the “brain” of your pack, on top of your pack using an adjustable V strap, or on the bottom of your pack using the sleeping pad/tent straps.
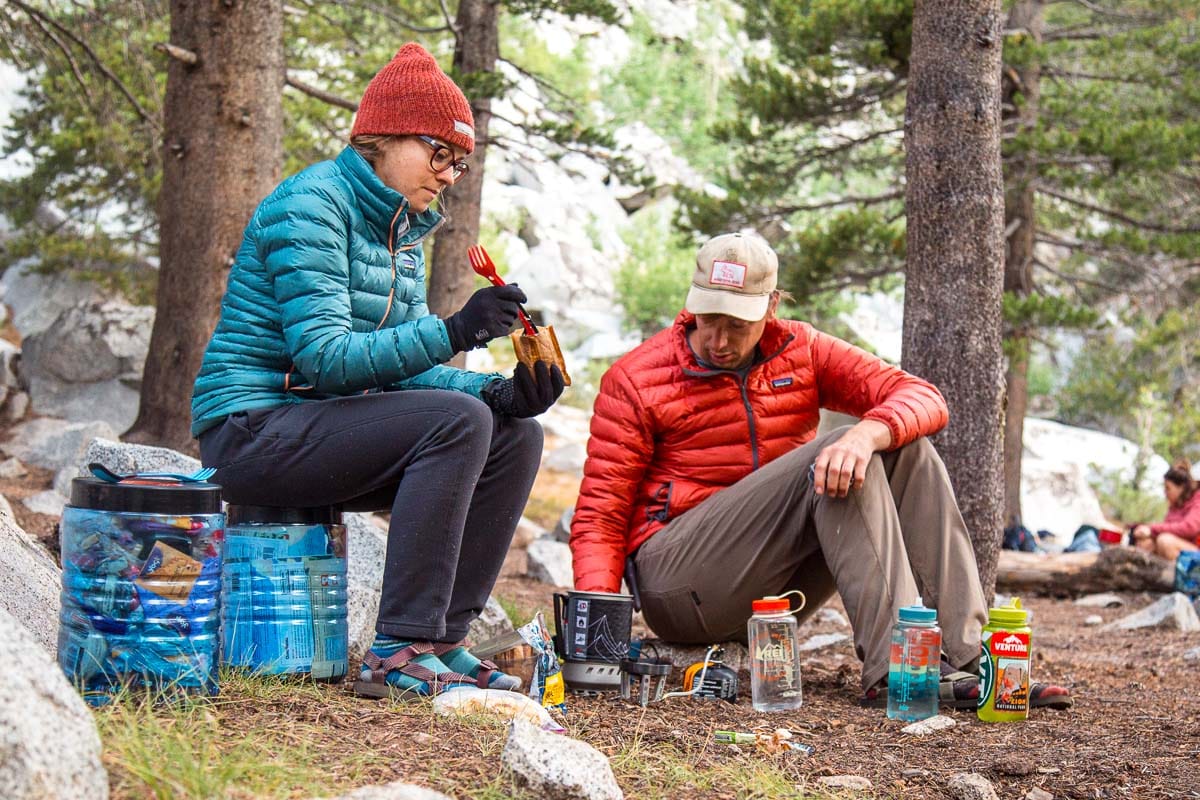
Tips for properly using your bear canister in camp
- Keep your canister properly secured and locked at all times, with the exception of when you’re getting something out or putting items in. A large number of incidents where a bear has obtained food involve improperly locked canisters, or instances where people have their canisters open and then flee when a bear shows up in camp.
- Store your bear canister 100 feet downwind from your tent—and in grizzly country, you’ll want to up that to 300 feet.
- Choose a spot away from cliffs and water sources. If a bear does bat your canister around, you don’t want it rolling off a ledge or into a river.
- Place something on top of your canister to act as a “bear alarm” that will wake you in the event a bear does investigate your canister. We use our cookpot and utensils or a few rocks. This way, we will (hopefully) wake up and be able to deter the bear from messing with the canister and further reinforce the desired behavior of just leaving bear canisters alone.
- Don’t tie anything to your canister that a bear would be able to bite and carry your canister off with. The exception here is if you’re using a Ursack, in which case you want to tie the bag to something so a bear can’t walk off with it (more below).
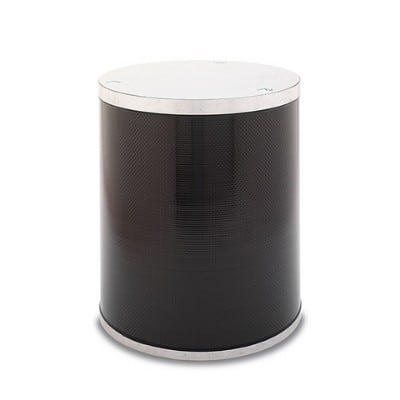
Best bear canisters for backpacking
Below is an overview of bear canisters that are approved for use in various parts of the United States. It’s not exhaustive, but it’s a good representation of the best options that are still widely available in stores and online.
For each canister, we review the specs as well as some of the pros and cons and notes about where it’s generally approved for use (but, always check with the local ranger station where you’re backpacking for current regulations).
Bare Boxer Contender
Weight: 1 lb 9.6oz (25.6 oz)
Volume: 4.5L / 275 cubic inches
Dimensions: 7.4 x 8 inches
IGBC & SIBBG Approved
If you’re a solo hiker and only go on short weekend backpacking trips, this bear canister is your lightest option. However, it only holds about 2 days of food (maybe 3 if you’re super efficient), so there is not much flexibility if you want to go on a longer trip—you’d have to rent or buy a larger canister for longer treks.
BearVault BV450 Jaunt
Weight: 2 lbs. 1 oz (33 oz)
Volume: 7.2L / 440 cubic inches
Dimensions: 8.7 x 8.3 inches
IGBC & SIBBG Approved
Notable exceptions: Not recommended for use in the Eastern High Peaks Wilderness Area of the Adirondack per the DEC
The BV450 Jaunt canister holds about 4 days of food for one hiker, so it’s a great option for solo backpackers who want more flexibility than the Bare Boxer Contender offers. The clear sides mean you can see what’s inside, which is super helpful when you’re looking for a specific item. Additionally, you don’t need any tools or coins to open the lid.

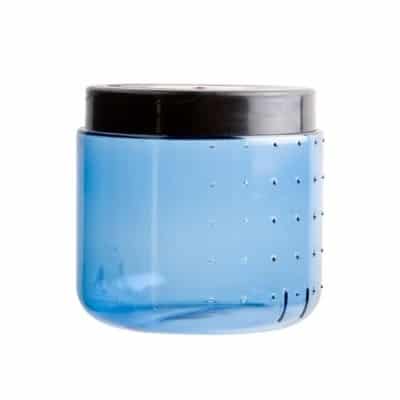
BearVault BV500 Journey
Weight: 2 lbs. 9 oz. (41 oz)
Volume: 11.5L / 700 cubic inches
Dimensions: 8.7 x 12.7 inches
IGBC & SIBBG Approved
Notable exceptions: Not recommended for use in the Eastern High Peaks Wilderness Area of the Adirondack per the DEC
The BV500 Journey is our top pick for solo backpackers who plan to go on longer hikes, or for couples who like long-weekend backpacking trips and want to save some weight by not carrying two, smaller canisters. This canister can hold around 7 days of food for one hiker, or 3-4 days of food for two hikers. Like the BV450, the BV500 has clear sides and there’s no need for any tools to open the lid.
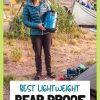
Michael and I share one BV500 for our shorter backpacking trips when hard-sided canisters are required, and we each carried one on our JMT trip.
Bearikade Weekender
Weight: 2 lbs (32 oz)
Volume: 10.7L / 650 cubic inches
Dimensions: 9 x 10.5 inches
Bearikade Expedition
Weight: 2 lbs 4 oz. (36 oz)
Volume: 14.7L / 900 cubic inches
Dimensions: 9 x 14.5 inches
NOT IGBC approved, but is SIBBG Approved so it is allowed in: Yosemite, Sequoia-Kings, Olympic, Lassen, parts of Canyonlands, and Shenandoah National Parks, but not in locations that specify an IGBC approved container is required
The Bearikade Weekender and Expedition models are made of carbon fiber and are the lightest weight canisters for their volumes. They are also the most expensive, setting you back $359 to $424, respectively. However, you can rent either model on the Wild Ideas website, and they offer a 45% discount on rentals if you’re thru-hiking the JMT, PCT, or AT.
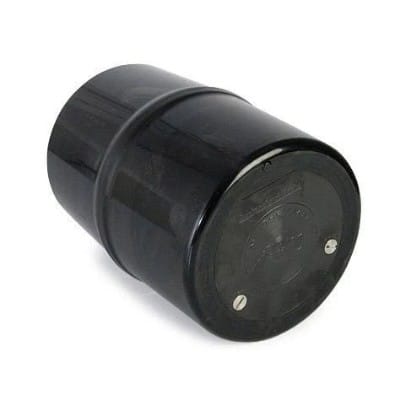
Garcia Backpacker’s Cache
Weight: 2 lbs. 12 oz. (44 oz)
Volume: 10L / 614 cubic inches
Dimensions: 8.8 x 12 inches
IGBC & SIBBG Approved
The Garcia Backpacker’s Cache is the heaviest canister on this list, but we’ve included it because it’s one of the most common canisters available to rent at national parks (including Yosemite) and it’s approved for use in all areas in the US. However, if you’re looking to purchase a canister and have no plans on camping in the Eastern High Peaks Wilderness Area, we’d recommend the BV500 instead, which is lighter, larger, and only $5 more.
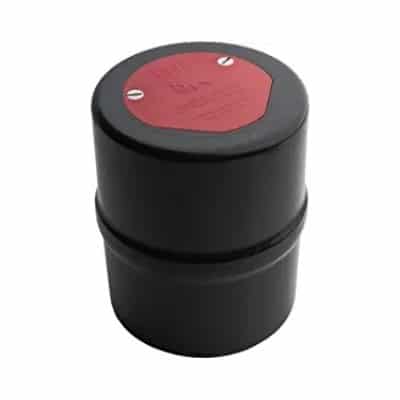
UDAP NO-FED Bear
Weight: 2 lb 6.4 oz (39 oz)
Volume: 7.5L / 455 cubic inches
Dimensions: 8 x 10 inches
IGBC & SIBBG Approved
The NO-FED Bear is a pretty bomb-proof canister that is approved in all areas requiring bear canisters in the US. But, like the Garcia above, it’s heavy for its capacity, and the BV450 would be a lighter option if you aren’t backpacking in the Eastern High Peaks Wilderness Area.
Bear canister alternatives
Ursack Major & AllMitey
Ursack makes two lines of lightweight bear-resistant bags: the Major and the AllMitey. The Major bags are bear-resistant only, while the AllMitey bags are bear and critter-resistant.
The difference lies in the materials: the Major is made of Spectra/UHMWPE fabric, which blocks large teeth and claws but allows smaller teeth to penetrate it. The AllMitey is made from Kevlar and Spectra/UHMWPE fabric, so it protects food from animals large and small.
While this article has focused on bear protection, the truth is that all kinds of animals are interested in your food, and you really want to protect it from all of them! We’d recommend the AllMitey line unless you plan on hanging your Ursack to protect your food from marmots and mice. We’ll admit, the Major line is lighter (as light as 7.6 oz!) and cheaper, so it does have its merits if you’re willing to take additional steps to protect it from critters.
The Ursack is our choice when hard-sided containers aren’t required. This brings us to its big drawback…
IGBC Approved, with a big asterisk
Notable Exceptions: Ursack is not approved in some national parks and wilderness areas, as some require hard-sided containers specifically. Take a look at this map to see which national parks do and do not allow it. Non-National park areas that may not allow the Ursack are not on the map, so check local regulations (as one example, the Ursack isn’t allowed in the Eastern High Peaks Wilderness Area of the Adirondack between 4/1-11/30).
Buy or rent?
Depending on how often you plan on using your bear canister, it may make more sense to rent one than it does to buy one.
Many local outdoor shops, some National Parks (like Yosemite), and even large retail chains like REI, will rent bear canisters for somewhere in the neighborhood of $5-$7 a week.
Additional resources
- Backpacking in Bear Country | REI
- Food Storage and Handling for Backpackers | REI
- Bear Canister Basics | REI
- What to Do if You See a Bear | Yosemite National Park
- Bear Safety Tips | Be Bear Aware
I love my Bearvault, but note that due to the lid design, it’s almost impossible to open when camping in below-freezing temperatures. Opening the lid requires flexing the lid material to get the “child-proof” teeth over bumps in the canister, but when frozen, the plastic of the lid is rock hard.
Fingers crossed that the grubcan gets approved in Olympic ASAP…
Agreed, the Bearvault can definitely be tough to open in the cold. We recently experienced that ourselves and it took some real persistence to get into there to retrieve our morning coffee! I’ve seen some “hacks” online that say if you stick a credit card between the teeth and the lock it helps the teeth slide under easier (alas, we didn’t have a card to try it with on our trip).