How to Make a Swedish Fire Log
This post may contain affiliate links.
Knowing how to make a Swedish fire log is a true camping hack. Our step-by-step instructions will show you how to make your own using an axe, chainsaw, or even regular pre-split wood.
A Swedish Fire Log – also referred to as a Swedish Torch or Canadian Candle – is a highly efficient campfire for cooking.
First developed by the Swedish army during the Thirty Years War, this type of campfire requires just a single log and can be made even when the ground is wet or covered in snow.
It is also a quick and easy way to cook food while camping, especially if you have limited wood to burn.
Benefits of a Swedish fire log
While there are countless ways to make a campfire, the Swedish Fire Log offers some distinct advantages, especially for cooking.
Efficient use of wood
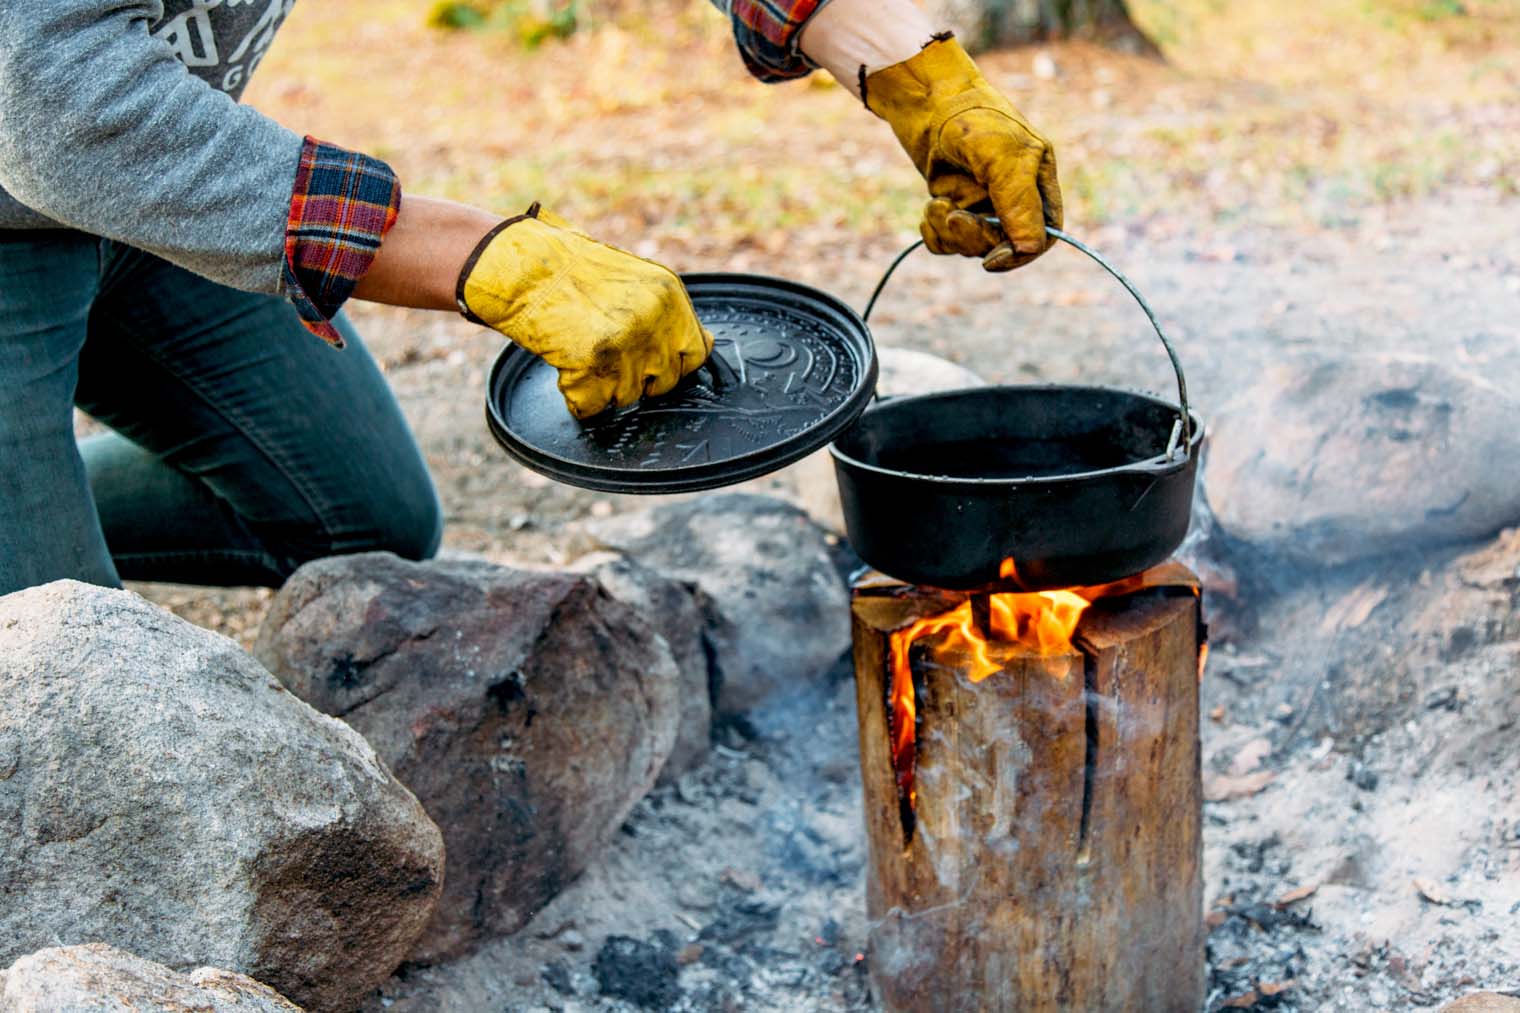
By carefully arranging the wood from a single log, the Swedish Fire Log produces a directional flame that burns from the inside out.
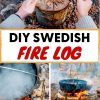
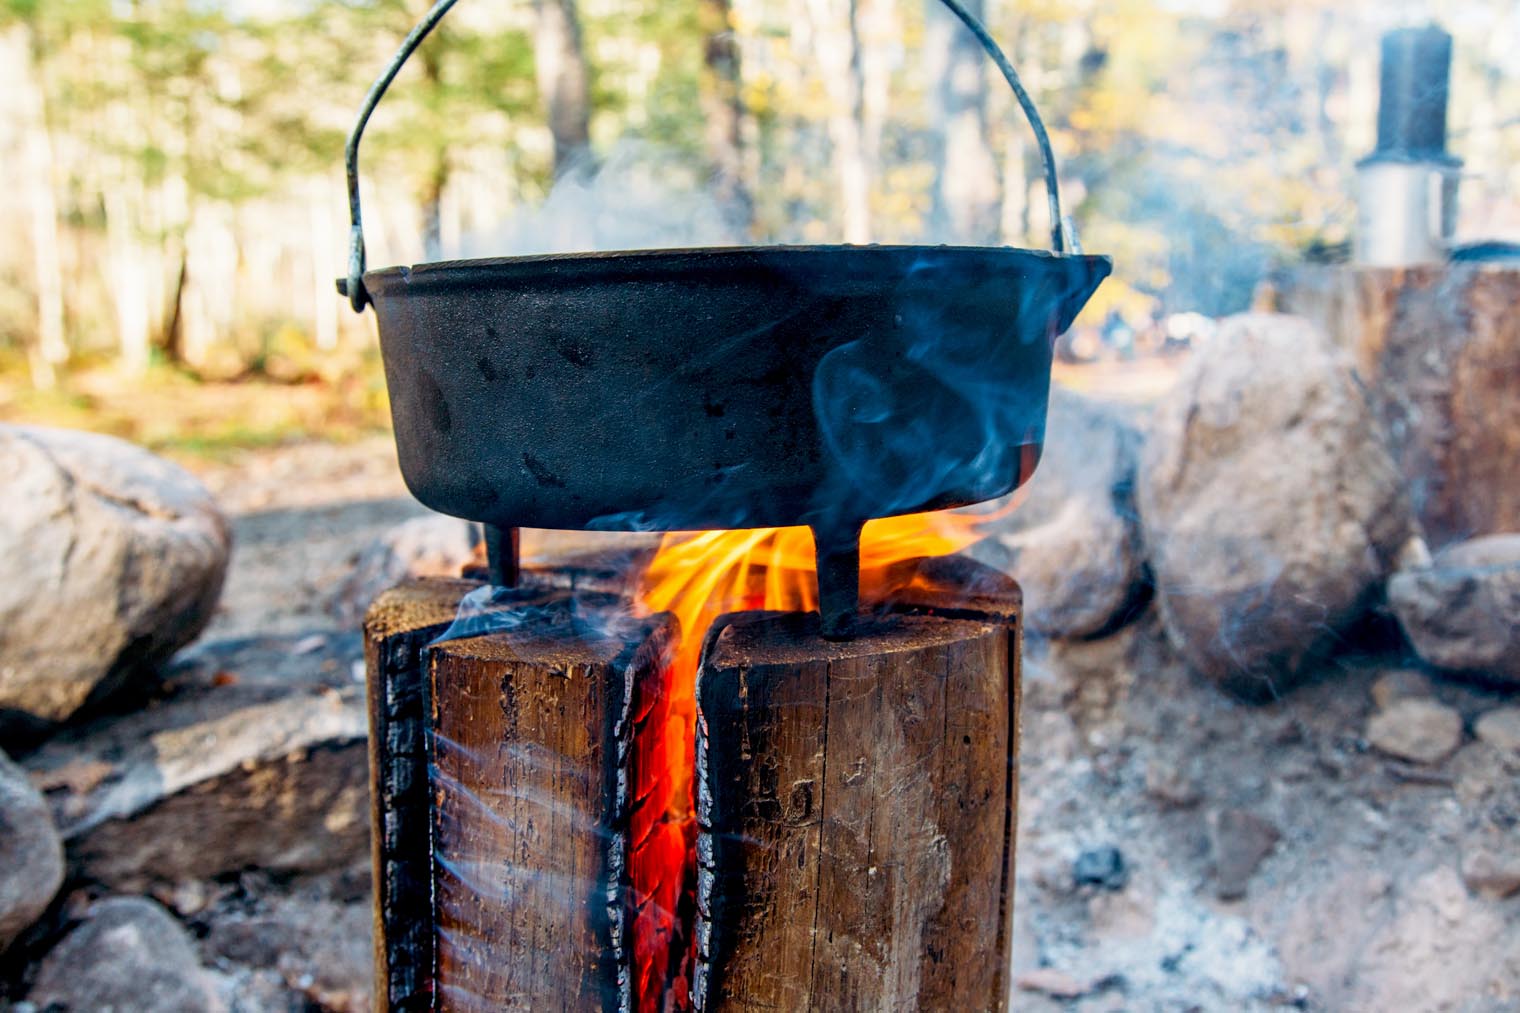
Flat surface for cooking
Placing the end of the log face down gives you a flat surface on the top for cooking. Depending on the size of your log, this surface can easily accommodate a water kettle, dutch oven, or cast-iron skillet. We use a camping dutch oven with legs to allow airflow to the fire beneath it.
Quick, usable flame
Because the flames of a traditional campfire are hard to control, it is usually best to wait until it burns down to embers before cooking. This can easily take over an hour. The Swedish Fire Log concentrates the burn of the fire, allowing you to cook over a focused flame within 20 minutes.
Keeps fire off of the ground
Even with dry wood, it can be difficult to make a traditional campfire when the ground is very wet or covered in snow. The Swedish Fire Log method keeps the fire up off the ground to start, preventing vaporized water moisture from putting it out.
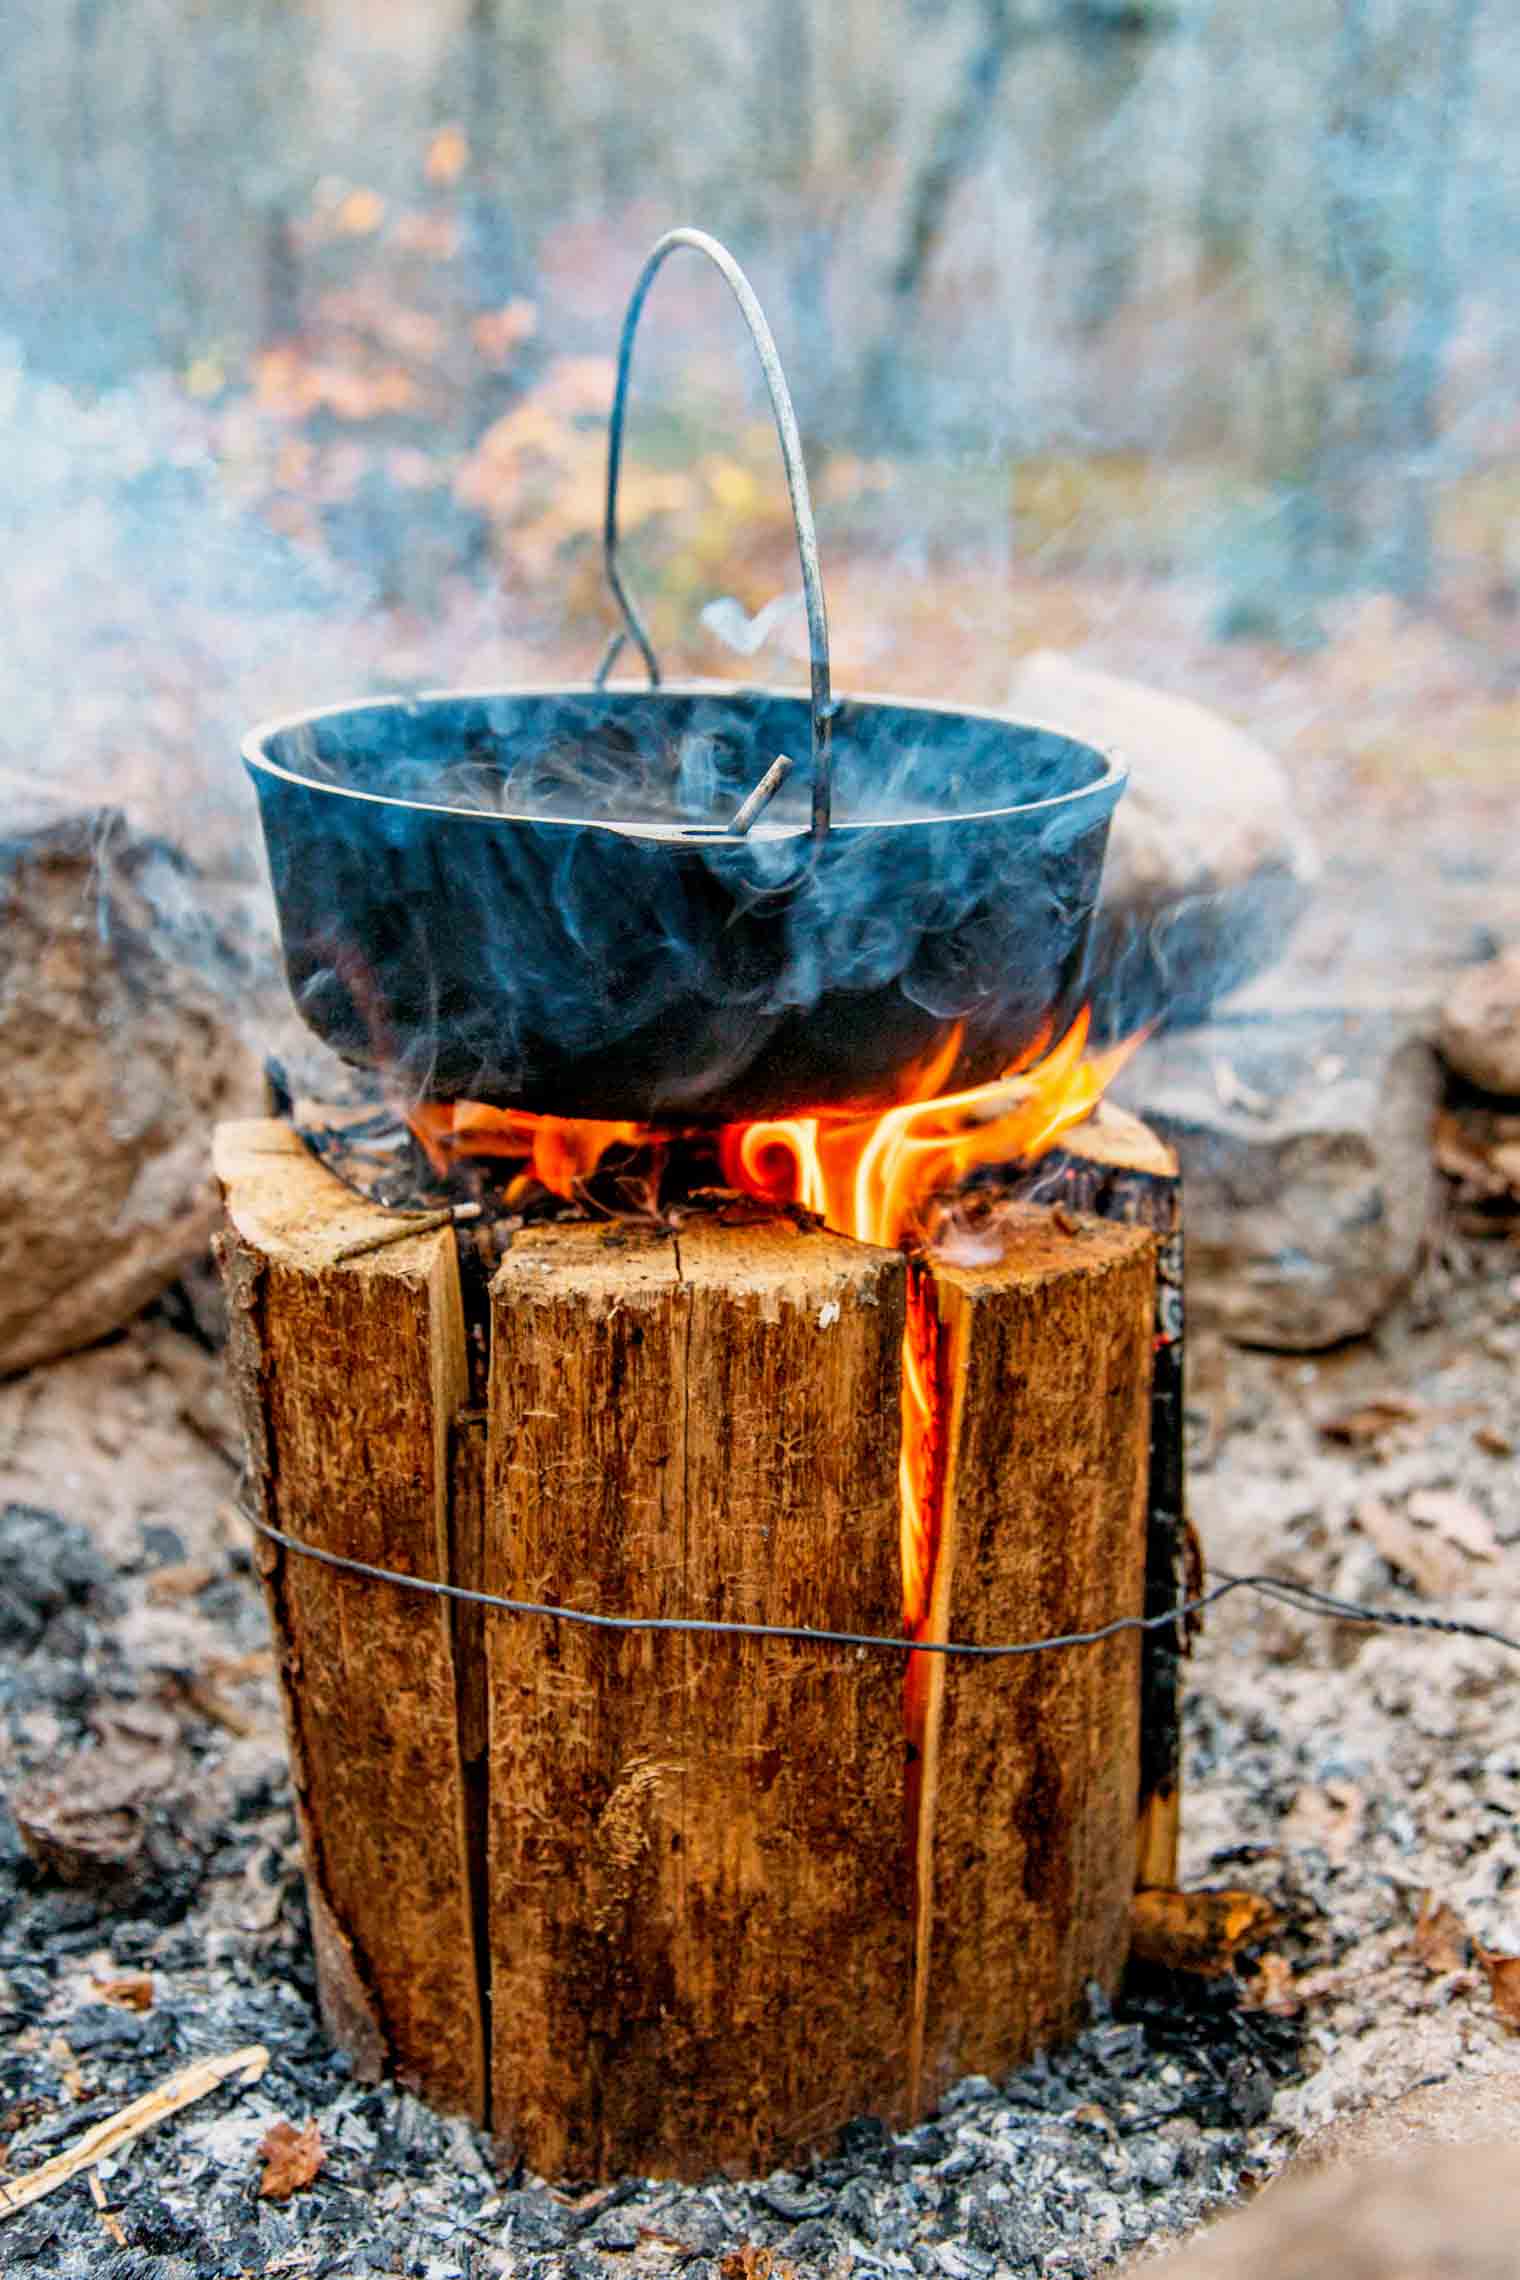
Self feeding and self ventilating
Unlike most campfires that need occasional tending, the Swedish Fire Log is completely self-sufficient once properly lit. As embers burn at the top, they fall down into the log, burning it from the top down. Air is continually drawn in through the slits on the side.
Selecting your wood
The most important step in building a Swedish Fire Log is to use dry wood.
Freshly cut logs are filled with moisture, which can make them very difficult to burn. Even when properly done, a Swedish Fire Log made using wet wood is going to be a nonstarter, so look for as dry of wood as possible.
 |  |
Swedish fire log variations
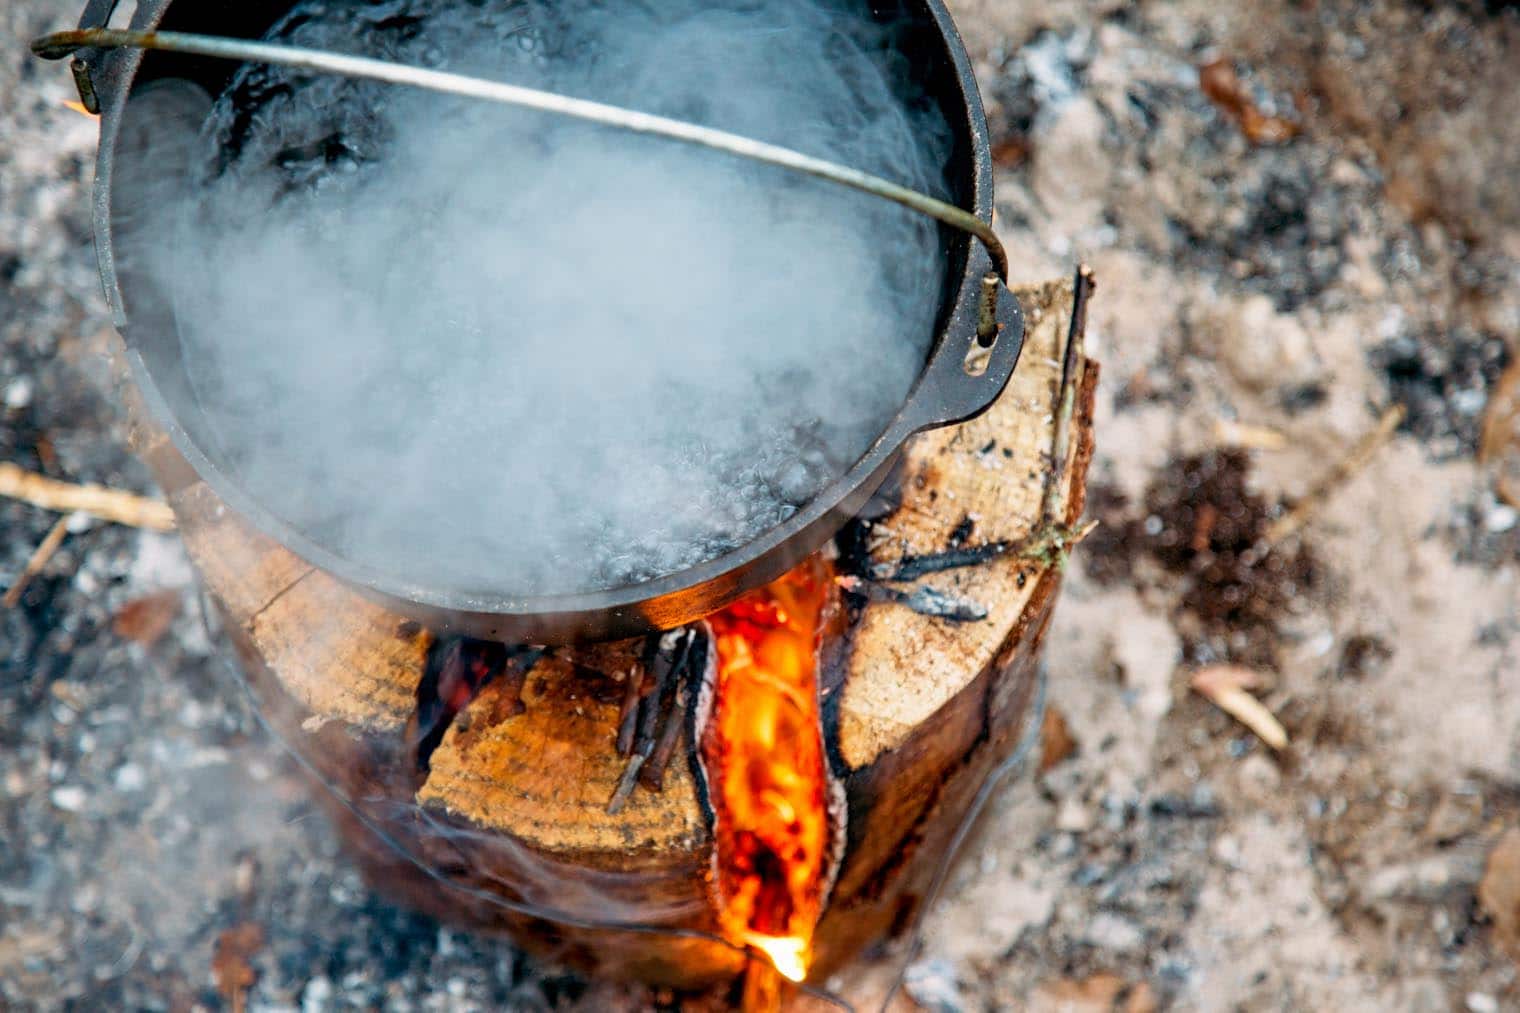
There are a couple of different methods of making a Swedish Fire Log depending on the tools you have available. Here are your options:
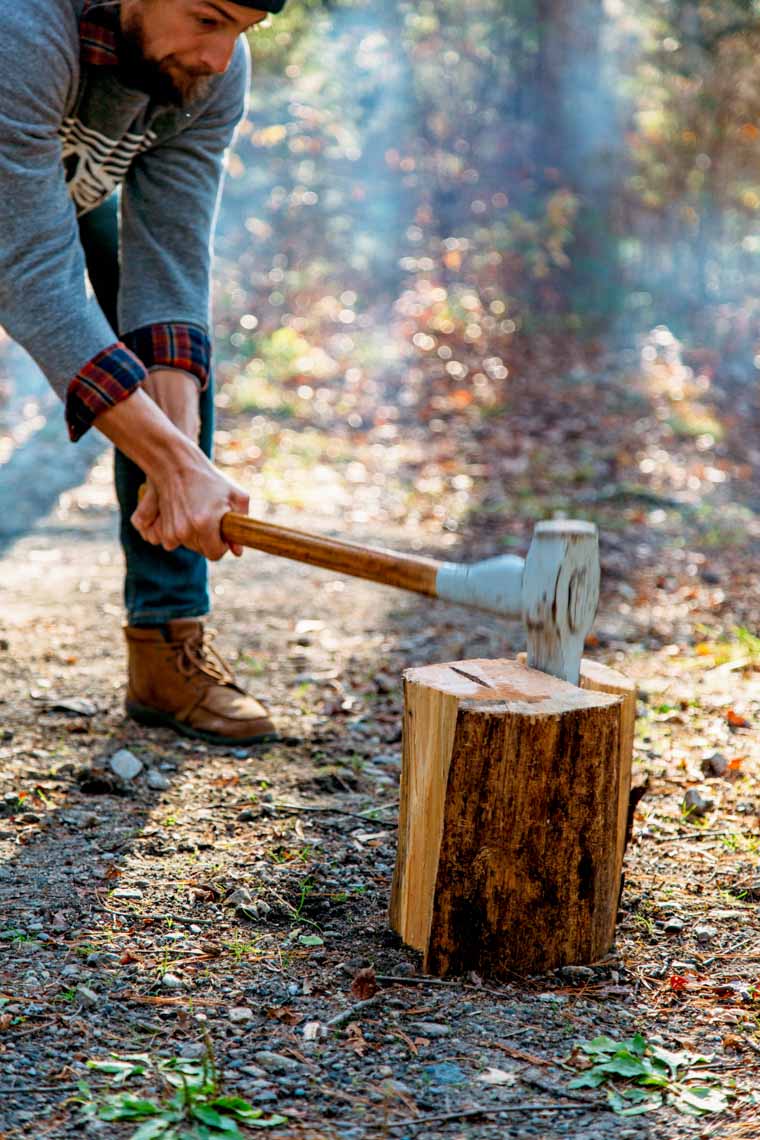
Axe a whole log
- Find or cut a suitably sized log with flat, level ends of either side.
- With a splitting axe or maul, split the log into quarters or sixths. It’s okay if your splits aren’t perfectly symmetrical.
- Reassemble the log and keep the pieces together by using a metal coat hanger or baling wire.
Assemble pre-split wood
- Find pre-split wood of roughly equal height with flat, level ends. Thankfully, most pre-split firewood is cut to uniform lengths.
- Arrange the split wood on its end so it resembles a log, with the bark side facing out.
- Use a metal coat hanger or baling wire to secure wood at its base.
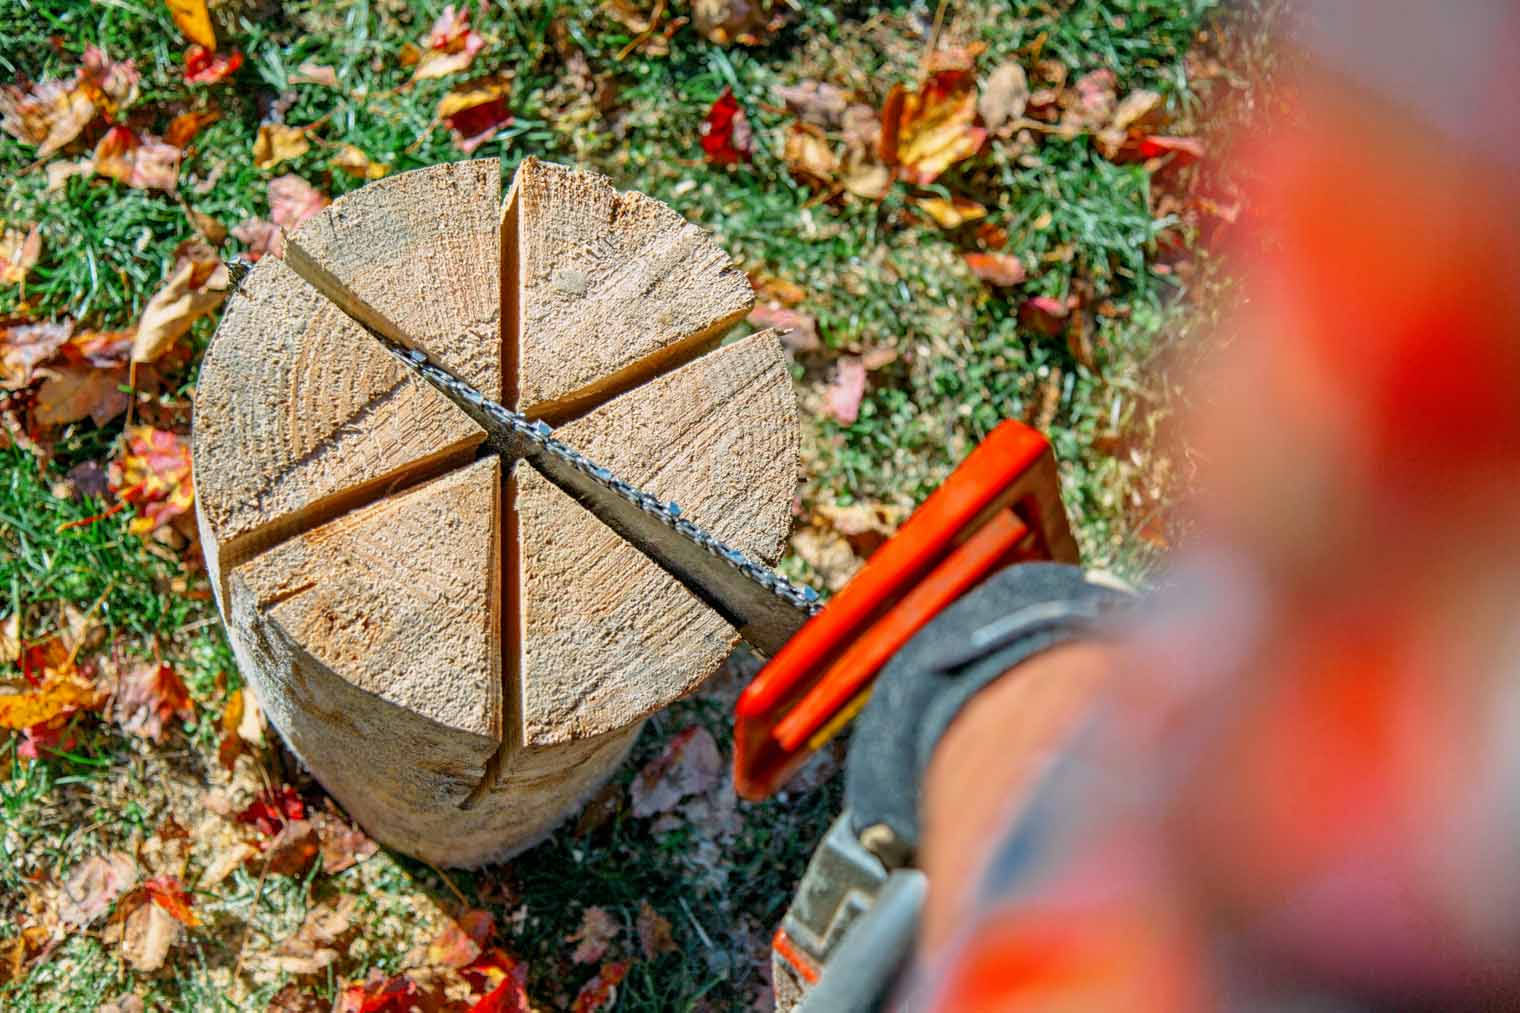
Chainsaw a whole log
- Find or cut a suitably sized log with flat, level ends on either side.
- With the log standing on its end, use a chainsaw to cut slits into the wood. Depending on the width of the log, this can be done in either quarters or sixths. Most chainsaws have crosscut blades, so cutting along the grain might be difficult. Use the bucking spikes as a fulcrum to get better leverage.
- Do not cut all the way through. Leave a few inches at the bottom, so the log remains a single unit so it is easier to transport and will maintain its structure while burning.

Pro Tip
Rough up the interior edges of the wood with a hatchet.
These rough edges will catch embers as they fall down inside the log and help it start faster. You don’t have to do the entire log, just the leading edge that faces the middle.

How to light your Swedish torch

Now that you have your fire log ready, here’s how you get it started.
- Gather kindling (dry sticks, fatwood) & tinder (birch bark, dry grass, paper).
- Insert kindling in the center of the log. Don’t overstuff or put kindling towards the outside of the log, as this will restrict airflow. A nice small bunch in the middle is all you need.
- Place tinder and a small amount of kindling on top of the log in the center. Light the tinder.
The embers from this small fire on top of the log should fall down inside and catch the other pieces of kindling. After a short period of time, the log itself will catch fire, and the fire will continue.
Practical applications
There’s nothing wrong with a traditional campfire, but there a few circumstances where the Swedish Fire Log might be a good option – at least to get a fire started.
Get cooking quickly
Arriving at the campground late? Forgot to make a fire until you’re already hungry? If you don’t want to wait for your campfire to burn down to embers, a Swedish Fire Log will allow you to start cooking right away.
Wet ground
If it has recently rained or there’s still snow on the ground, it will be important to start your fire above the wet ground. A Swedish Fire Log can help you get your fire started and generate enough heat to dry out the surrounding area around your fire.
Limited Wood Supplies
Buying firewood can get expensive, especially at popular campgrounds. Make the most of your wood with a more efficient burn method.
Wow, that’s definitely the coolest thing I’ve seen in months. Can’t wait to give it a try when we’re back in the land of nighttime fires. Did you use a chainsaw or axe, or try both? How long did it burn for, as it’s essentially like one bundle of wood more or less, right?
We tried all three methods: chainsaw, splitting maul, and pre-split wood. Finding a whole log that is dry can be somewhat difficult, while pre-split wood is far more prevalent – especially at campgrounds. Depending on the size of your log (or bundle) it burns for a quite awhile. Ours went for about 2 hours, but the bigger the log, the longer the burn.
I also what I’ve learned! I was also asking my self the same question about ‘how long did yours last. Thank you for the info FRESH OFF THE GRID!!
Great idea!!! With your permission, I’d like to use this information in the summer issue of Scandinavian Press magazine. (www.scandpress.com) Please contact me if you are able to do that. Thank you.
Most of us know this method in Sweden….
Can’t wait to try it. We have a chainsaw, fire pit and logs in our back yard. I will try it tomorrow and if it works good have some ready for our next camping trip.
This experienced camper thanks you. I must ask over and over again, at least in my life, the rhetorical question, once again in my 65 years….”Why didn’t I think of that?!” 🙂 It was used more than 400 years ago in the Thirty Years War?!!! Bloody Hell! I am so dumb…and others are so smart. Thanks for the worthy info. Time to sharpen up my axe and hatchet.
We hear ya! Sometimes it feels like all the good ideas have already been taken! Then again, there’s no point in measuring up against the whole of human history. We’re just thankful a few smart tricks have been passed down to us from past generations.
have been making these for years! one log good height is 24 in 18 t 24 in diameter. cut out cone from top and holes around the bottom for air and light kindling in bottom of cone. wish i could show a pic
Such an informative post. would surely love to try it
So useful. The place is as beatiful as my country