Foil Packet Grilled Nachos
This post may contain affiliate links.
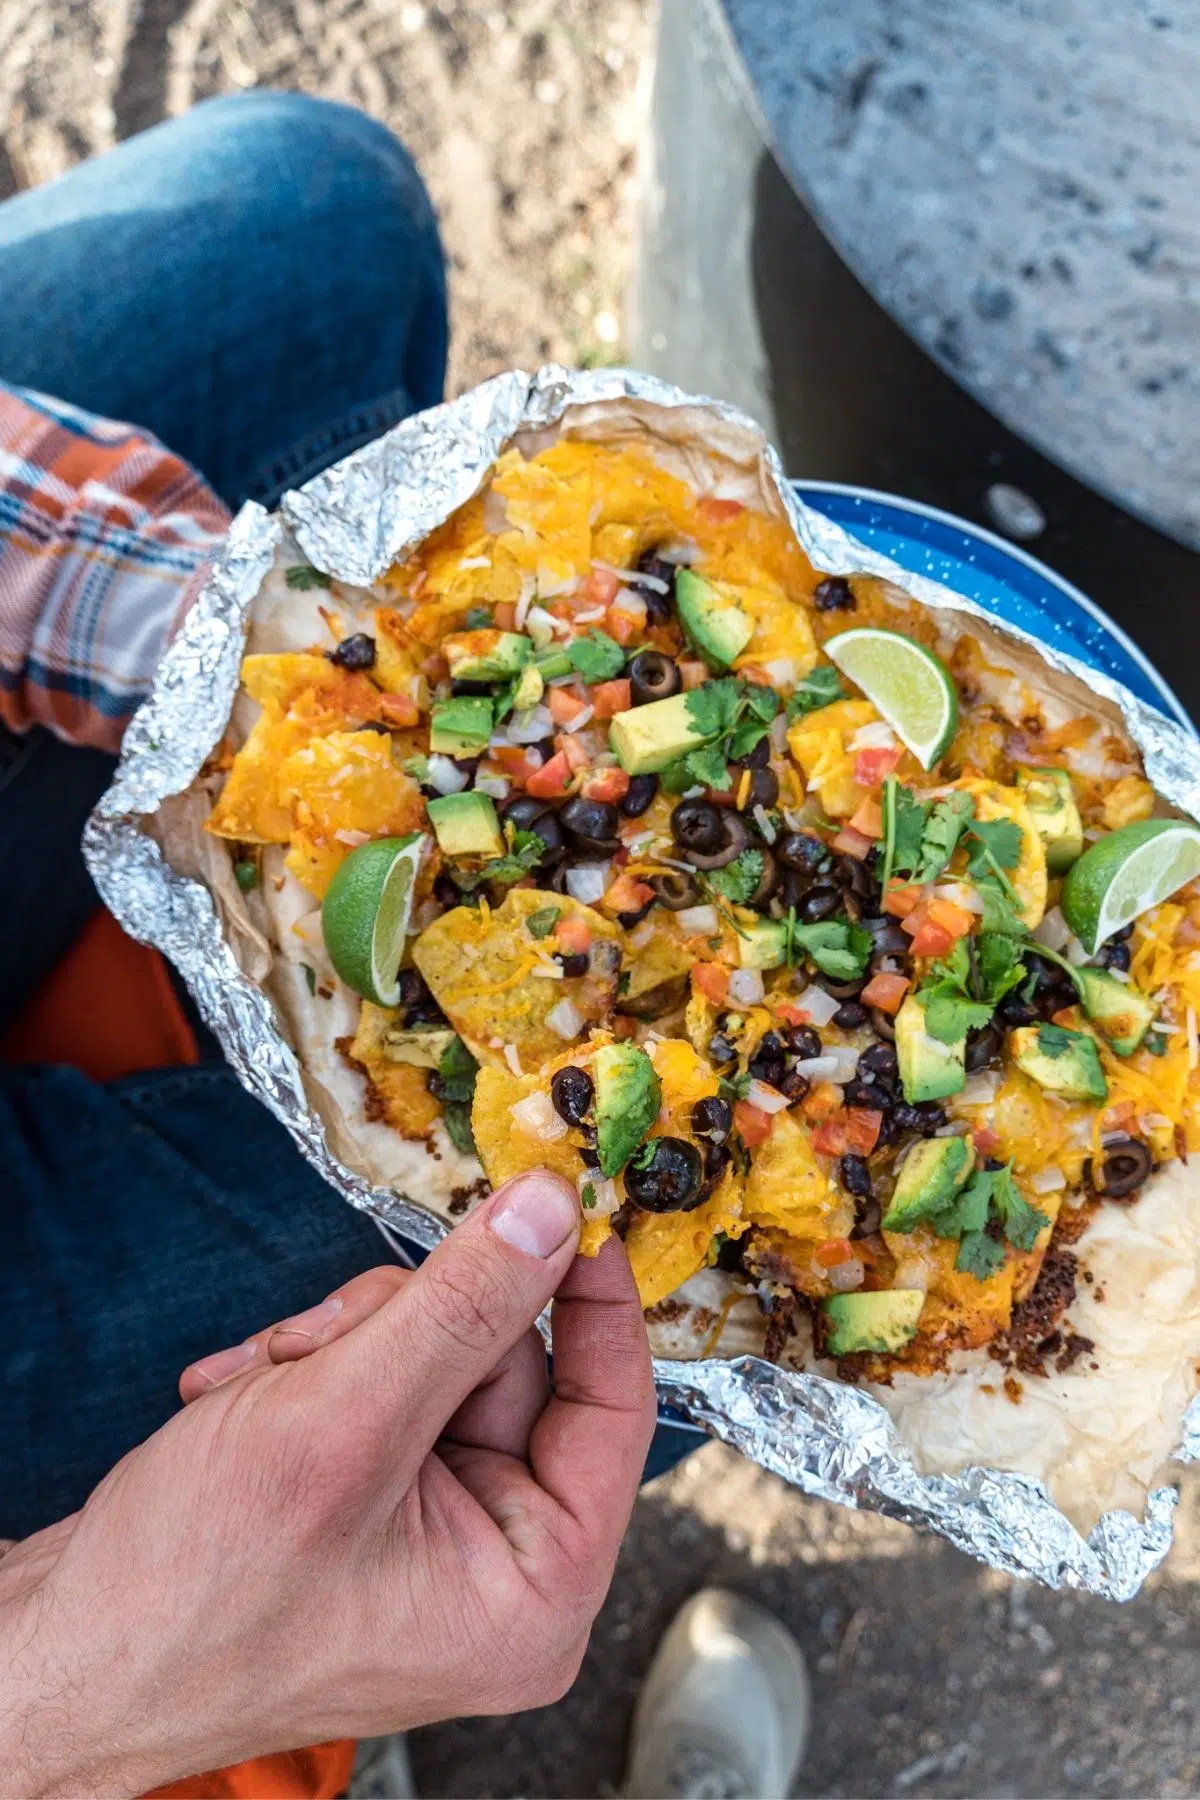
Whether served as an appetizer or entree, these foil packet grilled nachos are so simple to make and a guaranteed crowd-pleaser!
Just round up your favorite ingredients, seal them up in a foil packet, and grill over the campfire for a few minutes. The whole process takes less than 15 minutes, and cleanup is a cinch!
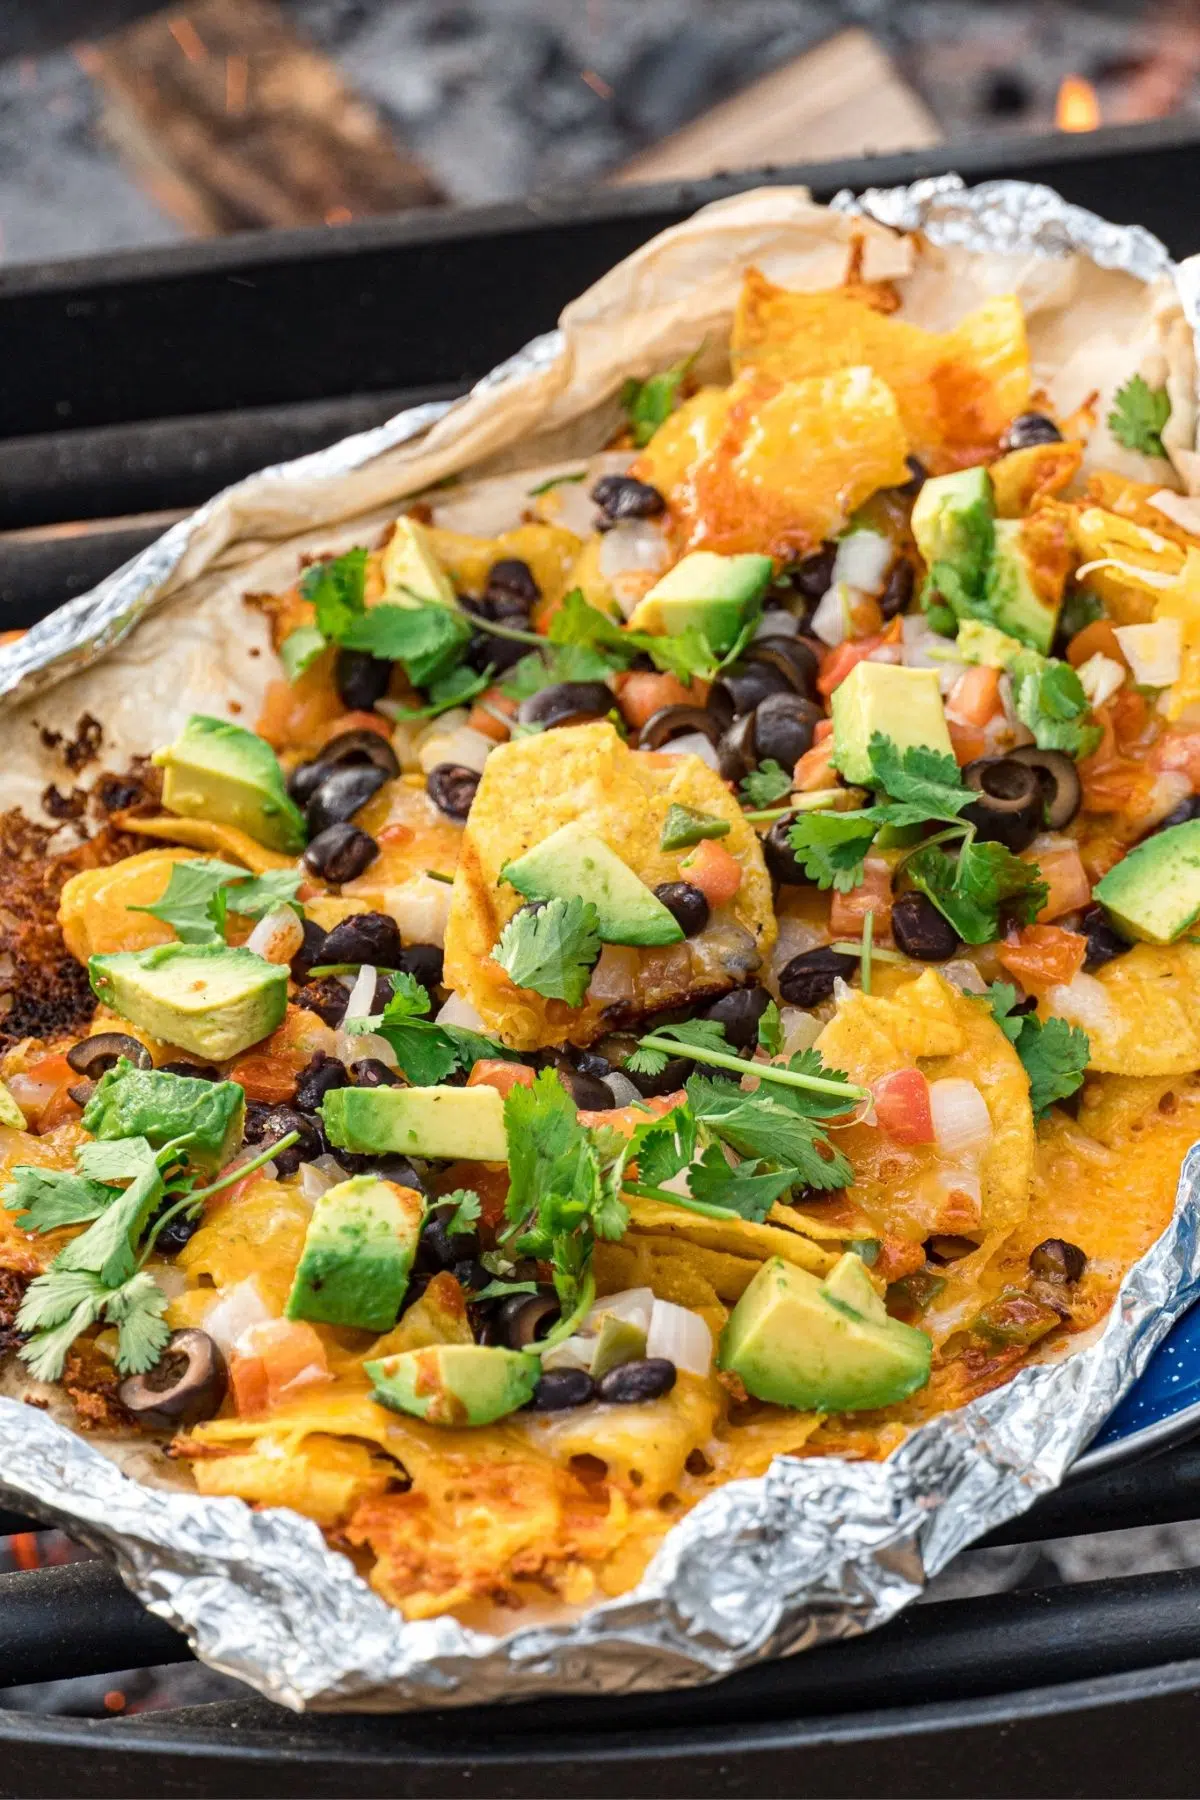
Our campfire nachos have been a fan favorite on this site for years—and for good reason! Who wouldn’t enjoy fully loaded, cheesy nachos at a campsite?!
This summer, we’ve started doing them a little differently, though—grilling nachos in foil! While we love our Dutch oven, sometimes we want to keep things really simple, and that’s where foil packet meals really shine.
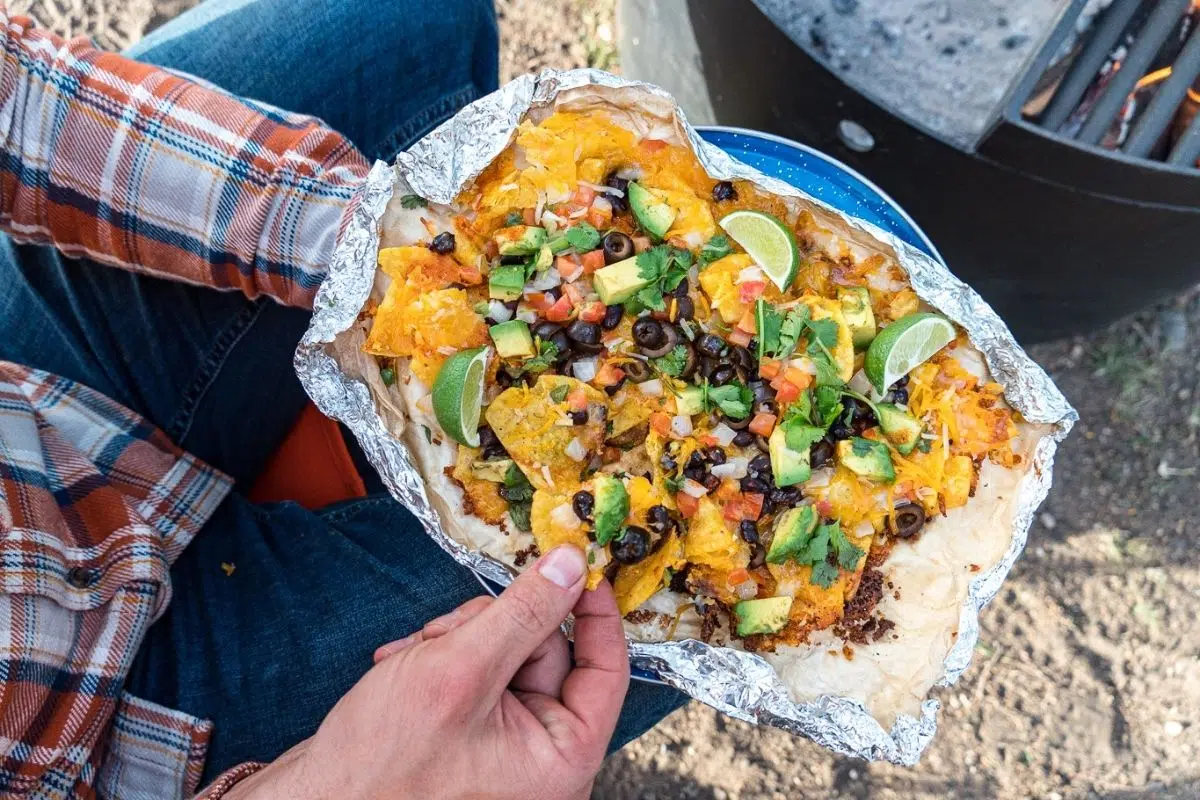
Since they are the perfect single-serve size, we get to create our own nacho foil packets exactly how we each like them. Then, the packets get tossed on the campfire grill for a few minutes until the cheese melts, and they’re done!
Keep reading to learn how to make your own perfect grilled nachos on your next camping trip!
Ingredients
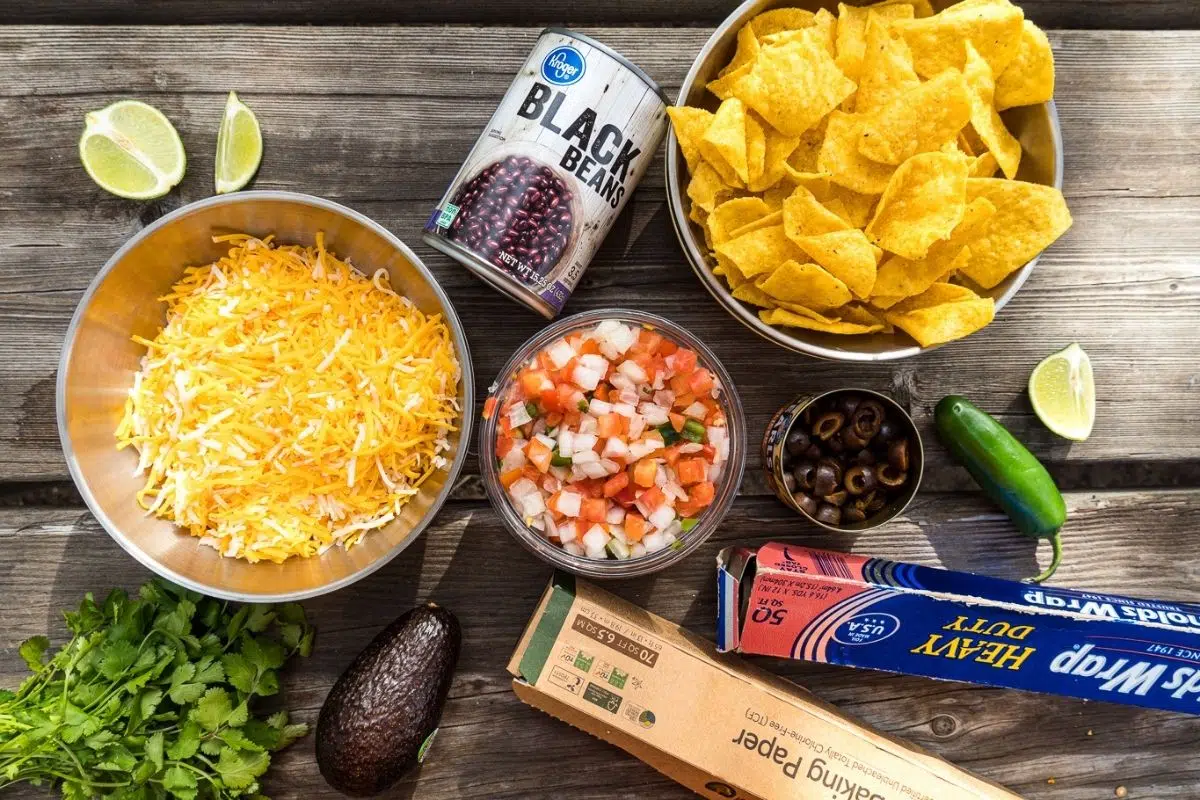
Obviously you have A LOT of creative liberty when selecting ingredients for nachos. What ever combinations taste good to you! But here are some of the major ingredient categories.
Chips: You’re going to need some sort of chip to make nachos. Corn tortilla chips, Kettle chips, tortilla / kettle chip blend, pork rinds (keto).
Cheese: A shredded Mexican blend is the classic, but you can mix it up with different cheeses. Cheddar, Monterey jack, pepper jack, etc. For a vegan VioLife makes a really good, very meltable shredded cheese.
Extras: You can really go wild here, but here are some of our favorites: black olives, diced red onion, fresh jalapenos, sliced cherry tomatoes, green chiles (from can), black beans, pulled pork, carnitas
Toppings: These are cold ingredients that are added after the nachos are done cooking. Cilantro, green onions, avocado slices or guacamole, sliced red cabbage
Salsa: Pico de gallo, Tapatio, Cholula
Equipment
Aluminum Foil: Use Heavy Duty aluminum foil for these foil packets. It’s easy to work with, holds up to the heat of the fire, and doesn’t shred when handled with gloves or tongs.
Parchment Paper: If you want to avoid cooking directly on aluminum over high heat, line the inside of the foil packet with parchment paper. Everything cooks the same, just without direct contact with the aluminum. It also keeps the foil clean, so it can be more easily reused or recycled.
Heat Resistant Gloves: These heat resistant gloves make working around a campfire or backyard grill so much easier.
Step-by-Step
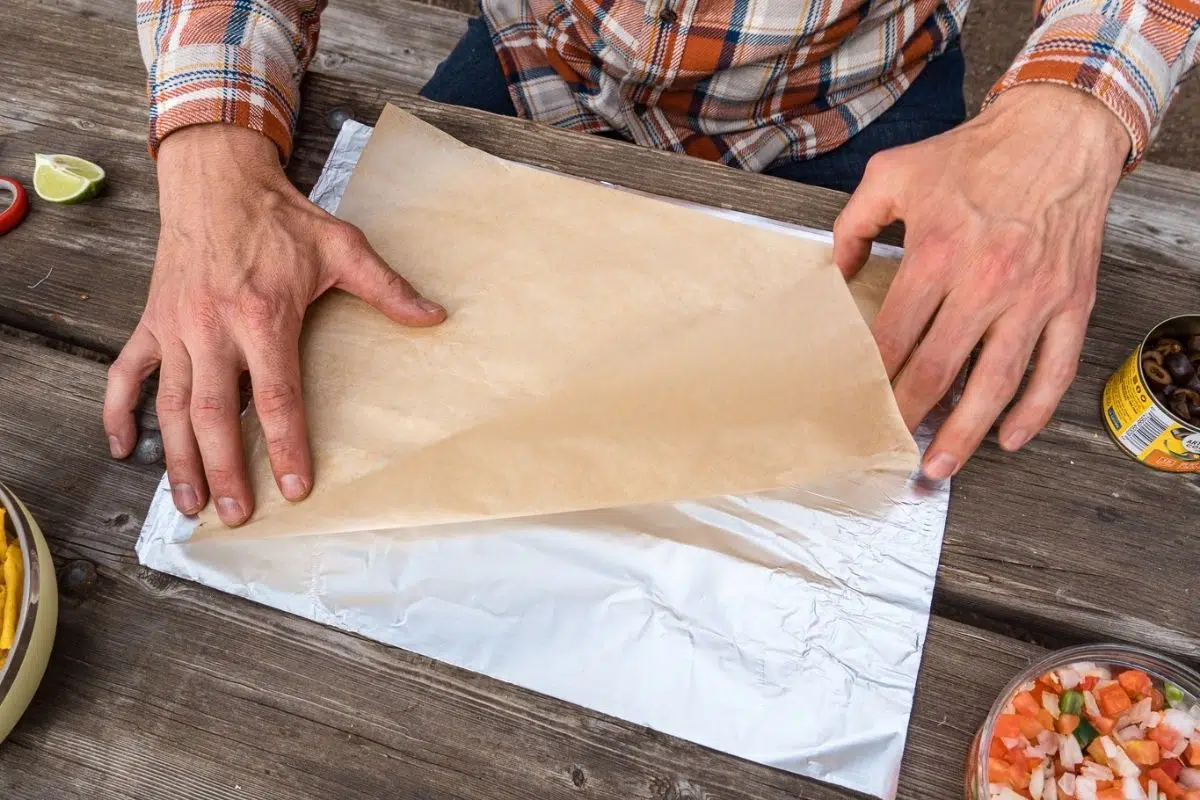
Lay down one sheet of aluminum foil about 18 inches long. Place a piece of parchment paper roughly the same size down on top of that. The parchment paper is optional, but it helps the foil stay clean so it can be re-used a few times before being recycled.
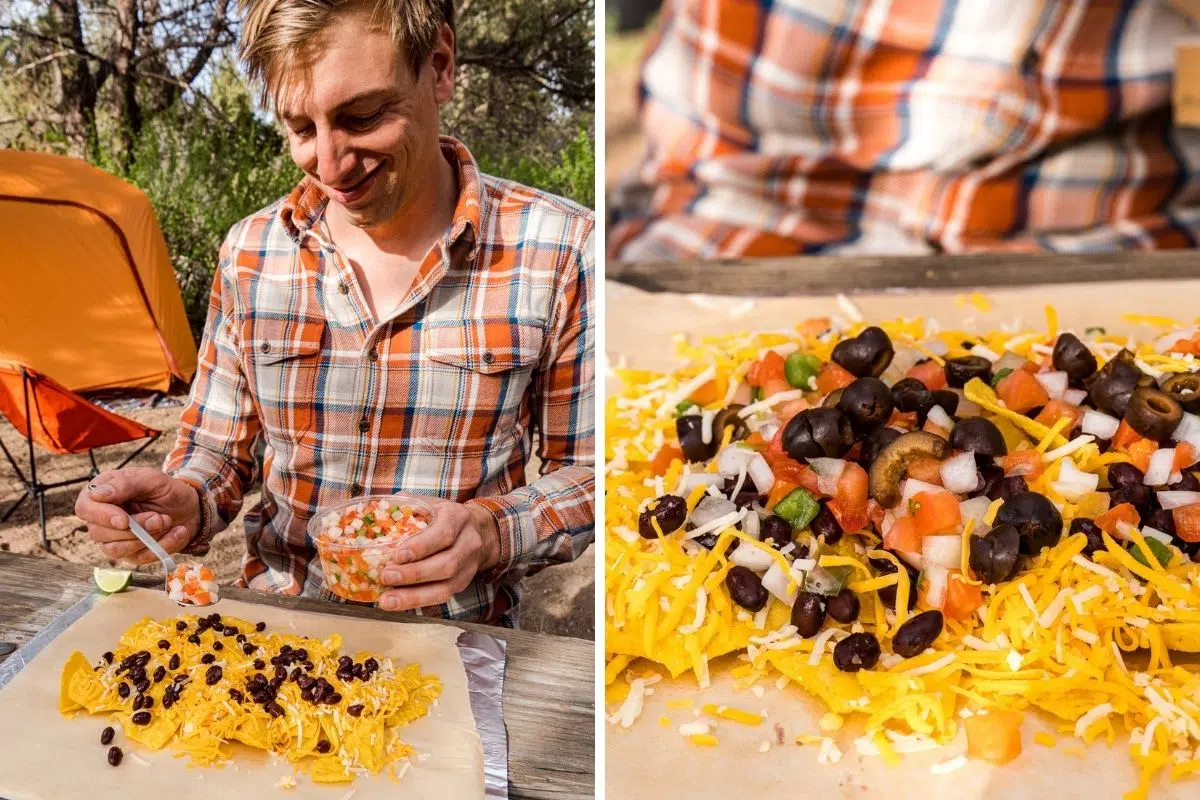
Create a mound of chips in the middle, leaving about a 2” perimeter from the edge of the foil. Add your cheese to cover the chips. Next, add any of your toppings you want to be warmed up, such as beans, salsa, olives, green onions, etc.
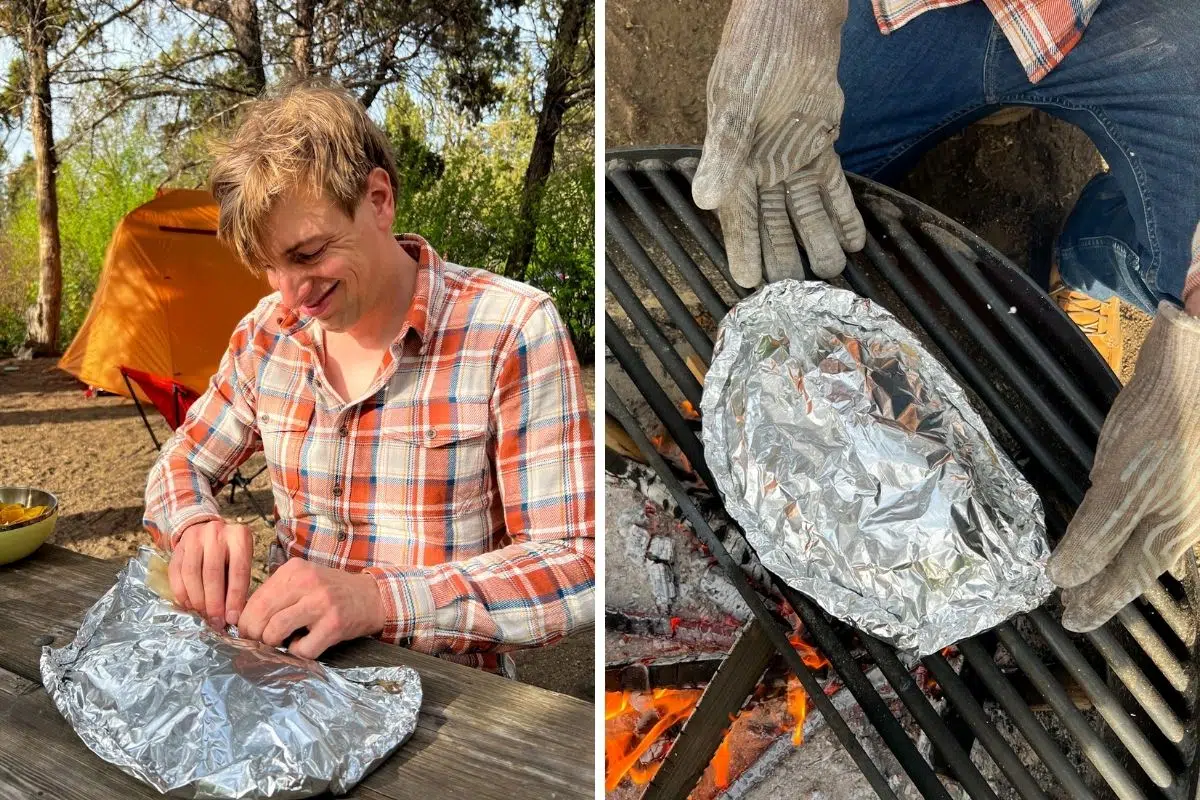
Place a second sheet of parchment paper on top, then a second sheet of aluminum foil on top of that. Crimp the two aluminum foil pieces together around the edges to create a tight seal.
Place the foil packet over indirect medium heat either over your campfire or propane grill for 8-10 minutes. You do not need to flip it.
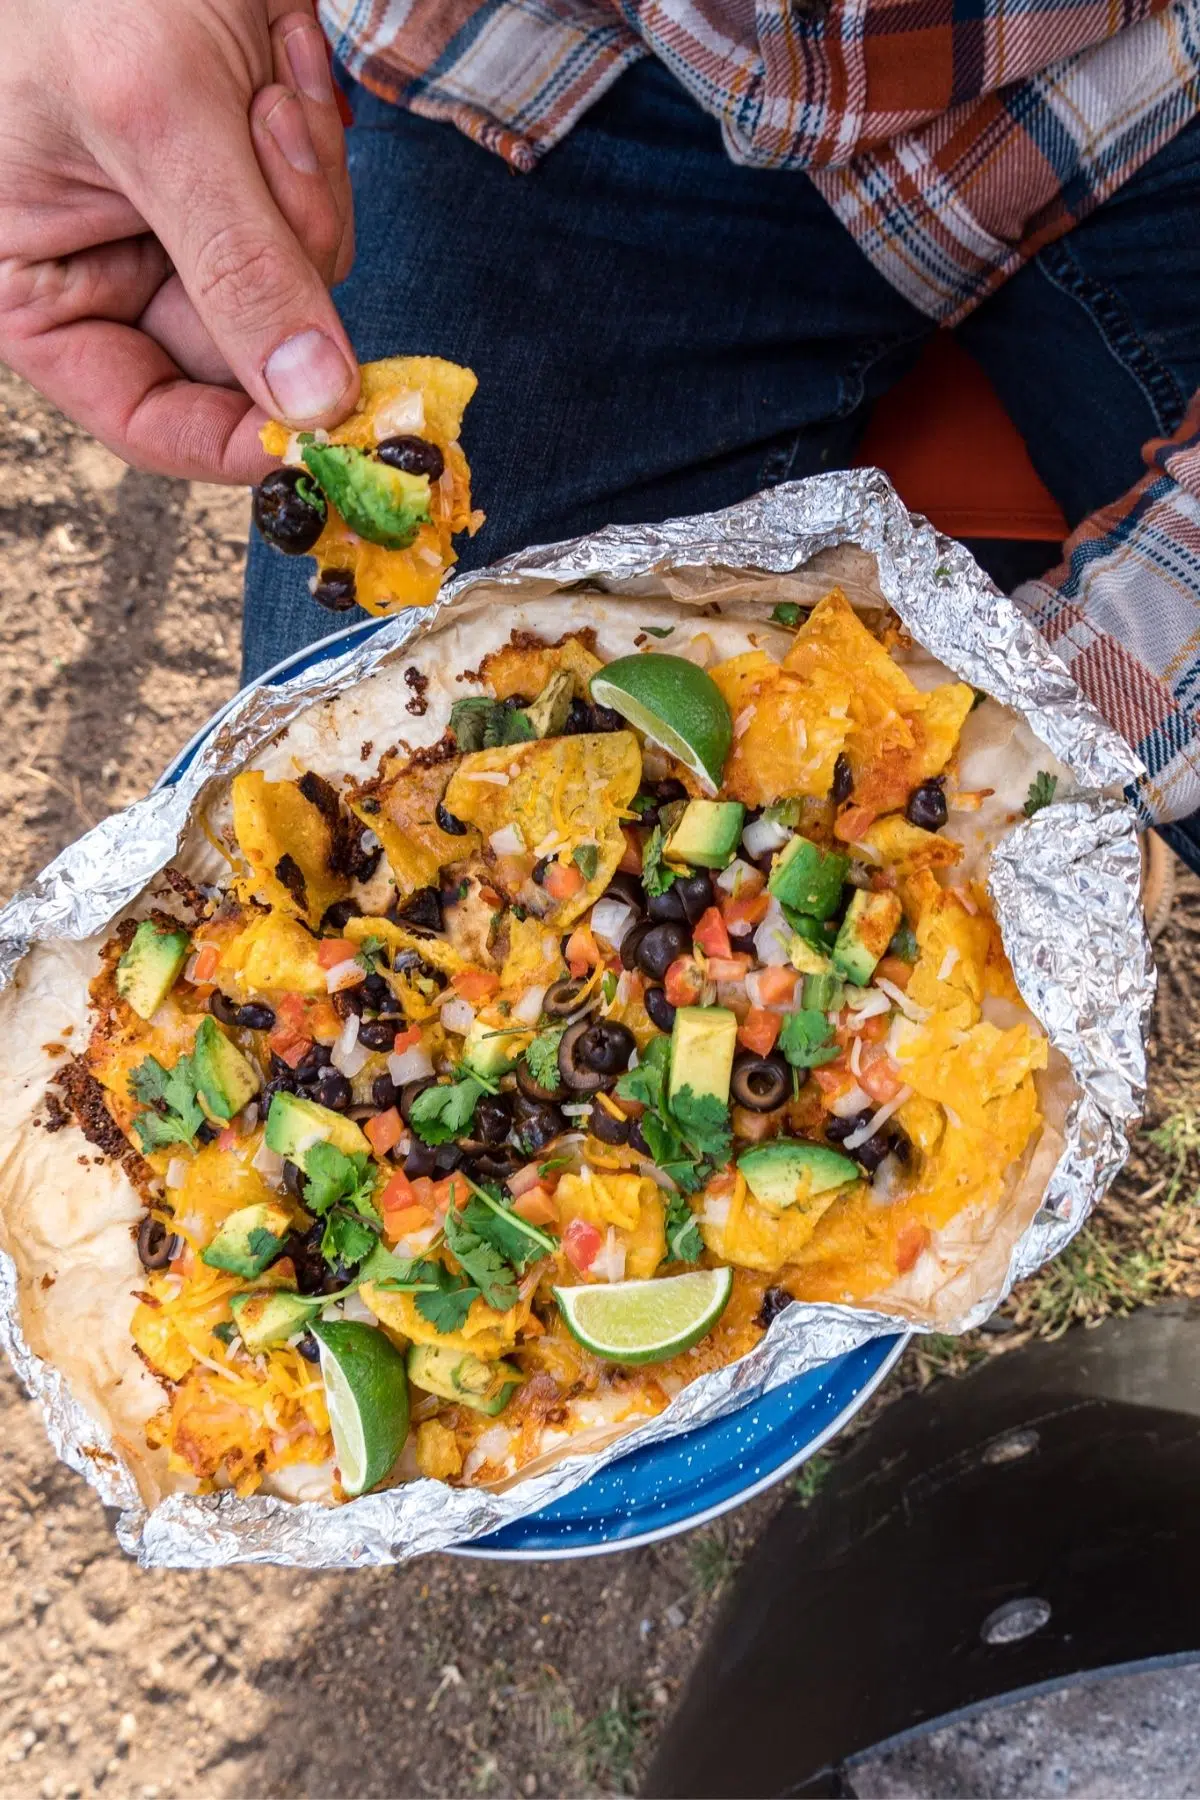
Remove from the heat and carefully unseal the top sheet of foil and parchment paper. You can now add any remaining toppings, such as avocado, cilantro, sour cream, hot sauces, etc.
Ingredients
- 4 oz tortilla chips
- 1½ cups shredded Mexican cheese blend
Toppings of your choosing
- Black beans
- Pico de gallo, or other salsa
- Sliced black olives
- Avocado, or prepared guacamole
- Cilantro
- Green onions
- Hot sauce
- Sour cream
Instructions
- Get your campfire started or preheat your propane grill.
- Lay down one sheet of aluminum foil about 18 inches long. Place a piece of parchment paper roughly the same size down on top of that.
- Create a mound of chips in the middle, leaving about a 2” perimeter from the edge of the foil. Add your cheese to cover the chips. Next, add any of your toppings you want to be warmed up, such as beans, salsa, olives, green onions, etc.
- Place a second sheet of parchment paper on top, then a second sheet of aluminum foil on top of that. Crimp the two aluminum foil pieces together around the edges to create a tight seal.
- Place the foil packet over indirect medium heat either over your campfire or propane grill for 8-10 minutes. You do not need to flip it.
- Remove from the heat and carefully unseal the top sheet of foil and parchment paper. You can now add any remaining toppings, such as avocado, cilantro, sour cream, hot sauces, etc.
- Enjoy!


