How to Dry Herbs
This post may contain affiliate links.
There are so many great reasons to dehydrate your own fresh herbs: they taste better than store-bought dried herbs, can reduce food waste, and can save you a ton of money. Best of all, drying herbs is incredibly easy!
One of the biggest benefits of owning a dehydrator is the ability to dehydrate your own fresh herbs. We didn’t know this was going to be such a tremendous value-add when we bought our first dehydrator, but now having owned one for years, being able to dry our own herbs is truly a total game-changer.
First, dehydrating your own fresh herbs just tastes so much better than anything you can buy at the grocery store. Dried herbs from the store all have a dull, vaguely dusty taste from sitting on the shelf too long, whereas recently dehydrated parsley, cilantro, mint, etc all have a vivid intensity of flavor. It can also be much cheaper to buy fresh herbs from the store and dehydrate them yourself – to say nothing of growing your own herbs yourself!
Secondly, food waste. How many times have you had to toss a sad, neglected bunch of cilantro or parsley that got buried in the back of the fridge? If you had dehydrated it, you could use it entirely at your leisure.
Lastly, if you have a small herb garden at home, dehydrating allows you to store your harvest for upwards of a year. So when it’s time to pare back that mint bush or figure out what you’re doing with all this basil at the end of summer, you can easily save your fresh herb bounty for winter.
In conclusion: dehydrating your own herbs is awesome. And we’re going to tell you everything you need to know to do it properly!
What types of herbs can be dehydrated?
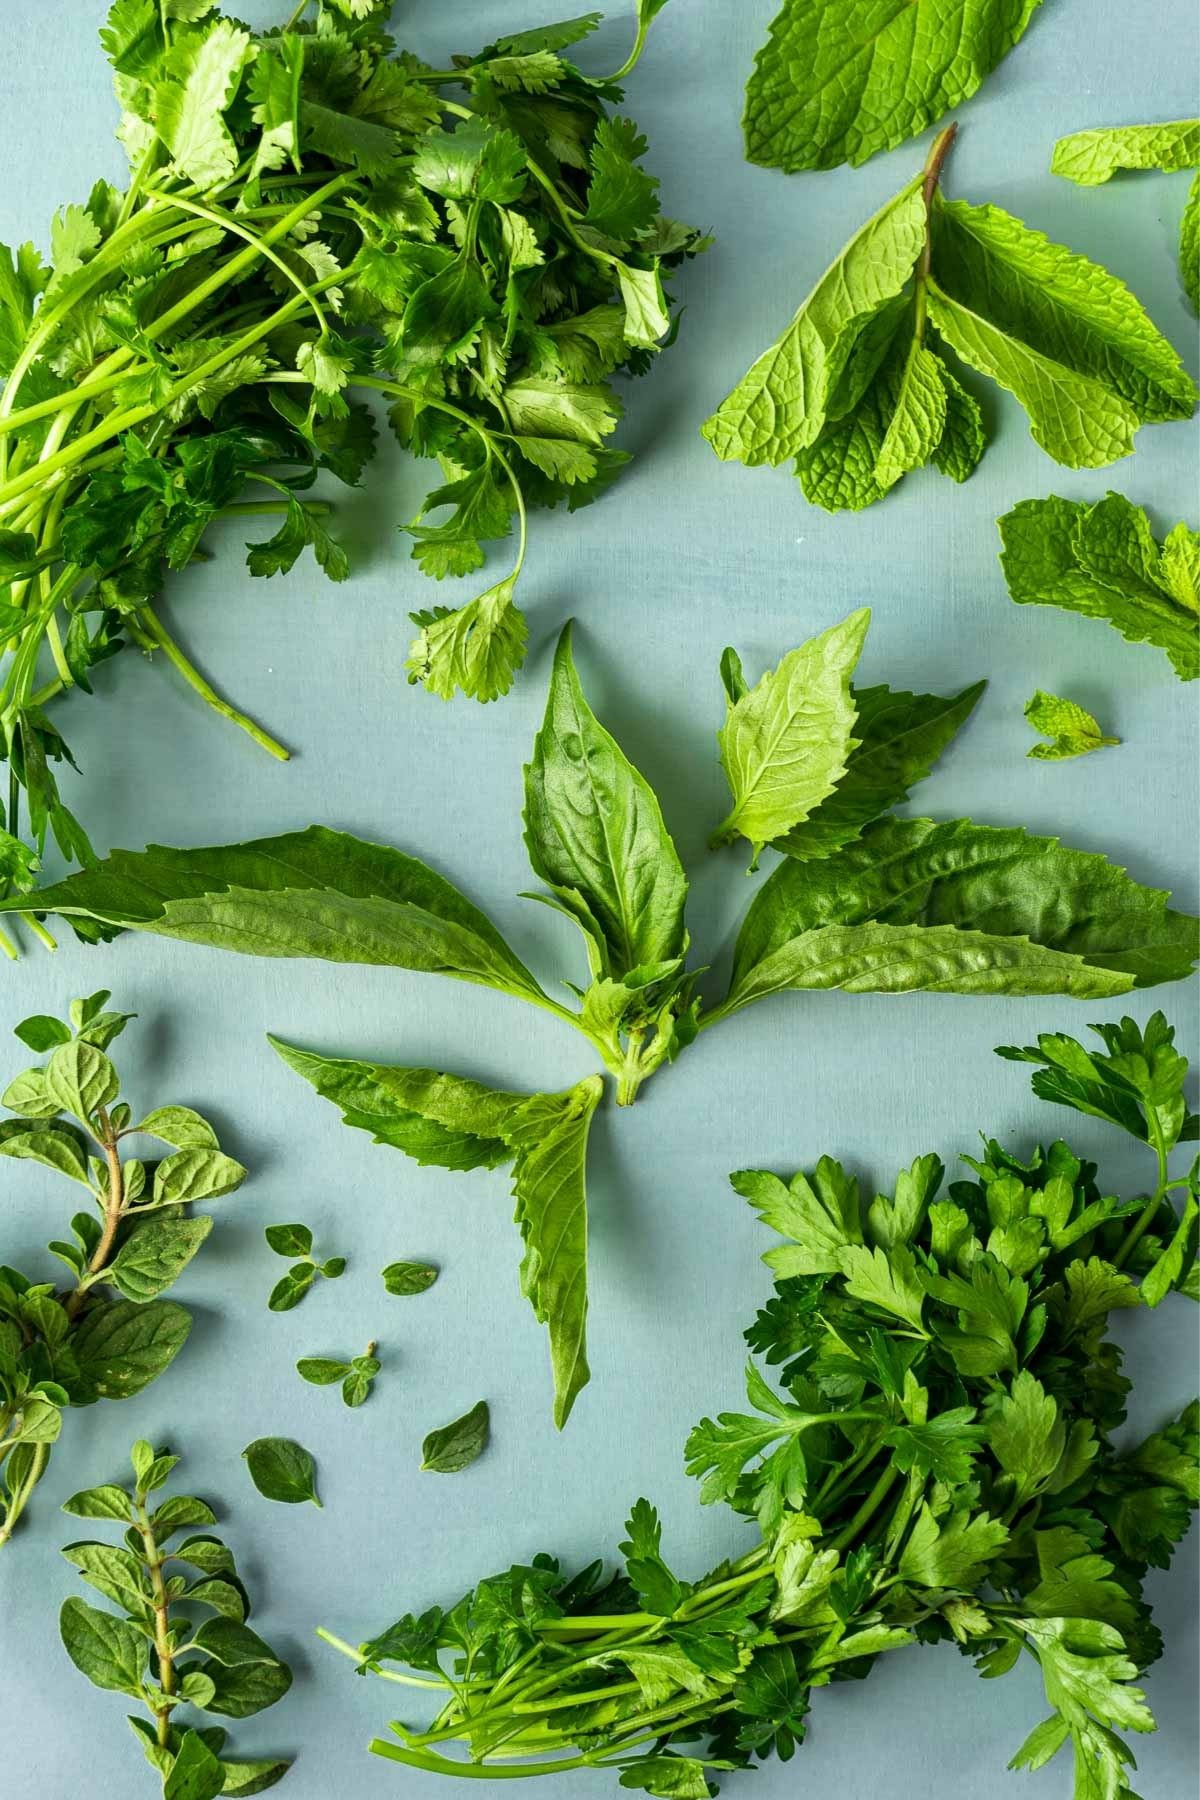
All sorts of herbs can be dehydrated! Try cilantro, Italian parsley, basil, mint, dill, thyme, rosemary, and oregano.
Choose fresh herbs that are vivid in color and aren’t bruised or starting to brown.

Prepping herbs for drying
- Wash the herbs: Rinse the herbs under cool water and shake or use a salad spinner to dry.
- Remove thick stems and damaged or bruised leaves and discard. Keep healthy bunches of leaves.
- You can dehydrate herbs on small stems. This reduces the chance of them getting damaged, but more importantly, it keeps them from getting blown around inside the dehydrator.
Equipment Spotlight: Dehydrators
If you’re in the market for a dehydrator, we recommend buying one with an adjustable temperature. This will allow you to dial in the drying temp to give you the best results for individual ingredients. The dehydrator we recommend (and use) most often is the COSORI dehydrator. You can also check out our best dehydrators post for a comparison of all the dehydrators we’ve used and would recommend.
How to dehydrate herbs
Dehydrating bell peppers is fairly simple and straightforward—a great ingredient for beginners! Once your counters, equipment, and hands are clean, set up your dehydrator and follow these steps:
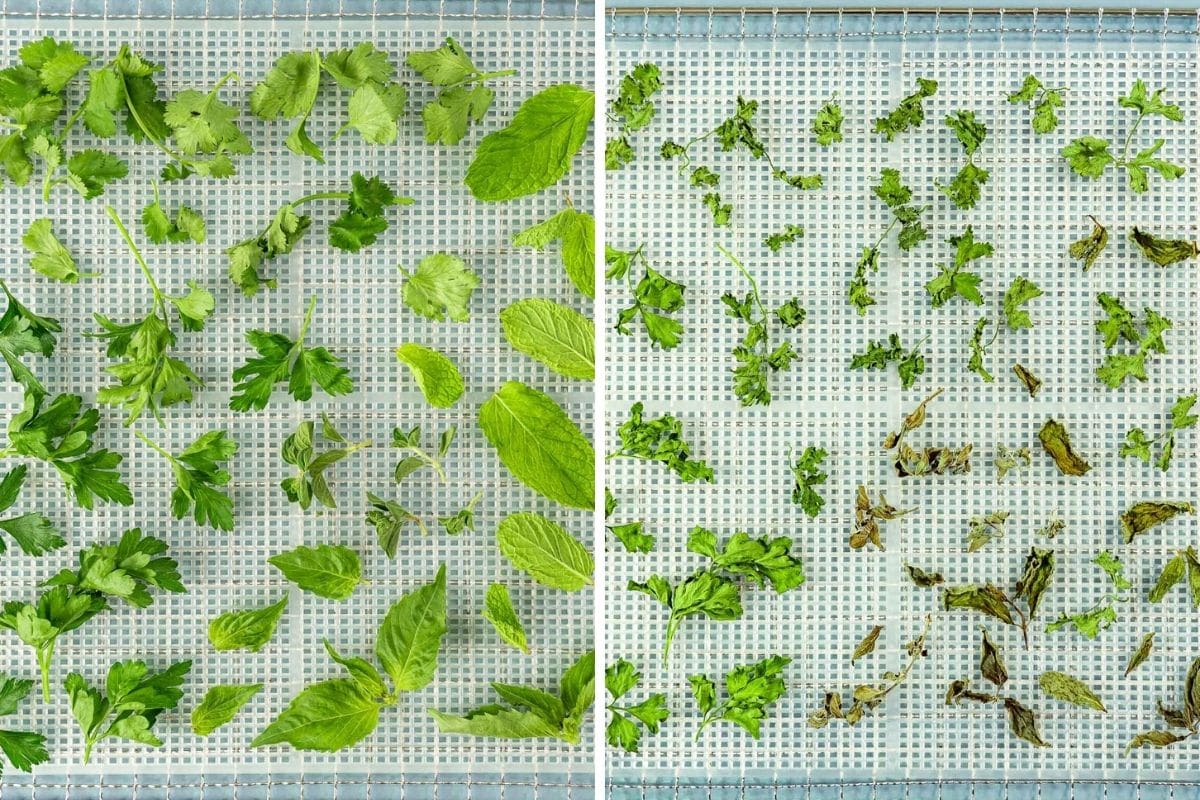
- Arrange the herbs on your dehydrator trays. If you’re using a tray that has large holes, line it with parchment paper or, even better, a mesh liner cut to the size of your tray. Leave space between the pieces to allow air to circulate.
- Dehydrate at 95ºF (52ºC)—or as low as your dehydrator will go—for 4-12 hours until the herbs are dry and crisp.
- Depending on your machine, you may need to rotate the trays every so often to promote even drying.
How to tell when herbs are done
Herbs will be crisp when they are completely dried. To test, let them cool, then rub a leaf between your fingers—it should crumble easily. If not, dry them for a bit longer.
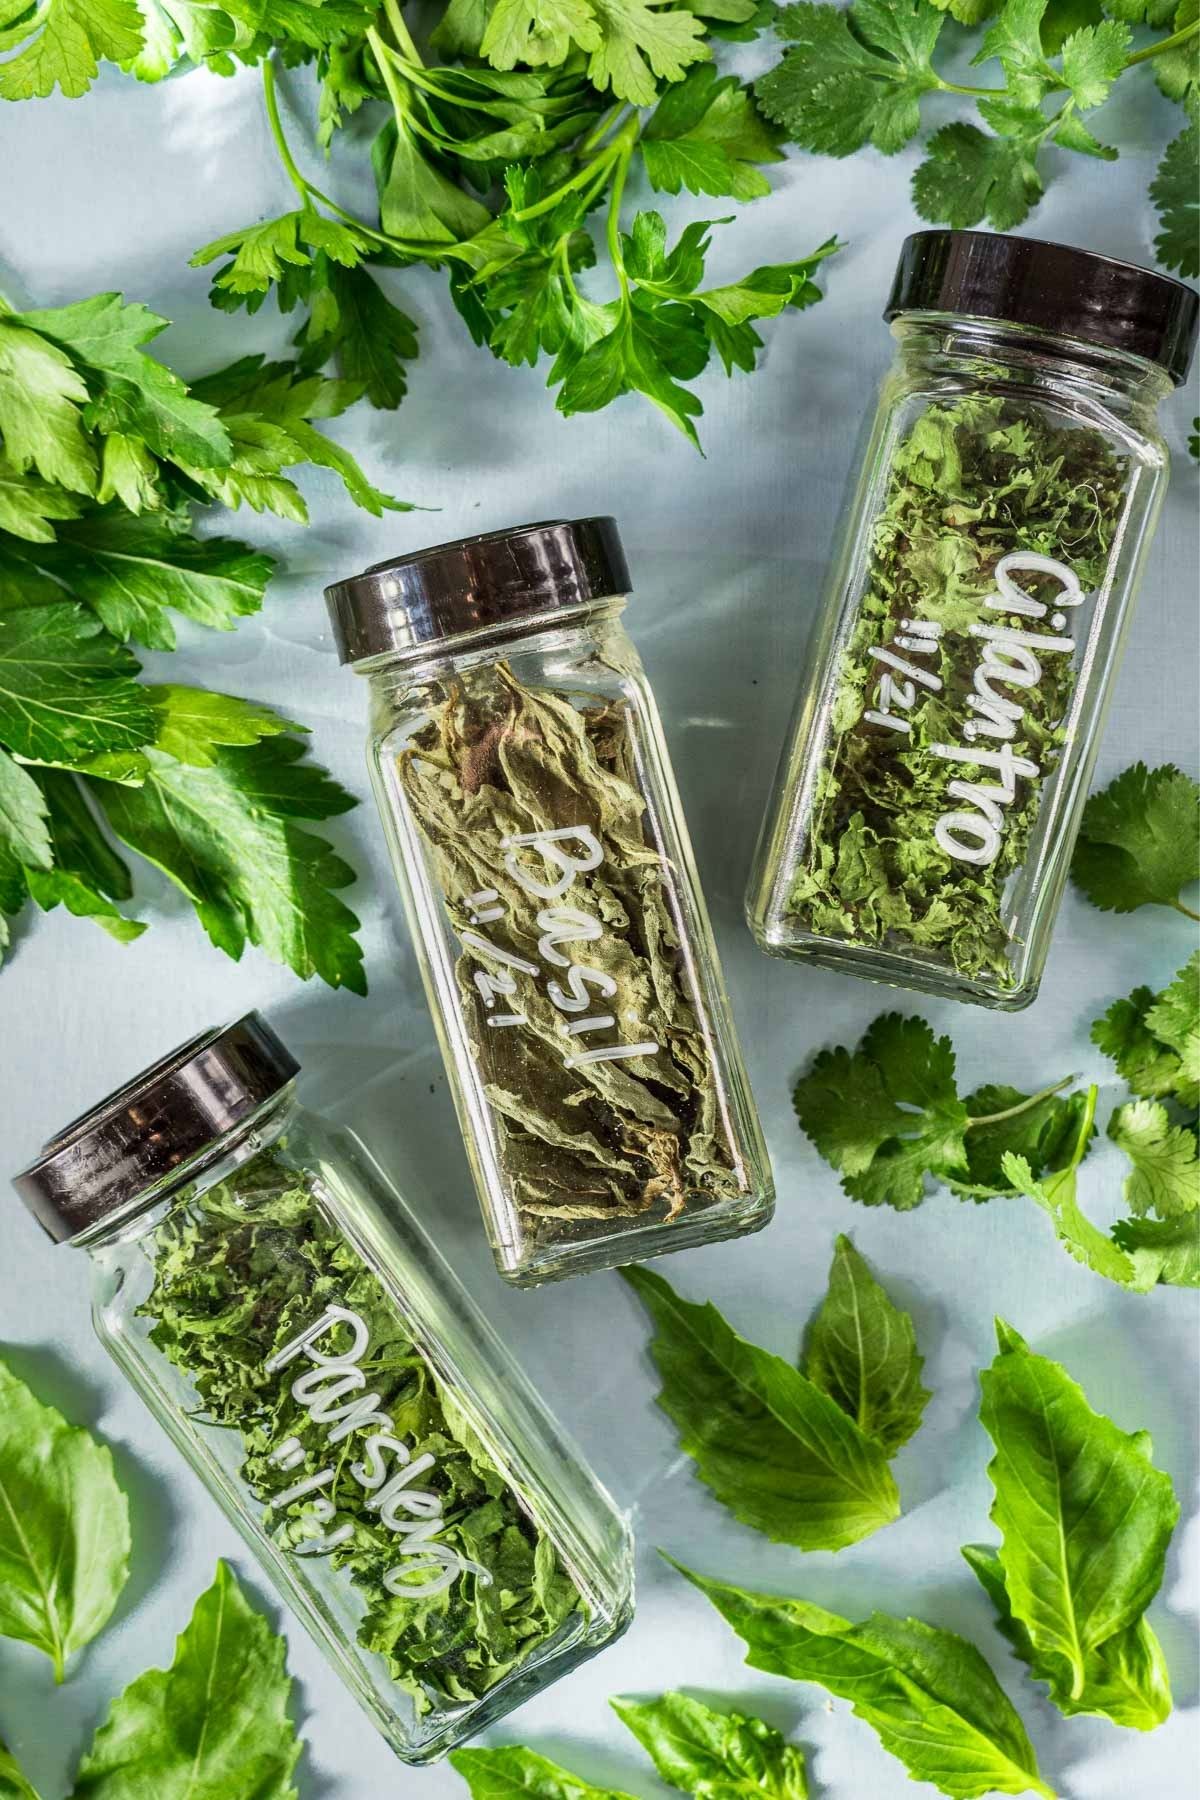
How to store dried herbs
When properly dried and stored, dehydrated herbs can last six months to a year. Here are our tips for storage:
- Let the herbs cool completely before transferring them.
- Remove the leaves from the stems before storing.
- The flavor of the herbs will last longer if you store them whole instead of crumbling them—do that right before you use them for best results.
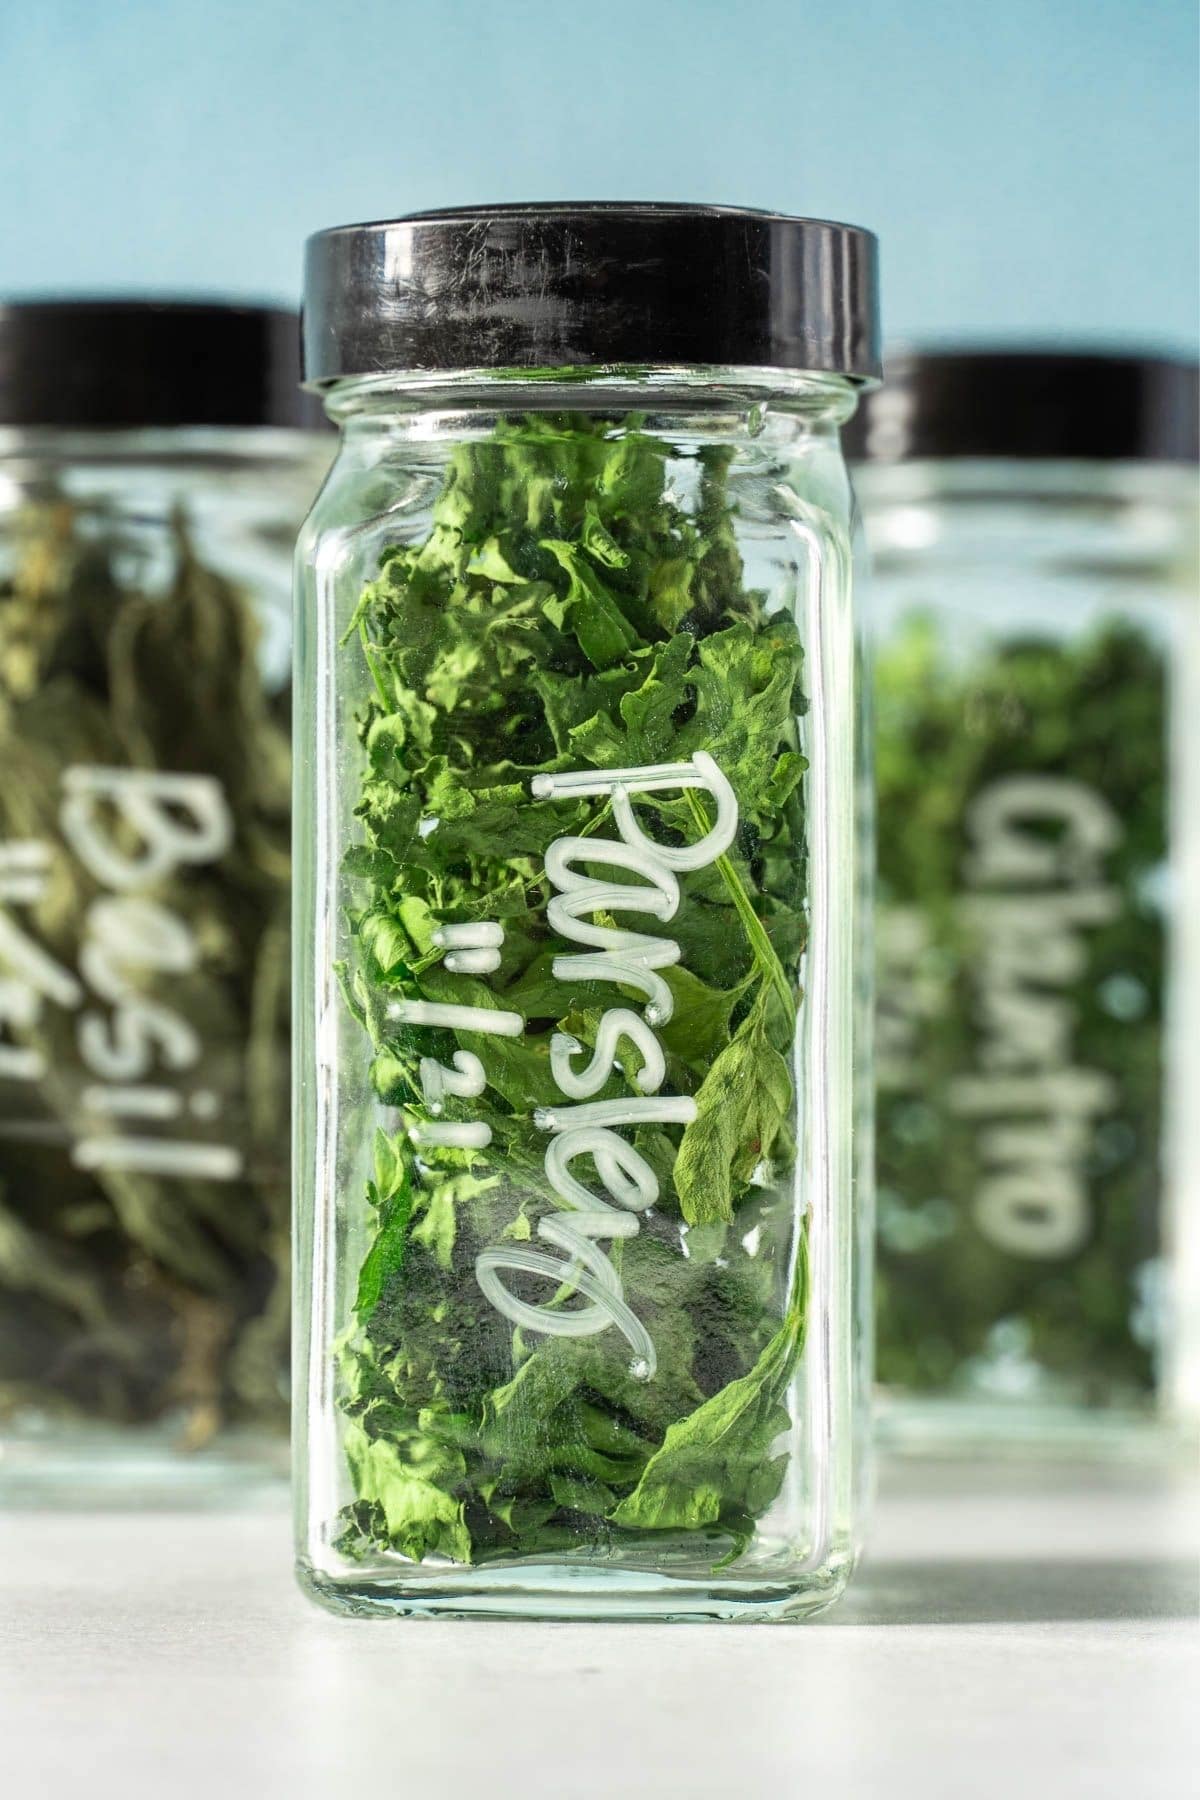
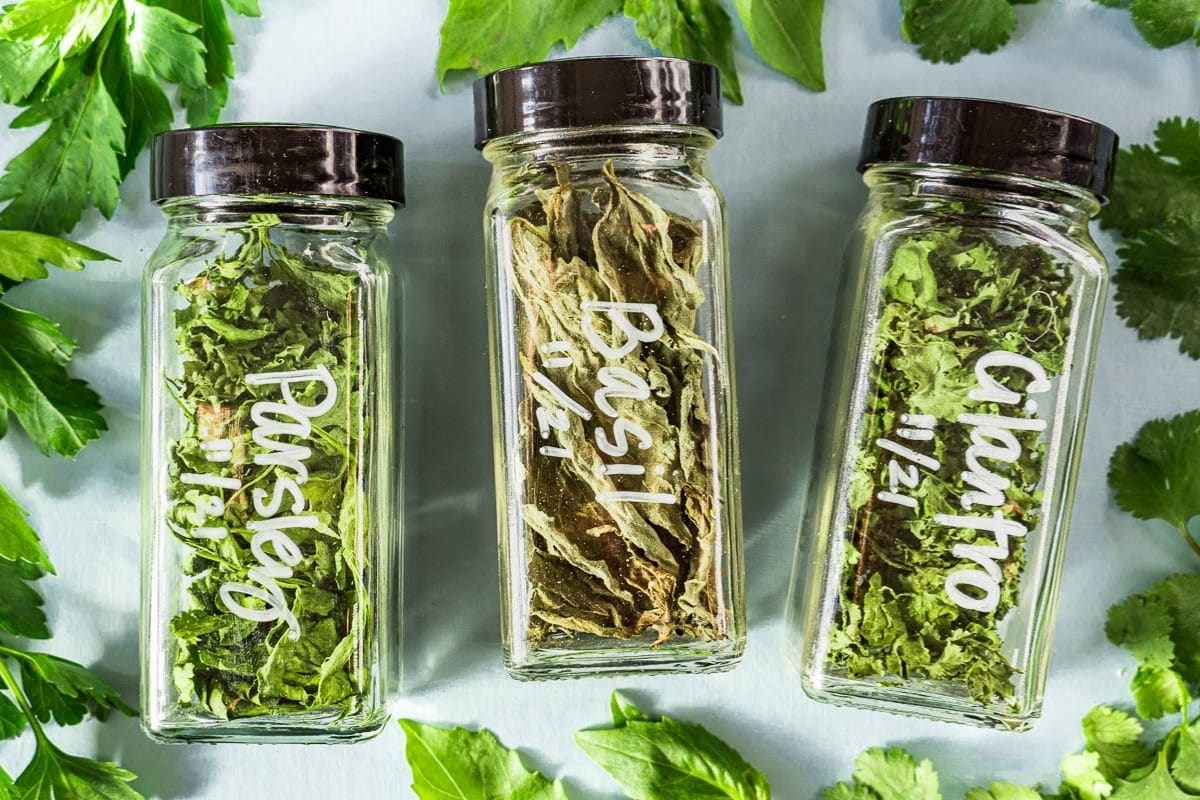
- Store in a clean, airtight container. For longer shelf life, vacuum seal.
- Use a moisture absorbing desiccant packet if you anticipate opening the container often, or if you live in an area with high humidity.
- Label the container with the date, the name of the herb, and any other important details
- Place the container in a cool, dark, and dry place—inside of a pantry cabinet or spice drawer works well.
Vacuum Sealing Tips
We like to store our dehydrated food in mason jars that have been vacuum-sealed using this handheld FoodSaver vacuum sealer along with these jar sealing attachments. This gives us the benefit of vacuum sealing without the waste (and expense) of plastic vacuum sealing bags. Since the jars are clear we make sure we store them in a dark spot in our pantry to keep them out of direct light.
How to use
Dehydrated herbs can be used the same way you would use any dried herb from the store. Dried herbs are more concentrated in flavor, so use ⅓ the amount called for if substituting for fresh herbs (ie, 1 tablespoon fresh = 1 teaspoon dry).
Here are a few more ideas on how to use your dried herbs:
- Rehydrate in warm water, drain, and use in homemade pesto or chimichurri
- Add dried mint to iced tea
- Use in marinades and rubs
- Use in these backpacking/camping meals:
Dried Herbs
Ingredients
- 1 bunch fresh herbs see note 1
Equipment
Instructions
- Start with clean hands, equipment, and countertops.
- Wash the herbs: Rinse the herbs under cool water and shake or use a salad spinner to dry
- Remove thick stems and damaged or bruised leaves and discard. Keep healthy bunches of leaves.
- Arrange the herbs on your dehydrator trays. If you’re using a tray that has large holes, line it with parchment paper or, even better, a mesh liner cut to the size of your tray. Leave space between the pieces to allow air to circulate.
- Dehydrate at 95ºF (52ºC)—or as low as your dehydrator will go—for 4-12 hours until the herbs are dry and crisp (see note 2). Depending on your machine, you may need to rotate the trays every so often to promote even drying.
Storage Tips
- Let the dried peas cool completely before storing.
- Pack the herbs into airtight containers. The flavor of the herbs will last longer if you store them whole instead of crumbling them—do that right before you use them for best results.
- Store in a cool, dark, dry location for up to 6-12 months.