How to Make Fruit Leathers
This post may contain affiliate links.
In this post, we’re showing you how to make fruit leathers using a dehydrator, plus recipes for three different flavors!
Want to incorporate more fruits (and veggies) into your active lifestyle? Learn how to make your own fruit leathers! Fresh Off the Grid contributors Kira & Brendon Hak of Adventure Haks show us how to make these healthy, lightweight snacks at home.
I used to feel really guilty about our lack of fruit whenever we packed our meals for a motorcycle tour or a multi-day backpacking trip. Fruit is heavy, takes up a lot of space, and doesn’t last very long, so it rarely makes the cut. But then fruit leathers came along, and we started feeling a lot better about what we were packing and eating!
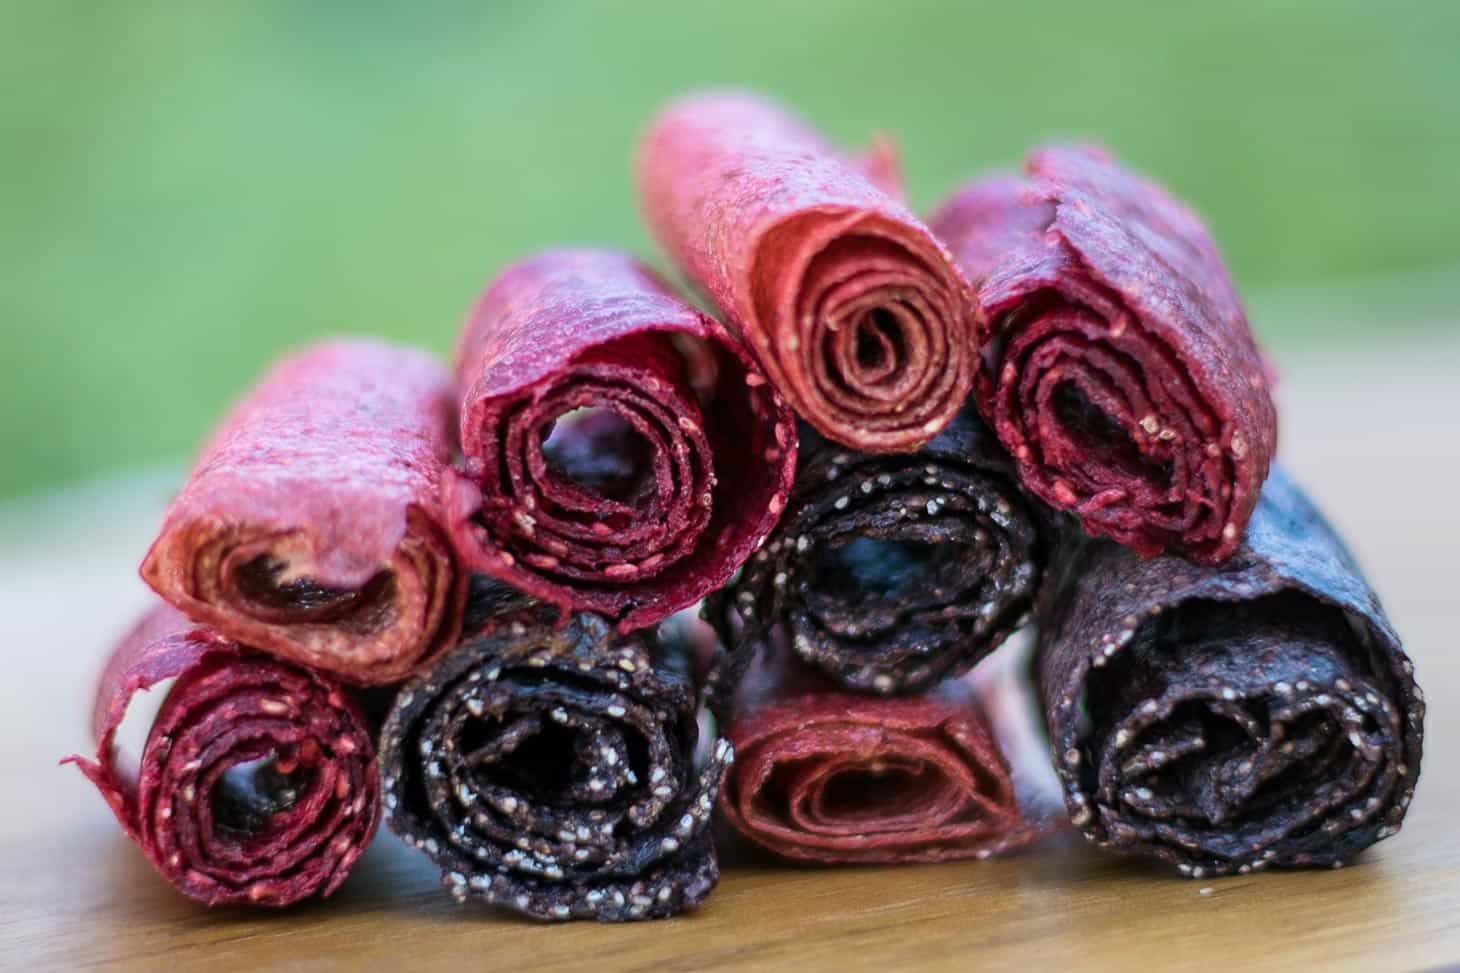
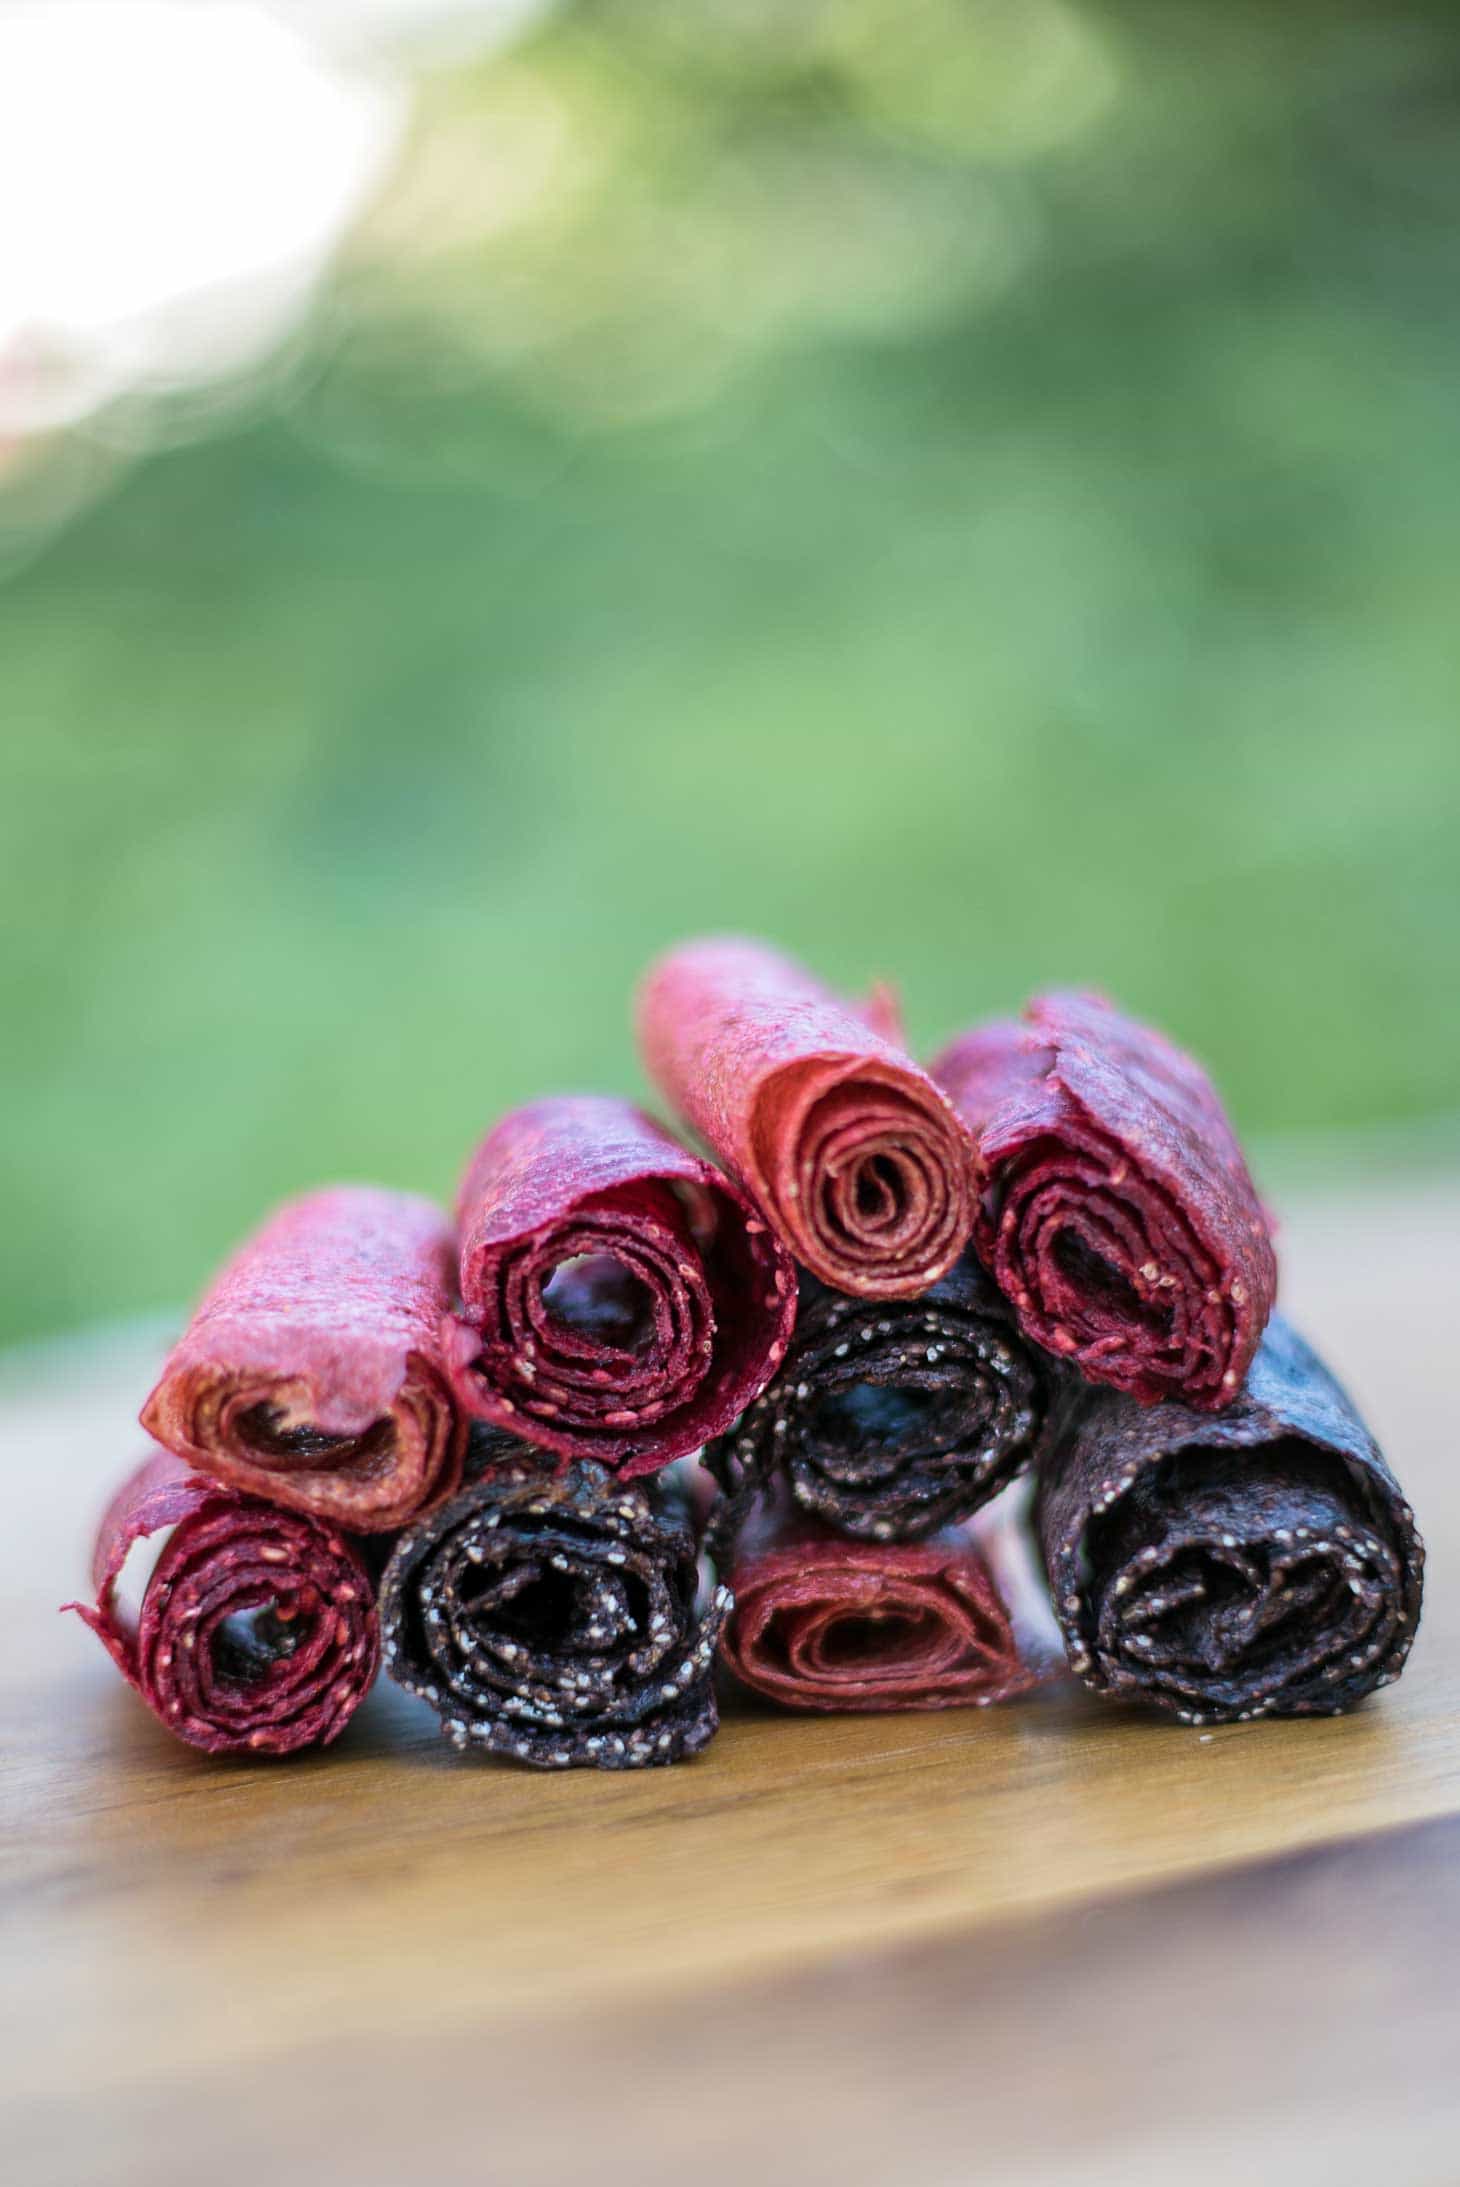
Fruit leathers are delicious and easy! You can take any fruit you have lying around, puree and sweeten (or not), and dehydrate it into a nutritious, chewy, and high-energy snack.
You will want to pick fruit that is ripe or even slightly overripe. To sweeten, we like to use either honey or pitted dates. Sometimes, if the fruit chosen isn’t tart, we even skip the sweetener altogether. The amount of sweetener is a personal preference, so be sure to adjust it to your liking.
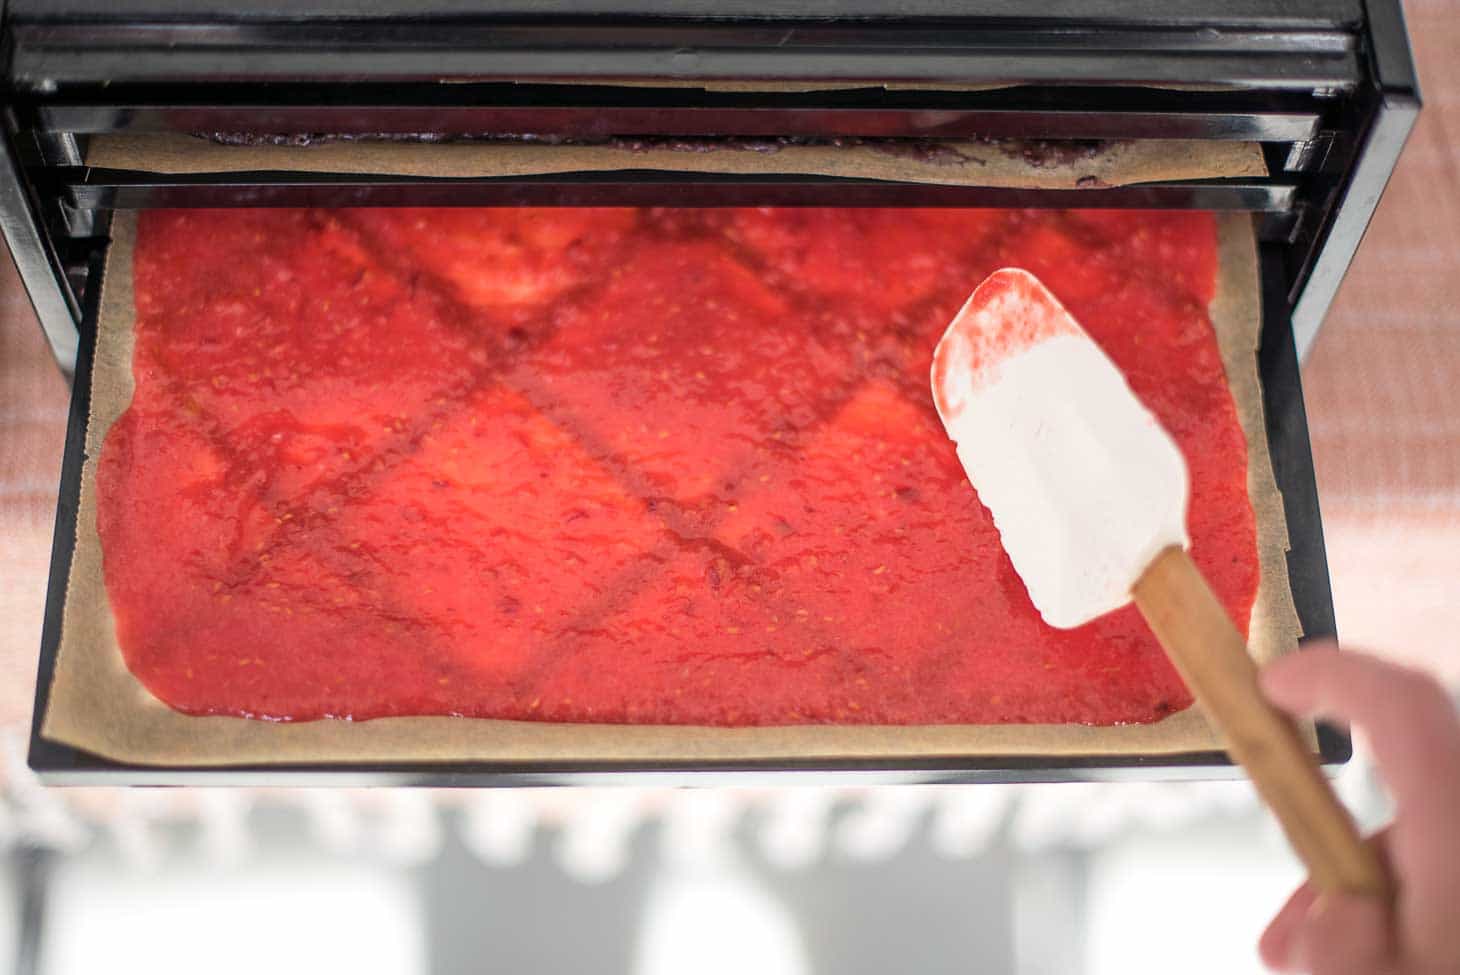
To fill all four of our dehydrator trays, we need about 6-8 cups of pureed fruit; depending on your dehydrator, this could vary. Line the trays with parchment paper, as sometimes the puree can leak through. We start with the wrap and remove it after a few hours when it has started to dry.
I’ve shared three of our favorites, but the flavor combinations are endless. We tend to choose flavors based on what is on sale or on what we have around the kitchen that needs to be used up. Fortunately, we live in a region of Canada called the Okanagan, which is a fruit orchard heaven. The recipes we have included are what we need to fill only two trays in our dehydrator. We like to do two kinds at a time and vacuum seal variety packs for the trail.
Using the recipes we have given as a guide, try these other flavors: Apricot (apricots & sweetener), Strawberry Lemonade (strawberries, lemons, honey), Apple Cinnamon (apples, honey, cinnamon), PB and Jam (strawberries and 1 cup PB) Have fun with it, you really can’t go wrong!
Equipment Spotlight: Dehydrators
If you’re in the market for a dehydrator, we recommend buying one with an adjustable temperature. This will allow you to dial in the drying temp to give you the best results for individual ingredients. The dehydrator we recommend (and use) most often is the COSORI Premium. You can also check out our best dehydrators post for a comparison of all the dehydrators we’ve used and would recommend.
DIY Fruit Leathers
Ingredients
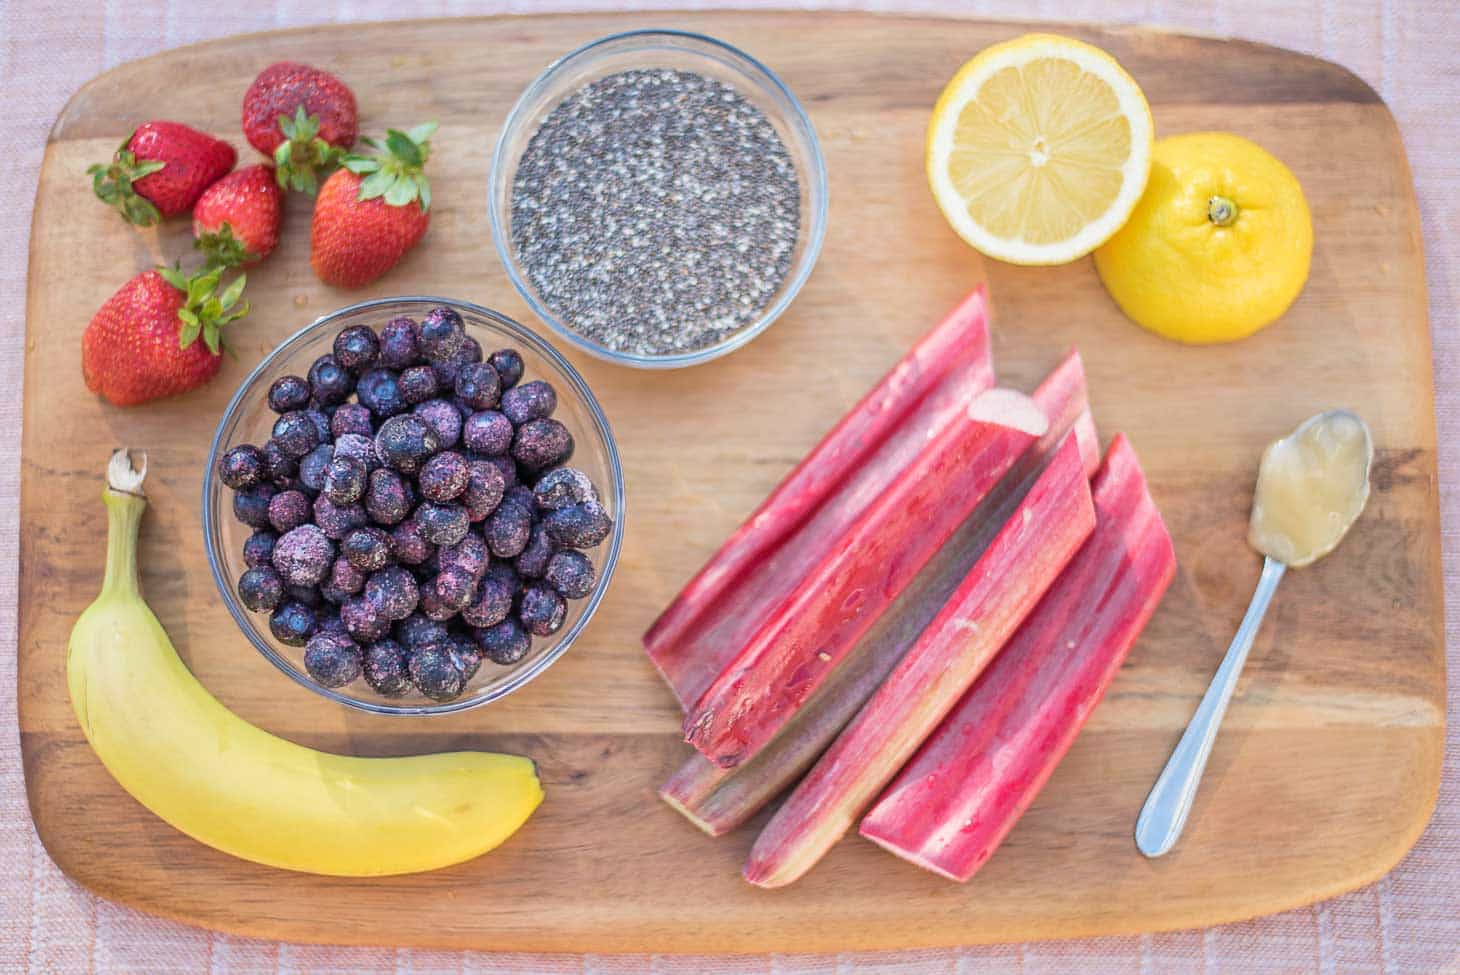
STRAWBERRY RHUBARB
- 2 cups rhubarb diced & cooked*
- 3 cups strawberries diced
- ¼ cup honey
BLUEBERRY CHIA BANANA
- 2 cups blueberries
- 2 small ripe bananas peeled
- ¼ cup chia seeds
- 5-10 dates pitted
RASPBERRY PEACH
- 2 cups raspberries
- 3 peaches pitted & diced
- ¼ cup honey
Equipment
Instructions
- Wash, peel and remove any stems or pits, if needed. The skin of the fruit is highly nutritious so we always use the peel as well (exception: bananas, pineapples, oranges, etc).
- Put all the produce into a blender or food processor, with your sweetener of choice, and blend until smooth.* If making the Strawberry Rhubarb variation: The rhubarb needs to be softened so after dicing put into a pot with just enough water to cover them and cook on medium until soft, we pour everything from the pot, water and all, into the processor so we don’t lose the nutrients
- Optional Step: We have found if your preheat the mixture in a pot before putting it in the dehydrator it speeds up the drying time. Just dump the blended mixture into a pot and heat on medium for 10-15 minutes, stirring occasionally
- Line trays with parchment paper. Spread onto dehydrated trays. Since the sides dry quicker, make the puree thicker around the edges – approx 1/4” inch and 1/8” at the center.
- Dry at 145F/63C for 6-8 hours. Another way to speed up drying time is to check after a few hours and remove the wrap/paper. When the leathers are dried, they will be a little bit shiny and non-sticky to the touch. Allow them to cool before removing them from the trays.
- Roll the leather into a tight roll and with a sharp knife, cut into a lengths of your choice. Wrap pieces with saran wrap, put in air-tight containers (like ziplock bags) or vacuum seal. Store in a cool, dark & dry place.
About the Authors
Meet Brendon and Kira – The Adventure Haks. We are avid outdoor enthusiasts who enjoy any activity that takes us outside. Most of our time is spent motorcycle touring, where we can combine the freedom to explore new places with our love for hiking, fishing, and camping. We are currently living & adventuring in British Columbia, Canada. Follow along @adventurehaks and at adventurehaks.com.
Great post, I’ll try them. I usually take dried fruit anywhere but never tried drying at home. OK, I tried it when I was a kid with mediocre success but these leathers look far more sophisticated.
They are really easy to do! We hope you get a chance. Let us know how it turns out. 🙂
I love the idea of pb in a fruit leather! Will have to try for our upcoming camping trip.
Have you tried dehydrating on a silpat? I avoid using plastic wrap whenever possible. The silicon mats aren’t recyclable, sadly, but at least are reusable.
We haven’t tried those, but we will now! we are always up for anything that is better for the environment!
Great note. Many thanks.
Quick question: Once they are packed, for how long can they be in the ziplock bag before they go bad?
I’m planning for consuming them 3 or 4 days after prepared. Would the leathers still be good by then?
Cheers
You are golden! We have done up to a week in a ziplock – they are usually gone after that ;). We have tested them up to 4 months so far (vacuumed sealed) with no issues.
Thank you for the recipes. Years ago, when I was young, I had a very low price dehydrator, but it worked good. Unfortunately, I lost it through the years, and reading your recipes has given me the incentive to buy another one. I need to eat healthier, and this is a perfect way. Thanks again.
We are happy to hear we inspired you to get dehydrating again. We have had a lot of fun playing around with different recipes. We have a few other recipes on here so be sure to check them out if you need some ideas. Good luck 🙂
Looks like you have a 5 tray exvalibur do you love it?..im in the midst of a purchase cant make up my mind on model. Any advice would be great excalibur does not have a ton of great reviews and im curious about the new digital control
Thanks
We have the 4 tray, and we love it. However, we have no experience with any other brands. As of right now, the only thing we would have done differently was get the 10 tray, so we could do more at once 😉
Chia in fruit leather, amazing!! Would chia be ok with just berries?
Yup, that works great! Be sure to use really ripe berries or add a sweetener, you might just find them to be a little tart if you don’t.
Thank you for your great recipes. I have a strawberry batch in the dehydrator right now, and it smells delicious! I’ve owned my Excalibur dehydrator for many years, and still love using it to process fruit, veggies, and herbs. Have you ever added veggies with fruit for a leather? I’m wondering about zucchini in with berries or plums? Thanks again, your recipes are the best!
Thanks! We haven’t tried veggie/fruit blends yet, but I’m sure with the right flavor pairing they’d be delicious.