Pie Iron Baked Bean & Cheese Toasties
This post may contain affiliate links.

Sponsored by BUSH’S® Baked Beans
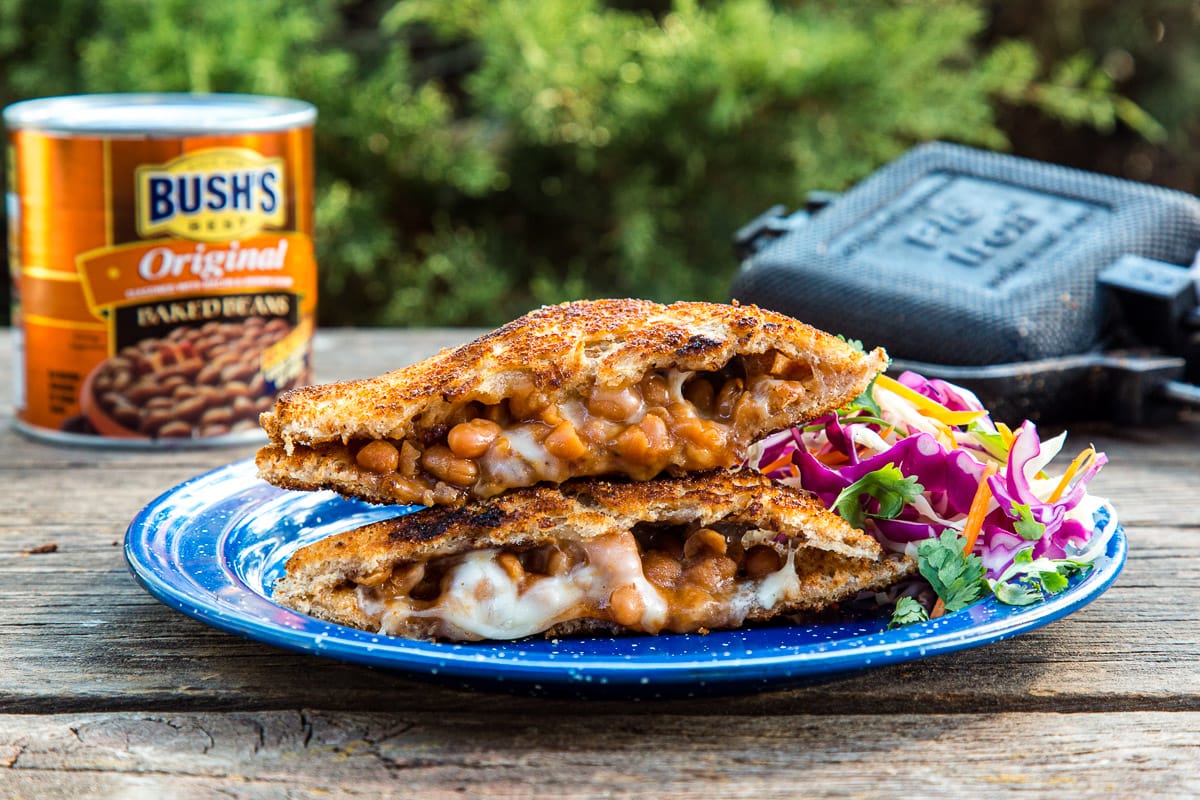
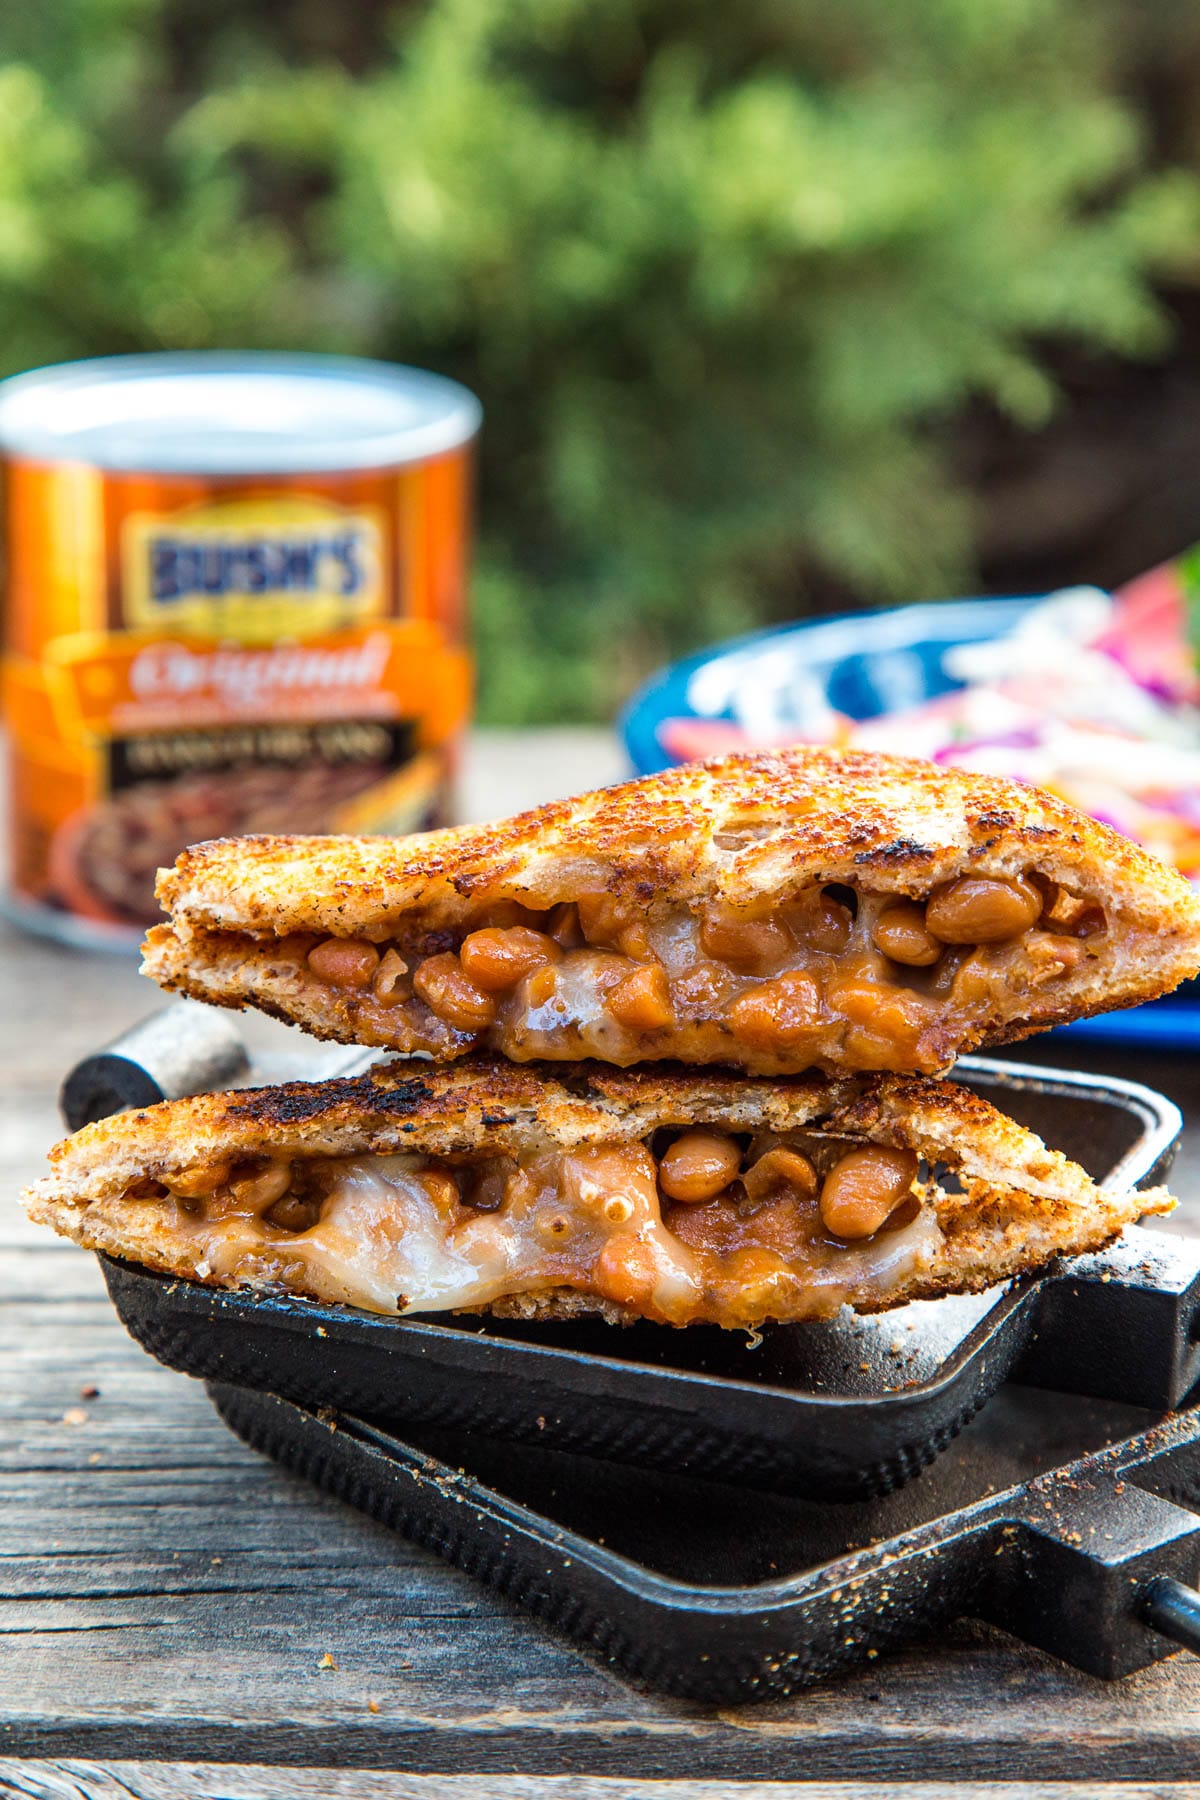
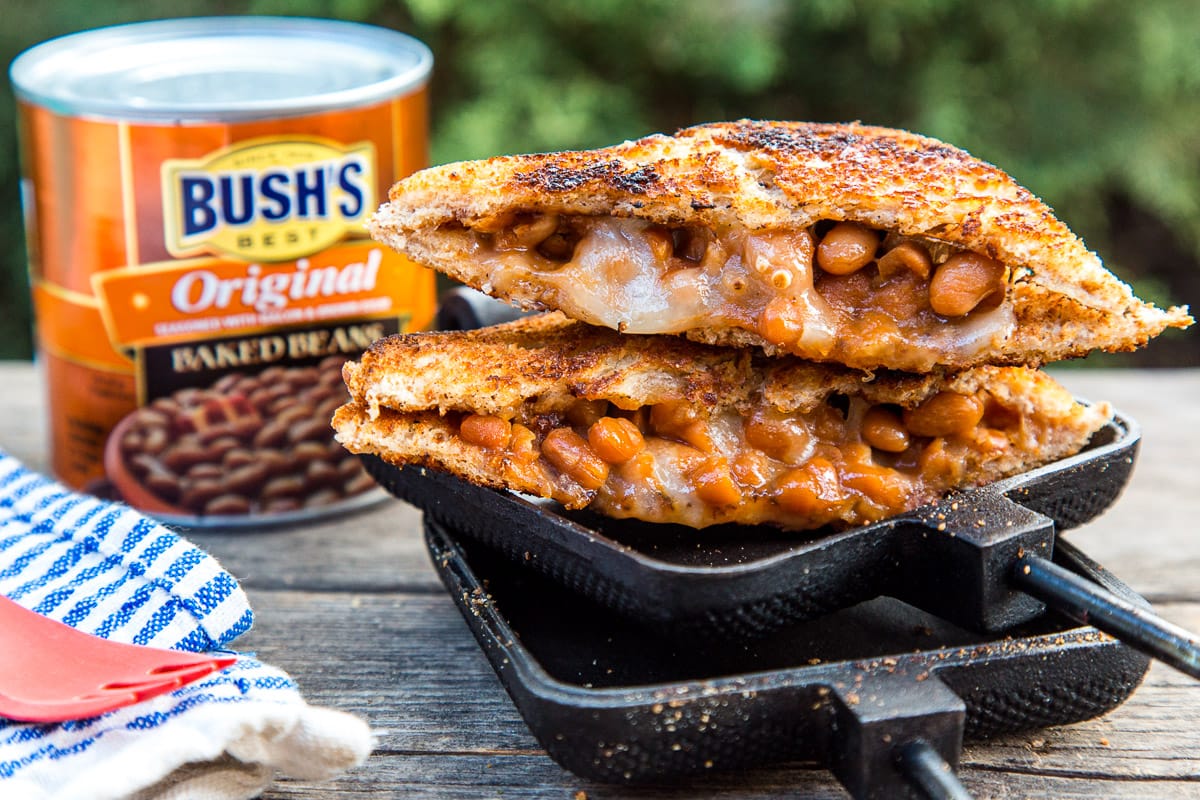
Tangy BUSH’S® Baked Beans and melty pepper jack cheese in a buttery crisp pocket, these pie iron “toastie” sandwiches are a perfect campfire lunch. Not to mention, one of the most fun camping lunches we’ve ever made!
Lunches while camping can be a real challenge. It’s hard to get excited about a plain-old cold-cut sandwich – or in our case – another pass by the bag of chips! But on a recent outing, we tried something new to us that was a total hit: Bean & Cheese Toasties!
A bean & cheese toastie is essentially just a pressed grilled cheese sandwich with baked beans. While it might sound a bit novel to an American audience, we recently camped with a friend from Melbourne who shared that this is pretty classic camp and after-school fare in Australia.
And think about it: baked beans are super flavorful, come in a perfectly shelf-stable can, and add protein to your meal. If they taste great as a side or on a hot dog, then why not in a grilled cheese, right?
For this recipe, we used BUSH’S® Baked Beans because their secret family recipe really packs in the flavor! We’ve made baked bean and cheese toasties using both the Original and the Brown Sugar Hickory Baked Beans (bonus–these are vegetarian!) and either one is great in this sandwich.
Now about the toastie… In Australia, they have electric toastie makers that function similar to a panini press. But for camping, we use a pie iron.
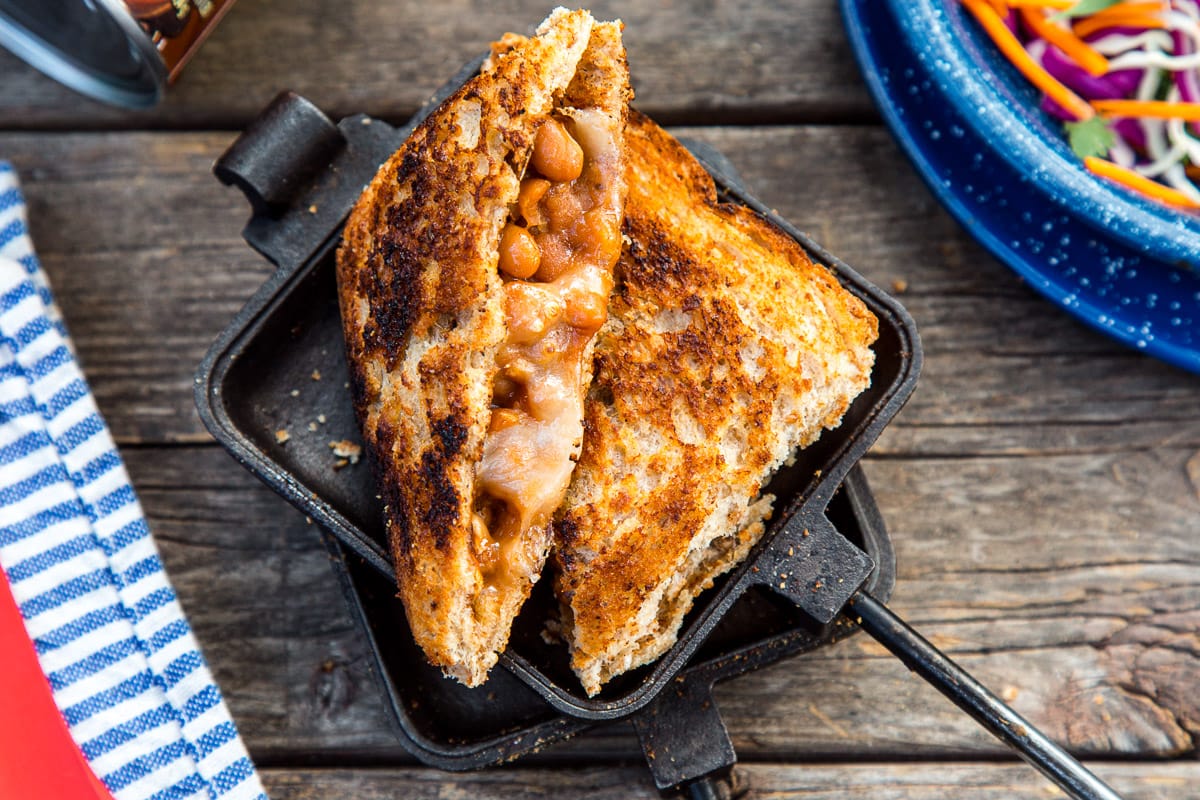
There are lots of things you can make with a pie iron, but toasted sandwiches have got to be one of the easiest. Just build your sandwich inside it, clamp it down, trim off the crust, and place it in the campfire. Since the sandwich is completely encased in cast iron, it won’t get any soot or smoke on it. It can also be cooked directly over an open flame, so you don’t need to wait until the fire burns down to embers.
This four-ingredient sandwich is definitely greater than the sum of its parts. It’s cheesy, tangy, crispy, and a lot of fun to make. We’ve never been so excited about making lunch before!
So if you’re looking for a fun camping lunch to make over the campfire, break out your pie iron and pack a can of baked beans and give this one a go!
You’re Going to Love These Because…
↠ Baked beans are shelf-stable, loaded with flavor, and add protein to your diet.
↠ A pie iron allows you to cook over a direct flame. Since the sandwich is encased in cast iron, you don’t need to wait until your campfire burns down to embers before you can start cooking.
↠ The first sandwich takes a minute (until the cast iron heats up) but then you can really crank these out.

Pie iron toastie making tips
↠ Oversize your bread! You want to pick up bread that is larger than the outside edge of your pie iron. The beauty of the pie iron is when you close it up, it crimps the edges of the bread and seals everything inside. But this only works if your bread is larger than your pie iron.
↠ Cut your crust! After you close up your pie iron, there will be some bread crust overhanging the edges. Cut that off so it doesn’t catch on fire and char when you place it in the fire.
↠ Don’t be afraid to check how it’s going. It’s really easy to (away from the flames) open up your pie iron and check to see how things look.
↠ Designate a heat-proof reload station. After the first run, the pie iron is going to be extremely hot! So designate a place where you can open it up, flip out the sandwich, and reload the next one.
Equipment needed
↠ Pie Iron: A classic square pie iron is perfect for this recipe. There is also a double-wide version if you know that you’ll be cooking for a crowd.
↠ Heat Resistant Gloves: While the handle of your pie iron won’t get hot, it’s never a bad idea to wear heat resistant gloves when cooking in/around a campfire.
↠ Can Opener: If you’re using a can of baked beans, a can opener is critical!
How to make pie iron baked bean and cheese toasties (video!)

BUSH’S® Baked Beans & Cheese Toasties
Ingredients
- 4 tbsps butter divided
- 8 slices bread
- 8 slices pepper jack cheese
- 1 16 oz. can BUSH’S® Baked Beans
Equipment
Instructions
- Add ½ tablespoon butter to one side of the pie iron. Place a slice of bread into the iron, then add a slice of cheese. Scoop ¼ of the baked beans into the center, then top with second slice of cheese, slice of bread, and ½ tablespoon butter.
- Secure top of the pie iron over the sandwich. If bread crust sticks out beyond the iron, use a sharp knife to cut away excess.
- Heat pie iron over campfire embers or on camp stove or grill, turning often to toast bread evenly and melt cheese, 4-6 minutes depending on heat source.
- Remove pie iron from heat and carefully open using heat proof gloves. Use knife to release edges if needed, and turn toastie out onto a cutting board or plate.
- Enjoy on its own or with a side of slaw, potato salad, grilled corn, or chips!
This is a genius idea! I definitely need to invest in a pie iron. I will have to save this recipe for my next camping trip.